This Google Classroom Quick Guide will go through setting up your Classroom in a matter of minutes and a tips and tricks.
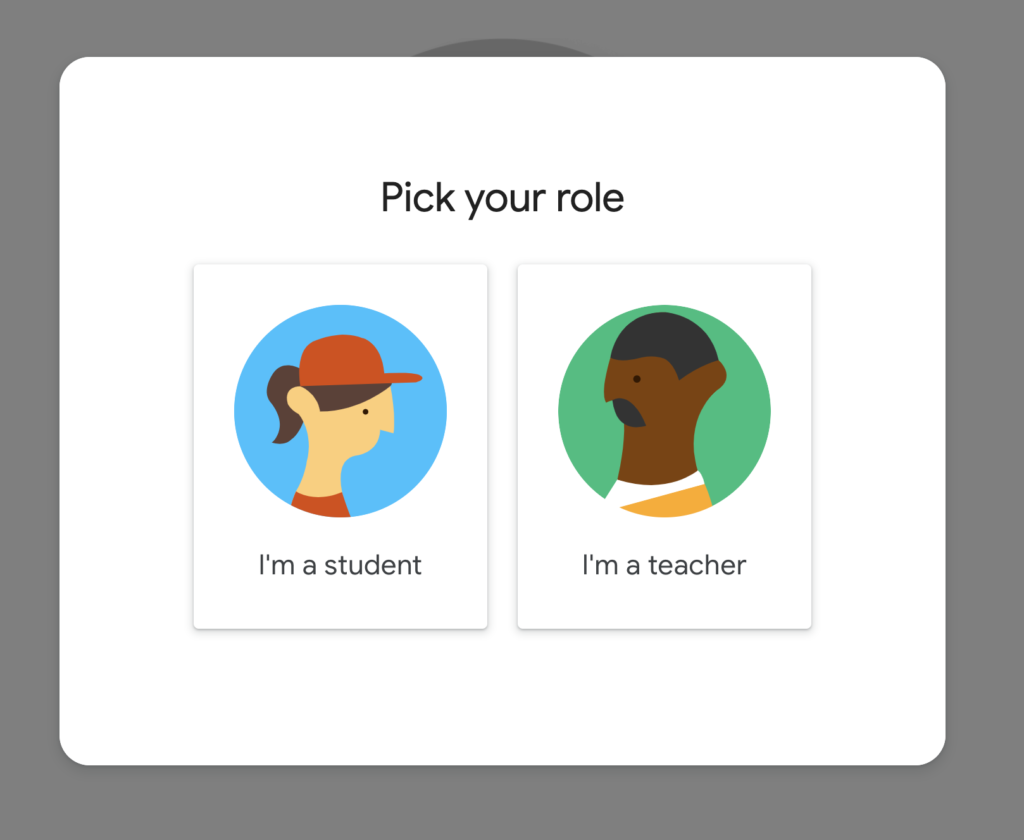
First off, what is Google Classroom?
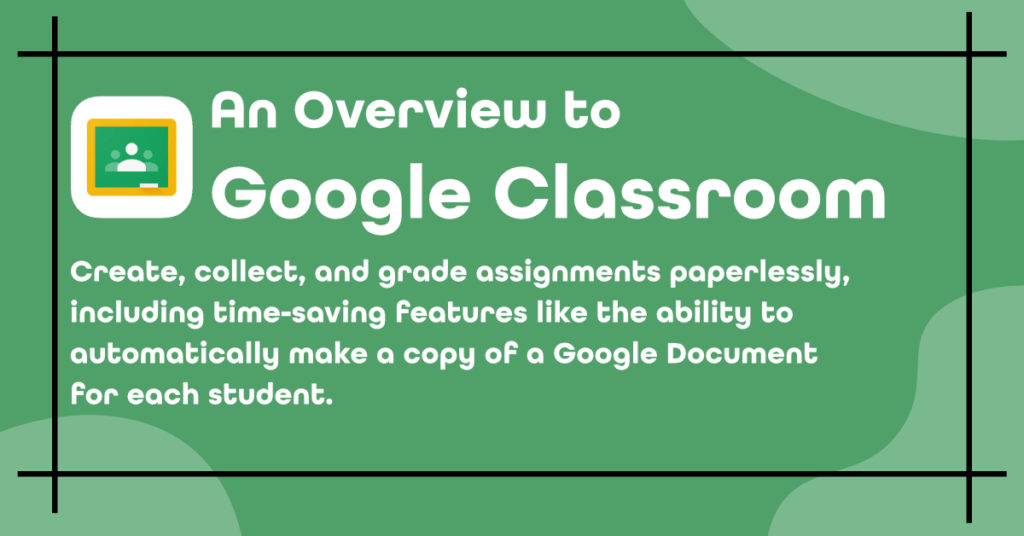
Google Classroom saves time and paper and makes it easy to create classes, distribute assignments, communicate, and stay organised.
Classroom is designed to help teachers create, collect, and grade assignments paperlessly, including time-saving features like the ability to automatically make a copy of a Google Document for each student. It also creates Drive folders for each assignment and for each student to help keep everyone organised.
Let’s get started with Google Classroom Quick Guide.
Setting up your classroom
Go to the following URL: https://classroom.google.com and log in with your Google for Education account.
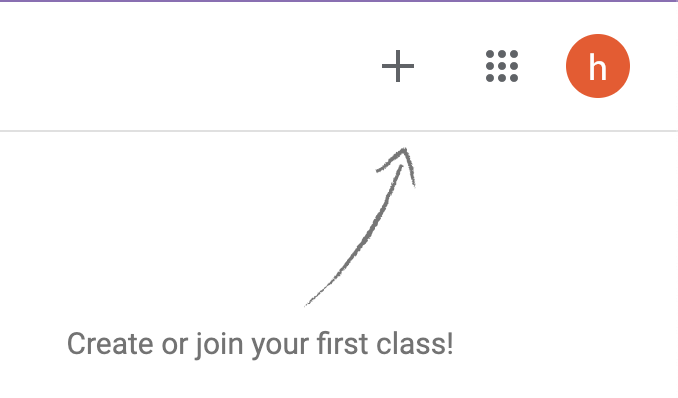
Click on the “+” button in the upper-right corner to create your first class
- If you’re getting started for the first time, your screen will likely look like the one on the right.
- If you have some classes already, they will display on this home screen. You can add new classes with the “+” button.
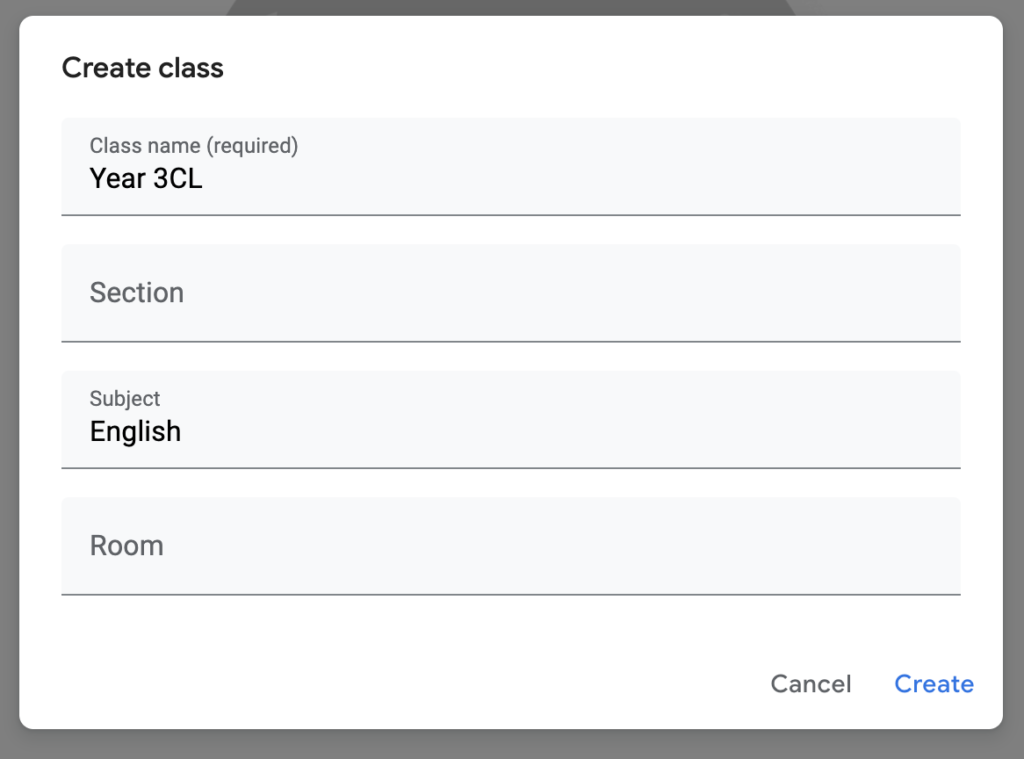
Clicking on the “+” button brings up a new screen, input the appropriate details.
Use the “Section” field to differentiate between different classes of the same type. Many teachers will use this field for the class period. (This field is optional.)
As a primary school, the two main sections you will probably use the most are the “Class Name” and “Subject“
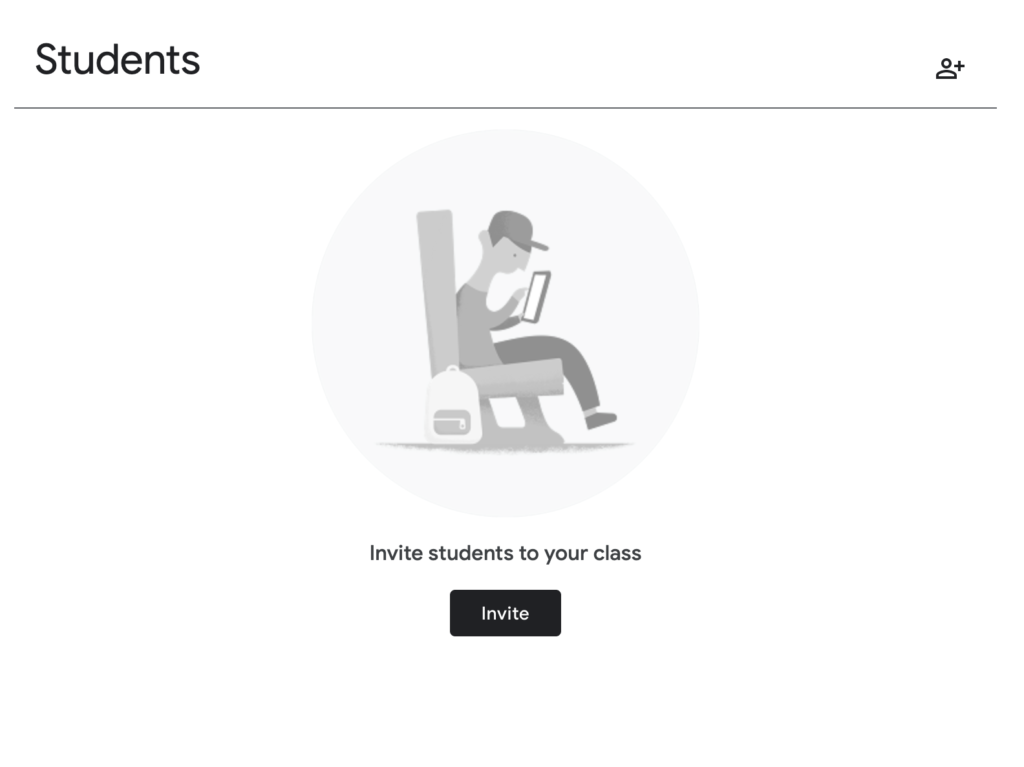
Inviting students to your classroom
There are 3 ways to invite students to your classroom.
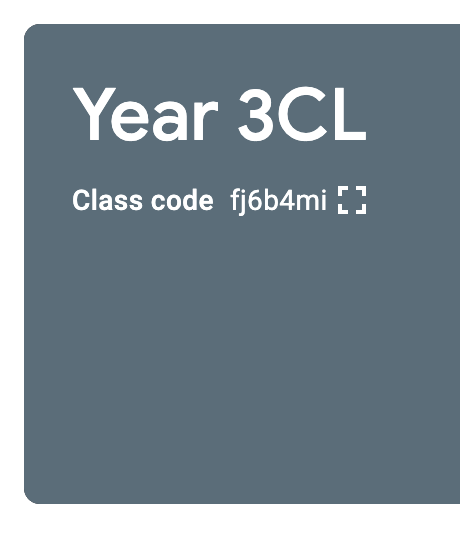
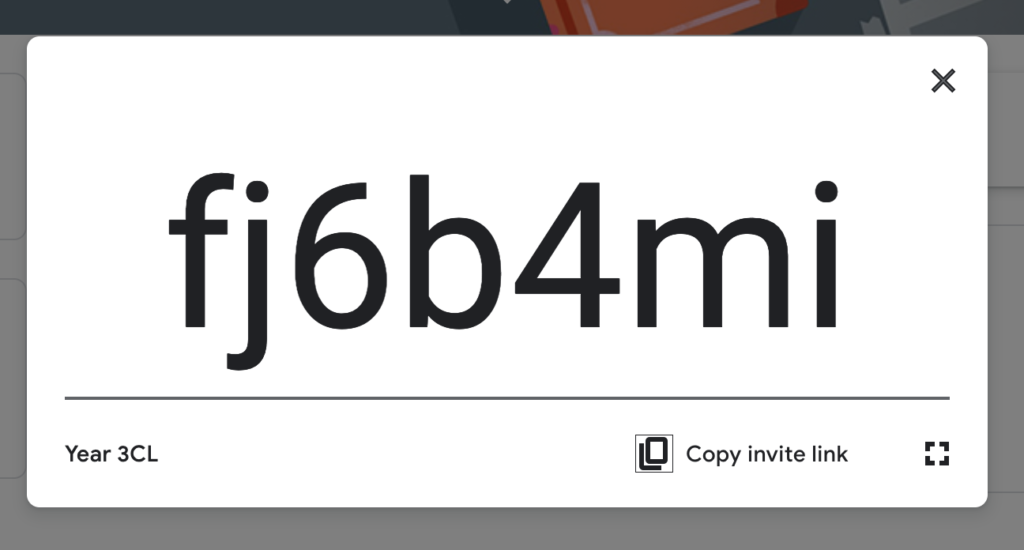
Students can join your class with a Join Code
This is a quick, easy way to get students to join your classroom. By displaying the join code(Click [ ]), students can log in to Google Classroom, click the “+” button and “Join Class” to enter the join code. Students will then be added to your class.
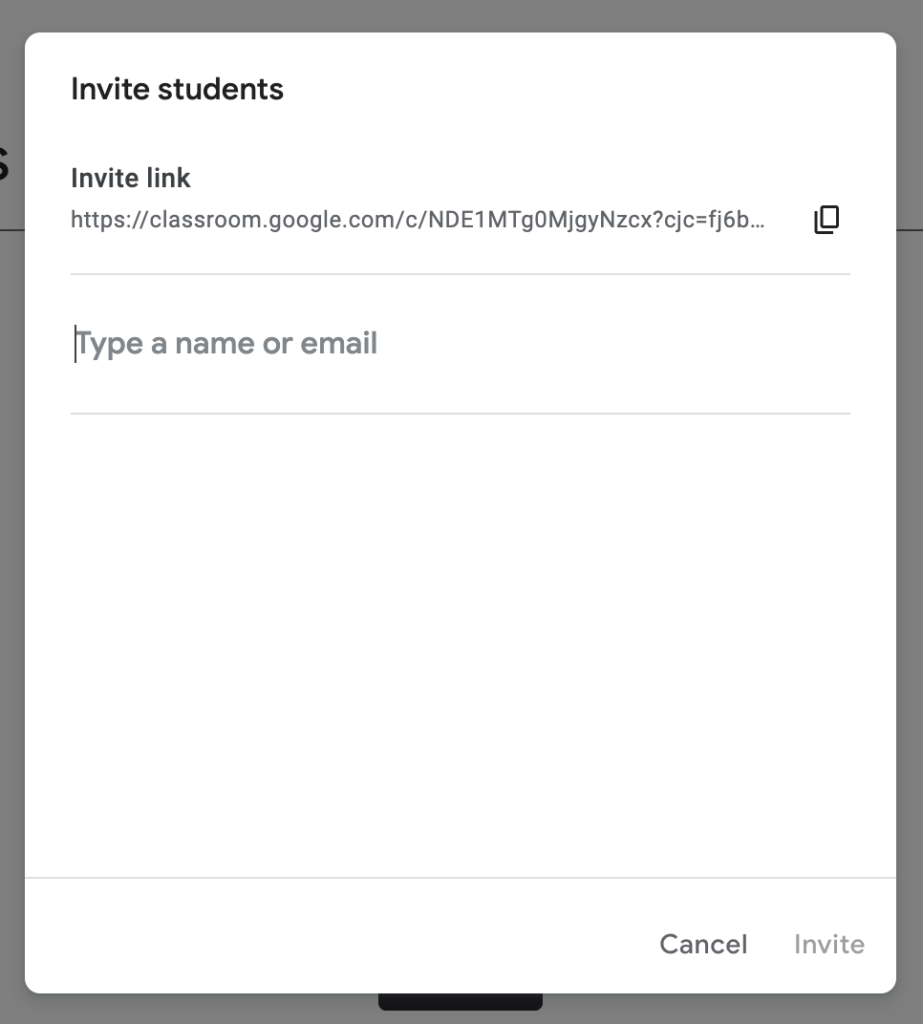
Invite students with a link
Students can now join your classroom using a special “invite link“. Just click on the class code and click “Copy invite link“. you can drop this link inside a group email list and send it to all your students.
Inviting students to your class by email
Similar to the “Copy Invite link” step. However this is a good option if students are remote learning. To do this, click on the “People” tab at the top. Then, click the “Invite Students“button (an icon with person and a plus). You can invite students individually with email addresses or by groups if all students are in a google group.
Using Google Classroom in everyday class
After your class has been setup and students have joined, you will then have a fully functioning Google Classroom!
Make an announcement
A great way to communicate to your class and them up-to-date information is through the “Share something with your class” option.
Navigate back to the “Stream” page and click on the “Share something with your class…” option
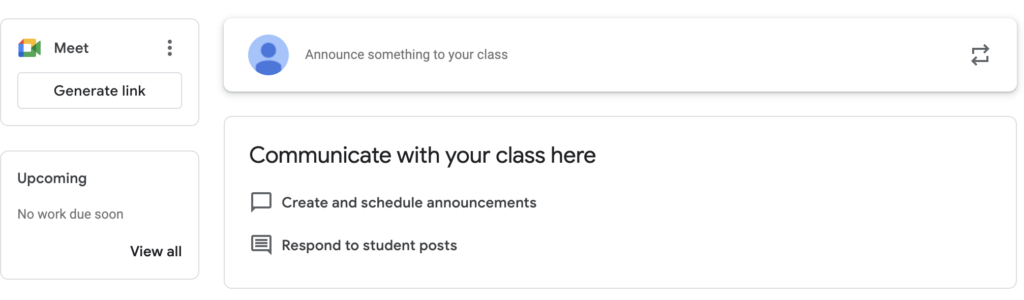
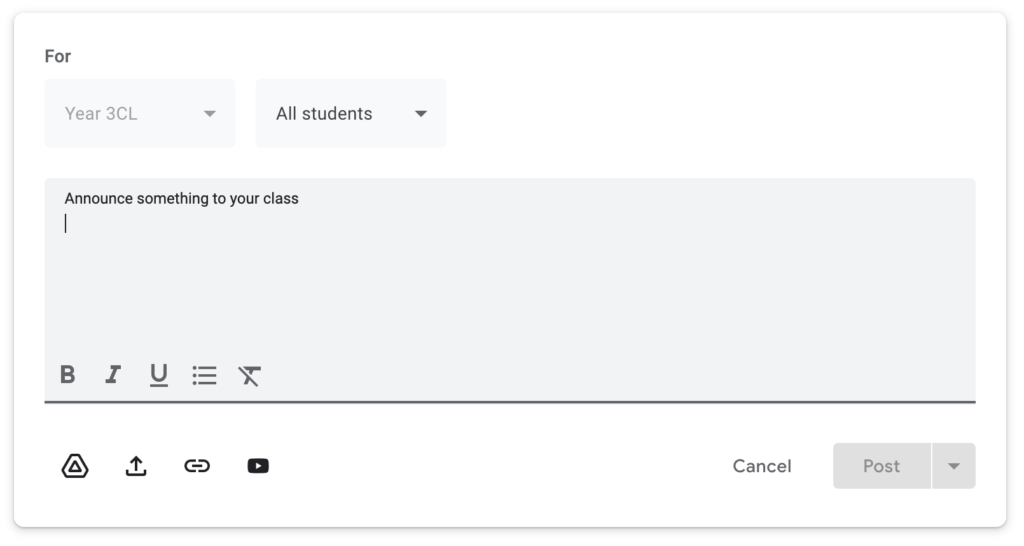
Once you have clicked the “Share something with your class” a new text area will appear. From here you can add your message and assign it to the whole class or to individuals by clicking on the “All Students” dropdown menu.
You also have the option to attach a document, YouTube video URLs, or attach a link to a document from your Google Drive.
You can then post it or even schedule the post for later.
Creating an assignment for students
This is where you put your students to work! You can create a graded or even an ungraded questionnaire for students to answer, a quiz or assignments for students to do.
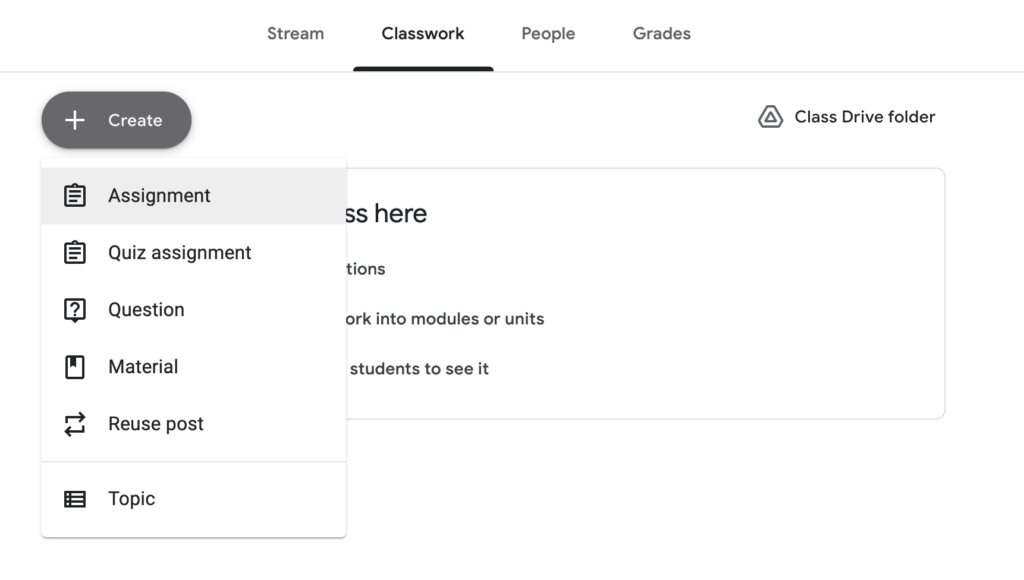
Navigate to the “Classwork” tab from your home screen and then on the “+ Create” button. A drop down menu will appear with a selection of options for you to choose from depending on the type of work you want to create.
For now, we’ll be creating a “Quiz Assignment“. A new window will appear with a few settings.
Title: Give your assignment a title
Instructions: From here, you can give a set of additional instructions for your class to follow.
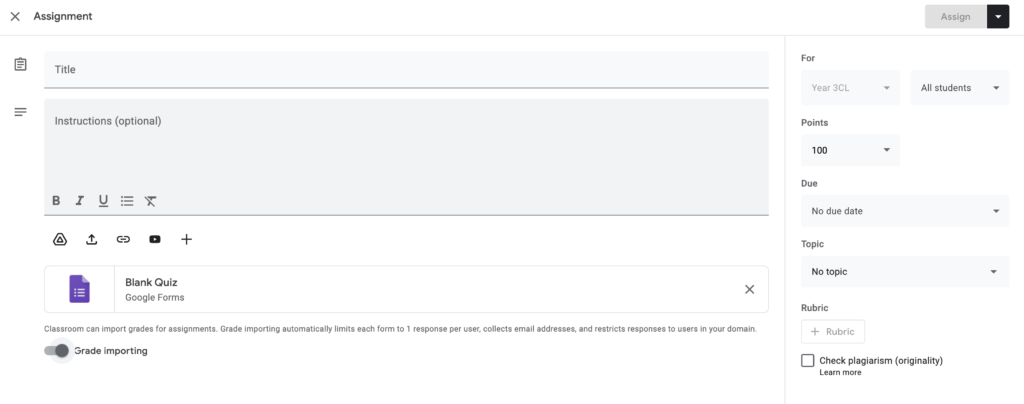
Right hand side menu
For: Here you can select a class this assignment is for and also if you want it for individual students or for the whole class.
Points: You can assign the total points a student will get for completing the assignment.
Due Date: Set a due for the assignment.
Topic: You can assign a piece of work to a certain topic.
Editing an assignment
To edit an assignment an assignment, click on the file icon underneath the “Instructions” text box. (Highlighted in a red box).
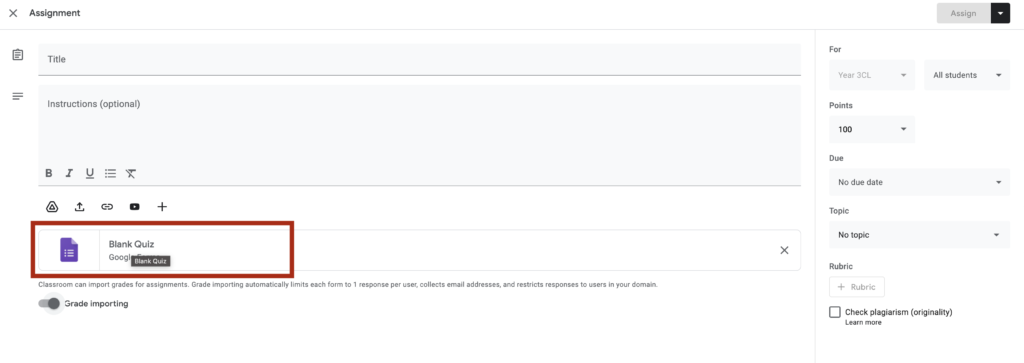
Once you click on the “Blank Quiz” file, a new tab will open with your assignment.
The screenshot on the left, is the default screen you will see when using the “Quiz Assignment” option.
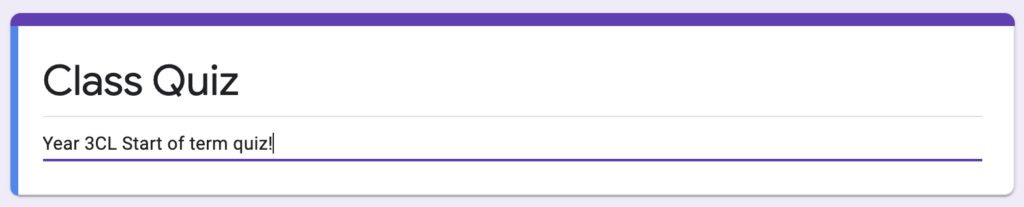
Our first step is to give our quiz a name and an optional description. By clicking into the relevant fields.
Building our quiz assignment
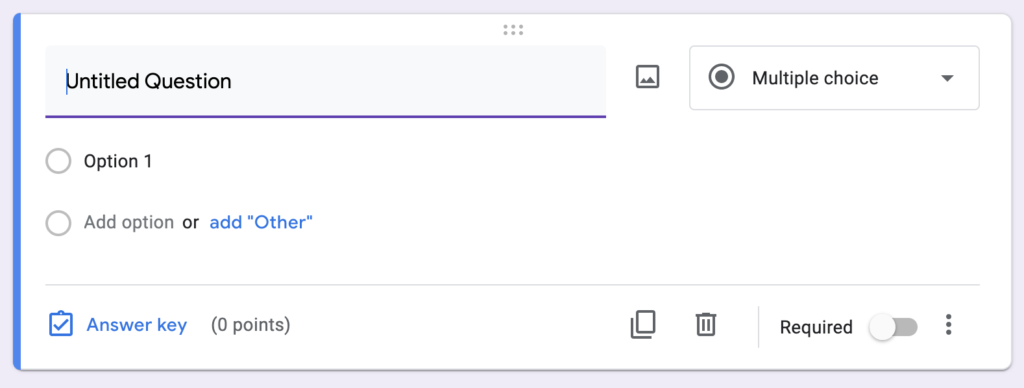
By default, you will have an untitled question created for you.
Let’s go through some of the options.
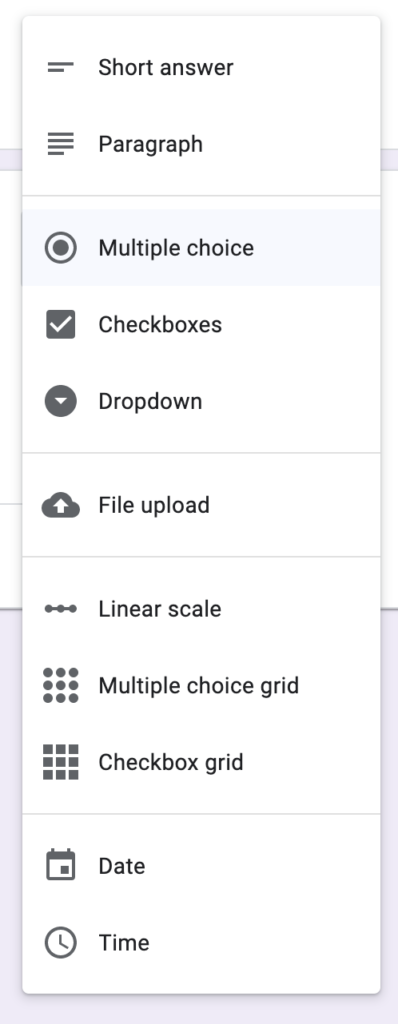
On the right of the title, you will see a drop down list, clicking on this will display a selection of different types of fields for you to choose from.
Short Answer: This field is perfect for asking for small bits of text
Paragraph: Much the same as the short answer field, this is a field for text—long-form text.
Multiple Choice: The default field for new questions in a Google Form, multiple choice lets you list options and have users select one.
Checkboxes: Similar to multiple choice, this field lets you list answers and have users select as many as they want.
Dropdown: Want all of the answer options in a menu? This field’s for you. It’s the exact same as the multiple choice field—with the same section jump and shuffle options—only this time the answers are in a menu. This is useful for keeping your form compact when there are many answer options.
Linear Scale: The field to let people select a number in a range, linear scale lets you set a scale from 0 or 1 to 2-10 with labels for the lowest and highest options. And yes, emoji work for labels, too.
Multiple Choice Grid: This is perhaps the most confusing field, as the fields are displayed in a list rather than in the grid as they’ll appear to readers. Essentially, you’ll add questions as rows, and options about them as columns.
Date: Want to ask for a specific date or time, perhaps to schedule an event or log an activity? The date field is the one you want to select. It can ask for a date and month and, optionally, the year and time as well.
Time: Time lets you request a length of time in hours, minutes, and (optionally) seconds, for a way to log how long an activity took.

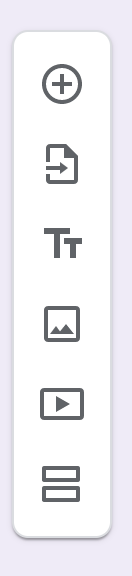
Add new question: Allows you to add additional question field type.

Import questions: Allows you to import a question from previously created forms within your Google account.

Add new title: Allows you to create a new title and description.

Add image: Add an image to your quiz.

Add video: Add a video to your quiz.

Add new section: Add a whole new section to your quiz. Think of a Part 2′ of the quiz.
By clicking the button, we have created a new title for our quiz.

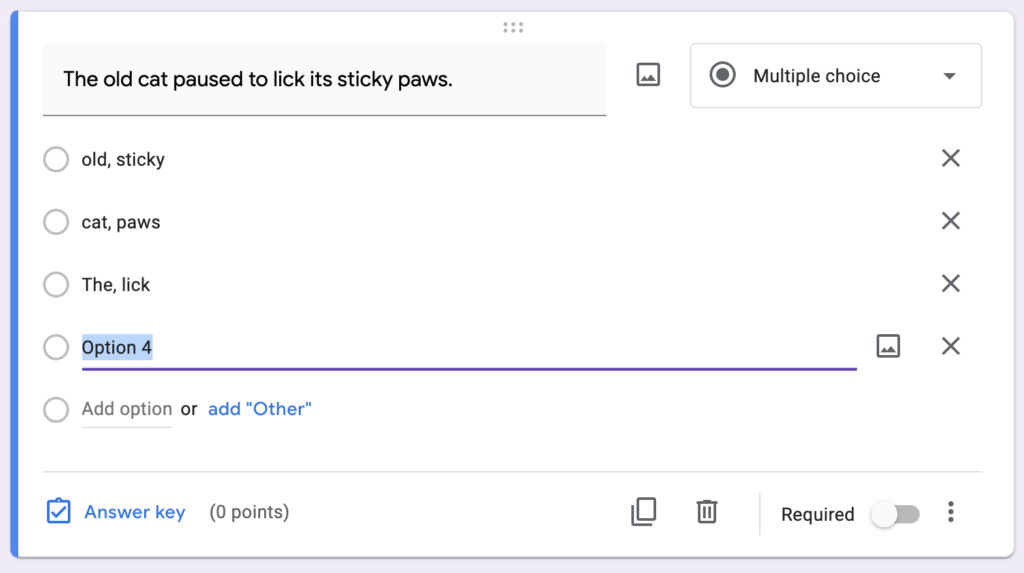
Here, we have created our first question, using the “Multiple Choice” field type.
To add additional options, click on the “Add option” or hit the “Enter” key on your keyword to add additional options.
To provide an answer to each question at the end of the quiz, simply, click on the “Answer Key” option.
Here you can select the right answer and assign the amount of points to each question.

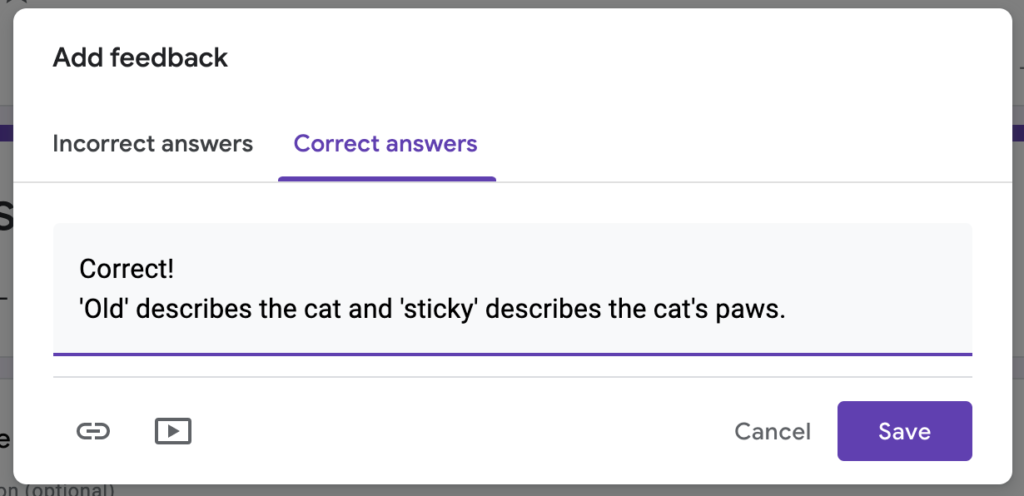
You can also provide feedback to each question, to both incorrect and correct answers by clicking on the “Add answer feedback” option.
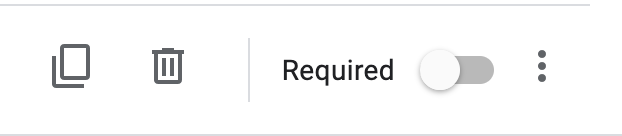
Additional options
On each question, you will also have another options toolbar available.

Duplicate: Duplicates a question.
Delete: Delete a question
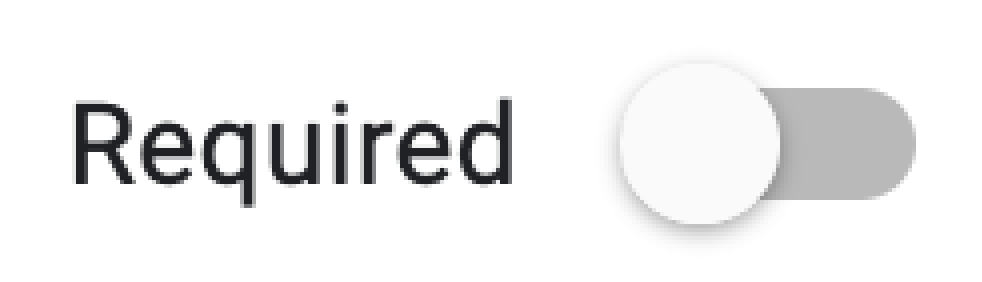
Required: Makes a question required to be answered by your pupils
Preview and send assignment to students
As you build your assignment, you can see a preview of how your quiz or form looks throughout the process.
On the upper-right corner, you will see the following icon. This “Eye” icon, clicking on this allows you to view a preview.
Once you’re happy with the way your assignment flows, you’re ready to “Send” to you class.

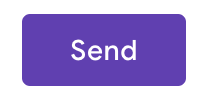
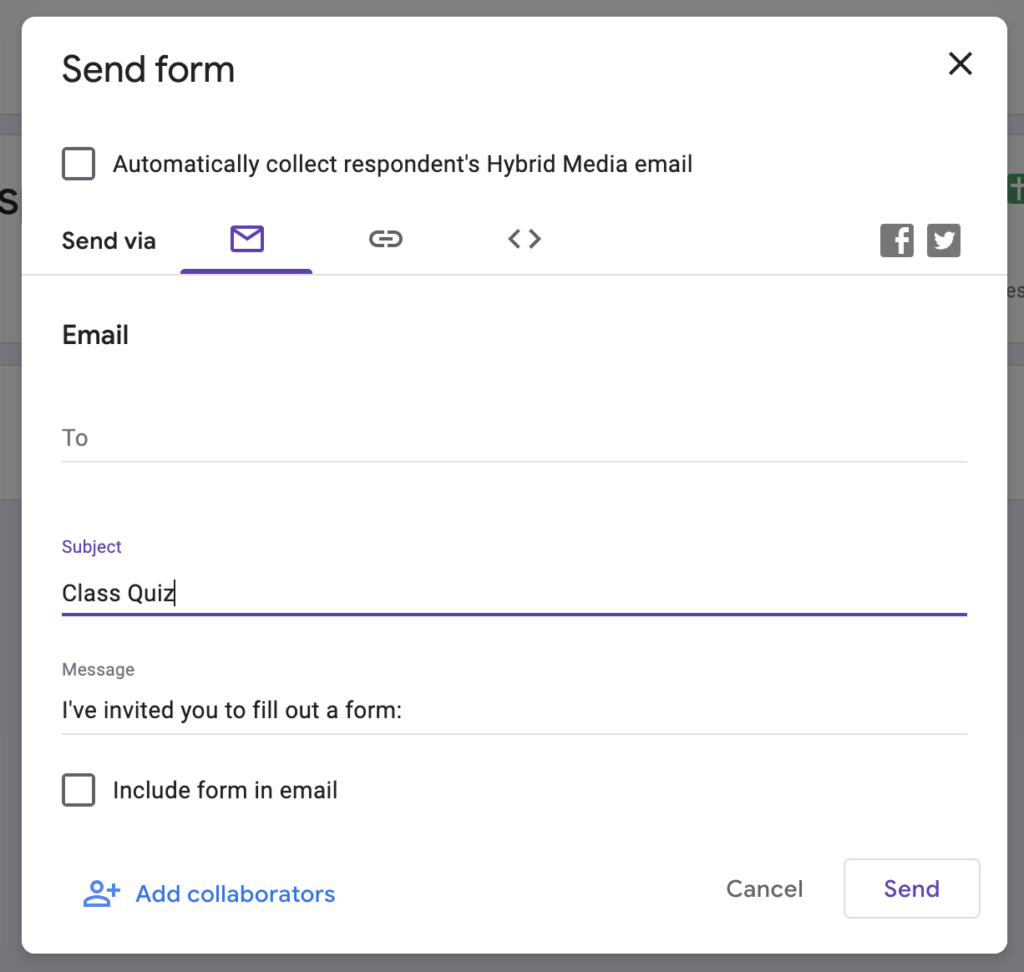
Pressing on “Send” brings up a pop-up with a couple of options.
Send via: here you have a few options, by default, send via email is selected.
Email: type in your class email or type in individual pupils email address.
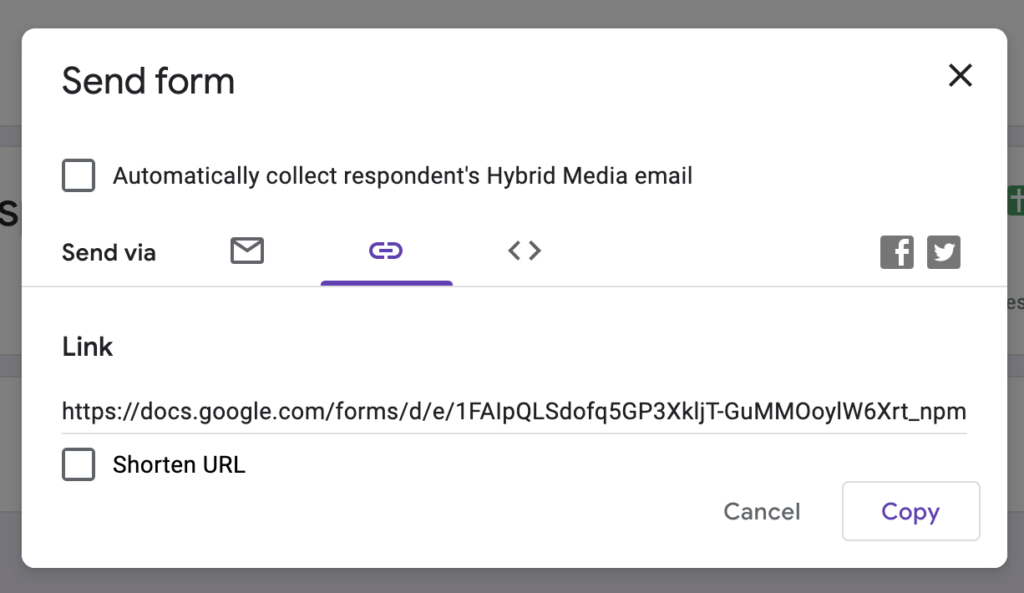
Link: you can email this URL in a separate email to specific users.
You also have the option to “Shorten” the URL.
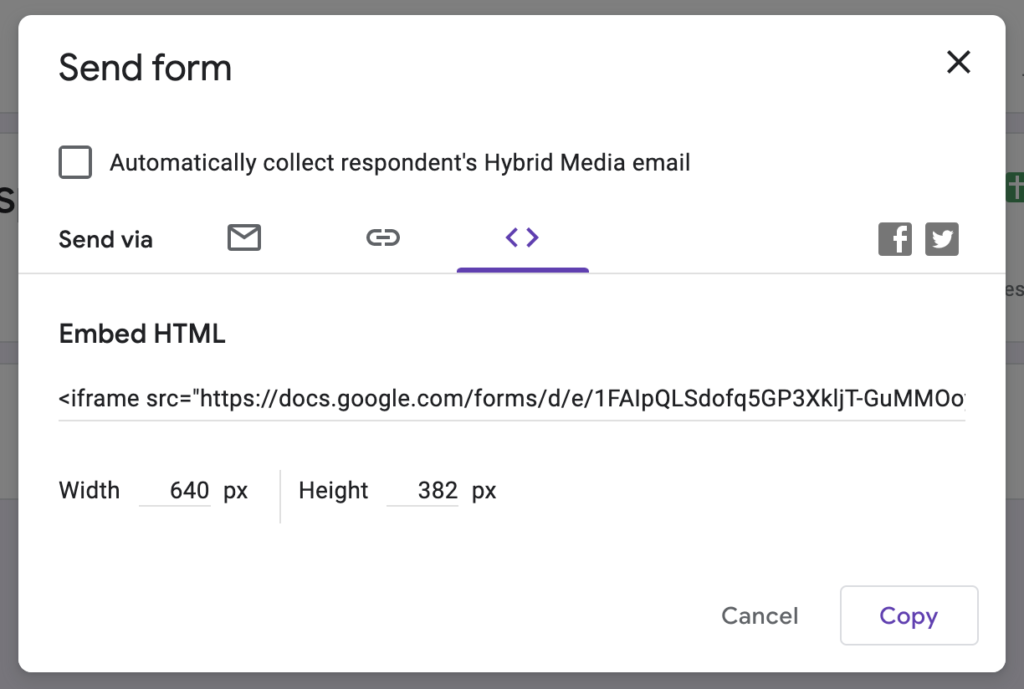
Embed: You can also embed your form onto your school website by copying the “Embed HTML” code.
You can also adjust the width and height of the iFrame by changing the values (higher the better).
Marking and return work
Once students have completed work, you can provide feedback and grade the assignment. Click on the “Classwork” button and click on the assignment to view student work.
Here are some of the actions you can take …
- Sort the assignment by students who have turned the work in or all students who were given the assignment. (Just click on the big number.) Or, you can sort by other options with the drop-down menu below the big numbers.)
- Open and view student work by clicking on it. Inside student documents, slide presentations, etc., you can add comments directly to the file. Or …
- Type and view private comments to the student by clicking on the student’s name. You can also see when files were turned in with the history.
- Add a grade to student work.
- When you’re all done, return work back to students. Be sure you’ve checked the box next to their names and click the “Return” button.
Conclusion
There we have it! We hope you you found this Google Classroom Quick Guide useful, why not check out our other Google Workspace guides, such as Google Slides or Google Docs.
Download a PDF version of Google Classroom Quick Guide