This iMovie iPad app guide will go through setting up and editing pre-recorded clips directly from your iPad without the need for fancy software.
The best part is, no account is required to start using iMovie and your final movie can be saved directly to your Camera Roll. You can even share your iMovie from OneDrive, Google Drive, Email, or even AirDrop them to other iPads seamlessly.
Additional features of iMovie
- Trim videos down
- Stick multiple videos together for one seamless video
- Add songs and music to your video. Even import GarageBand tracks to your iMovie
- Add titles, subtitles, and cards in-between or over videos.
There are plenty of other features iMovie can do, so let’s get started with this iMovie iPad app guide and make you a digital leader in iMovie.
Creating your first iMovie project
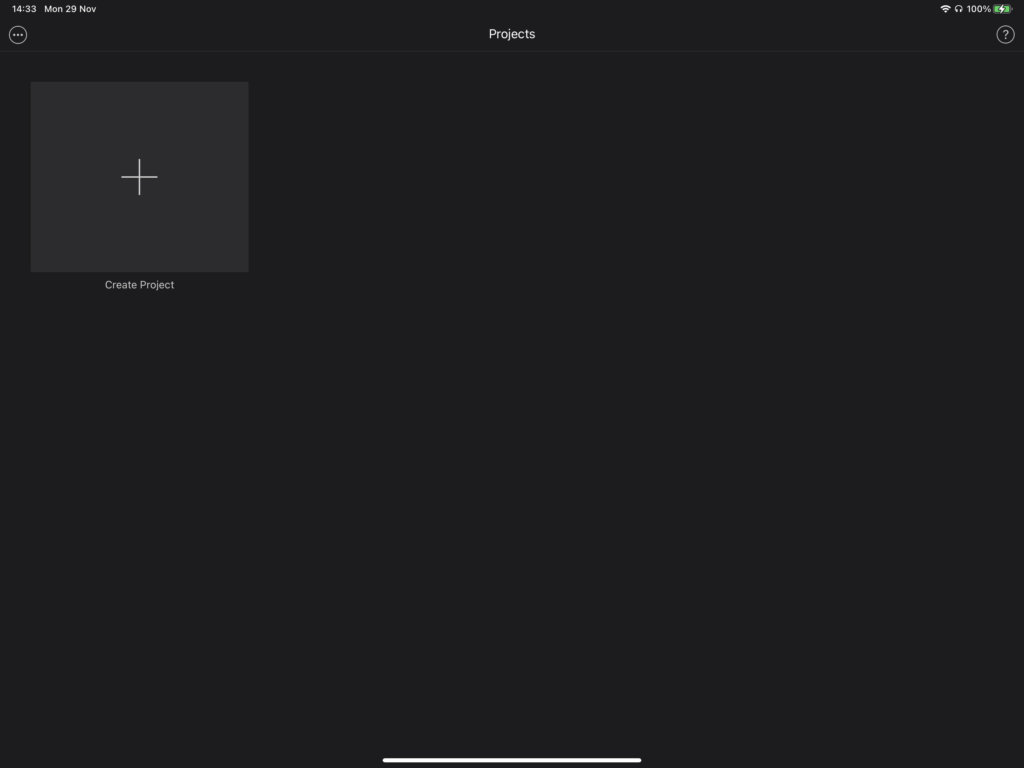
On your iPad, find the iMovie icon and tap it once to launch.
You will then be greeted with a menu. On your first use, you will have a screen similar to the one in the image on the right.
From here you can tap the + button to create a new project.
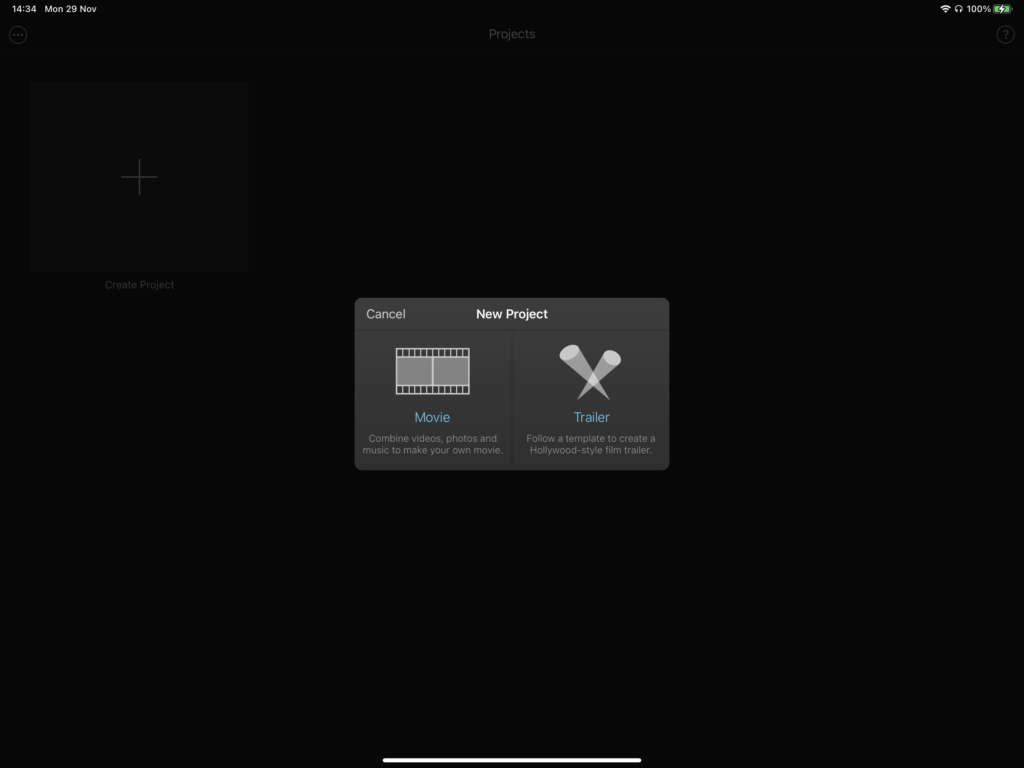
Two options will pop up: the ability to make a Movie or a Trailer.
If you select ‘Movie’, you will have the greatest amount of freedom to edit your videos and will allow you to do about anything.
Selecting the ‘Trailer’ option will allow you to insert your video footage into a variety of pre-set editing and transition filters.
Movie vs Trailer Projects
Movie Project
Movie Projects are mostly used if you’re just starting out and want the most flexibility.
Trailer Project
Trailer Projects uses templates and presets to make your project look like a movie trailer.
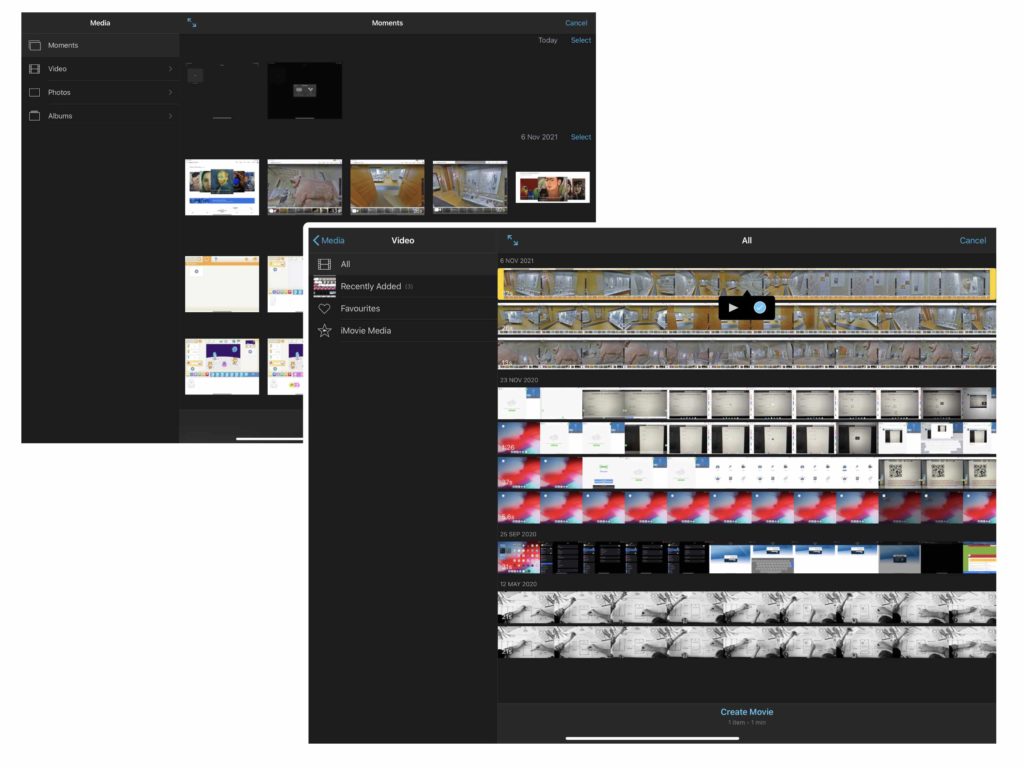
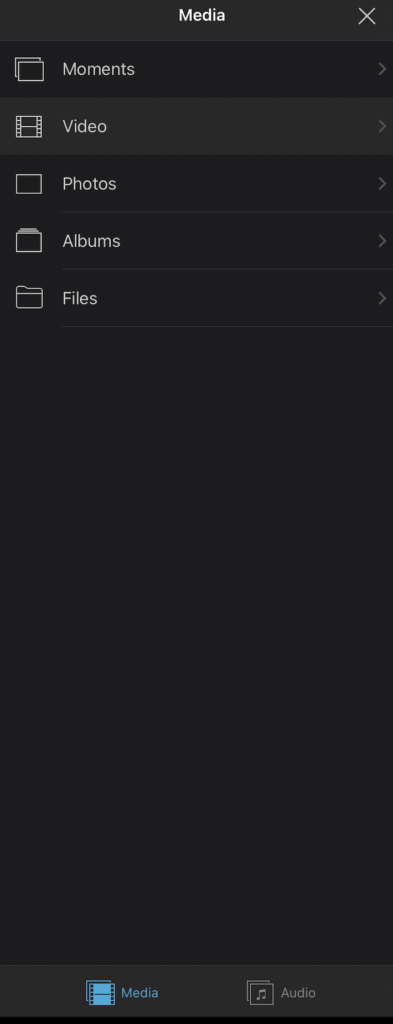
Selecting your clips
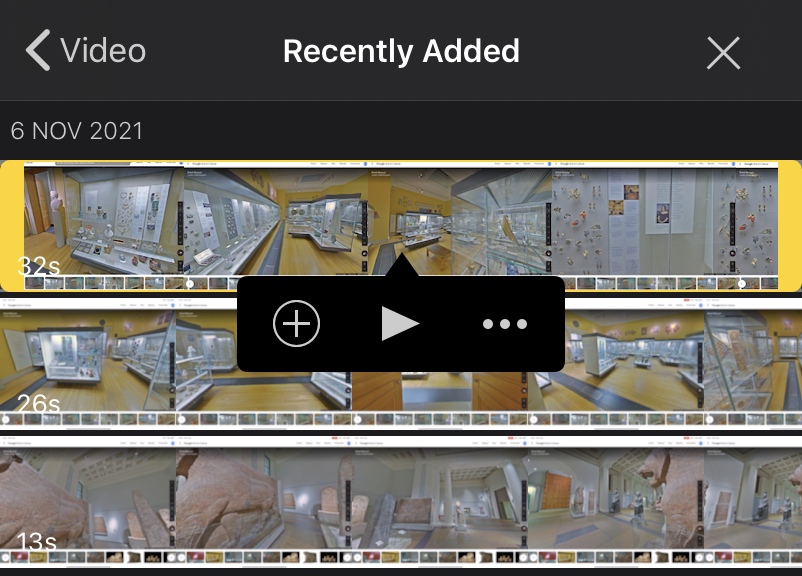
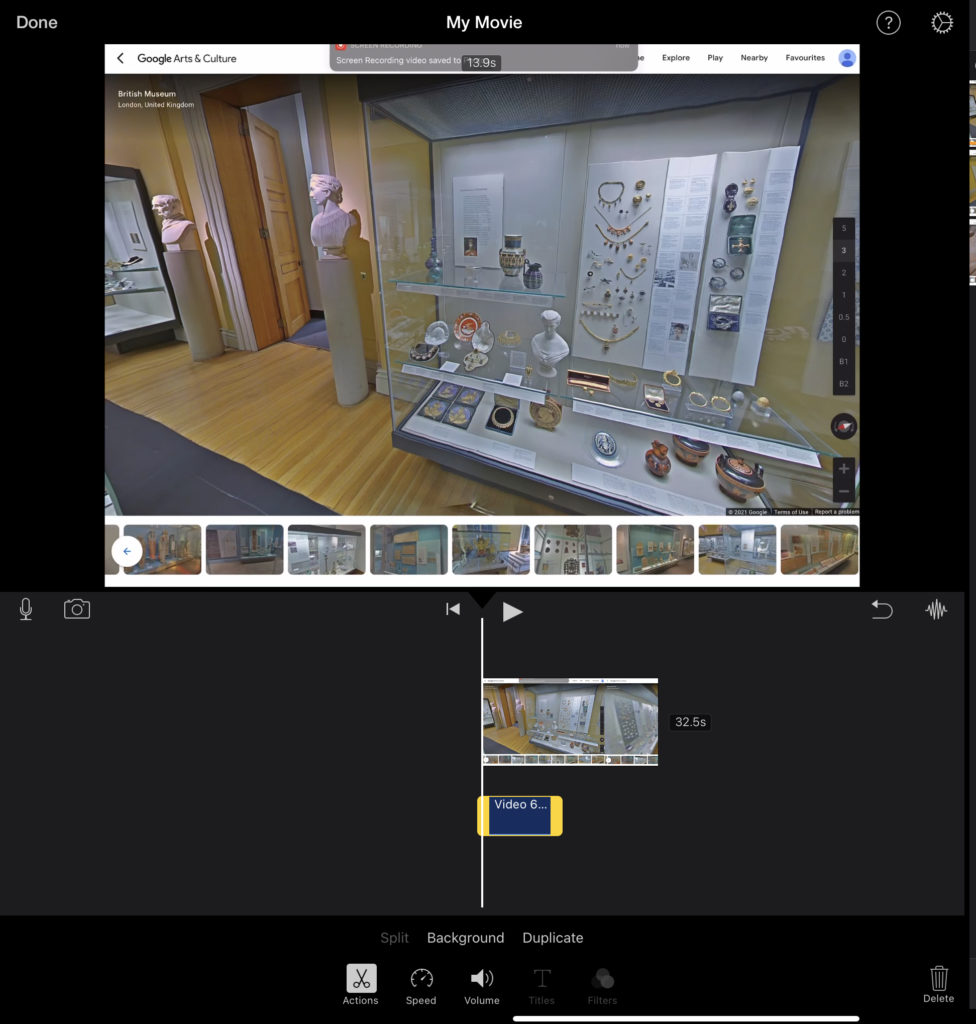
When choosing Movie as a project, you can then select the videos to import. From within the “Video” tab, you will see all your pre-recorded videos on your device. Select your relevant clips and click on the “Create” button on the top right-hand corner.
Each clip will be highlighted with a yellow outline, indicating the current selected clip, you can also select multiple clips by pressing the tick button in the middle of each clip which will turn blue when active.
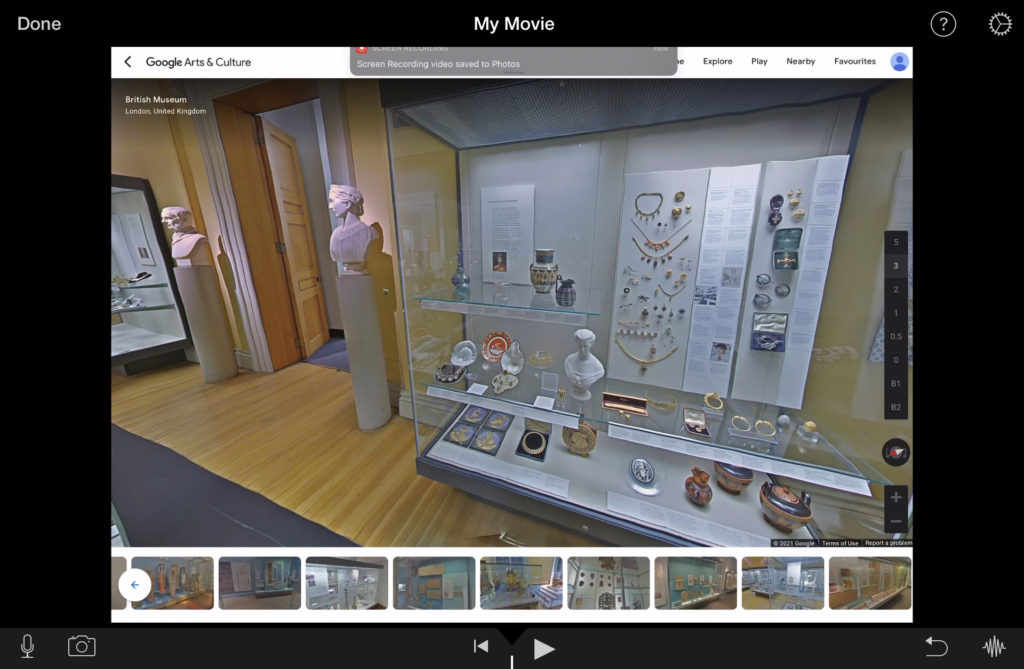
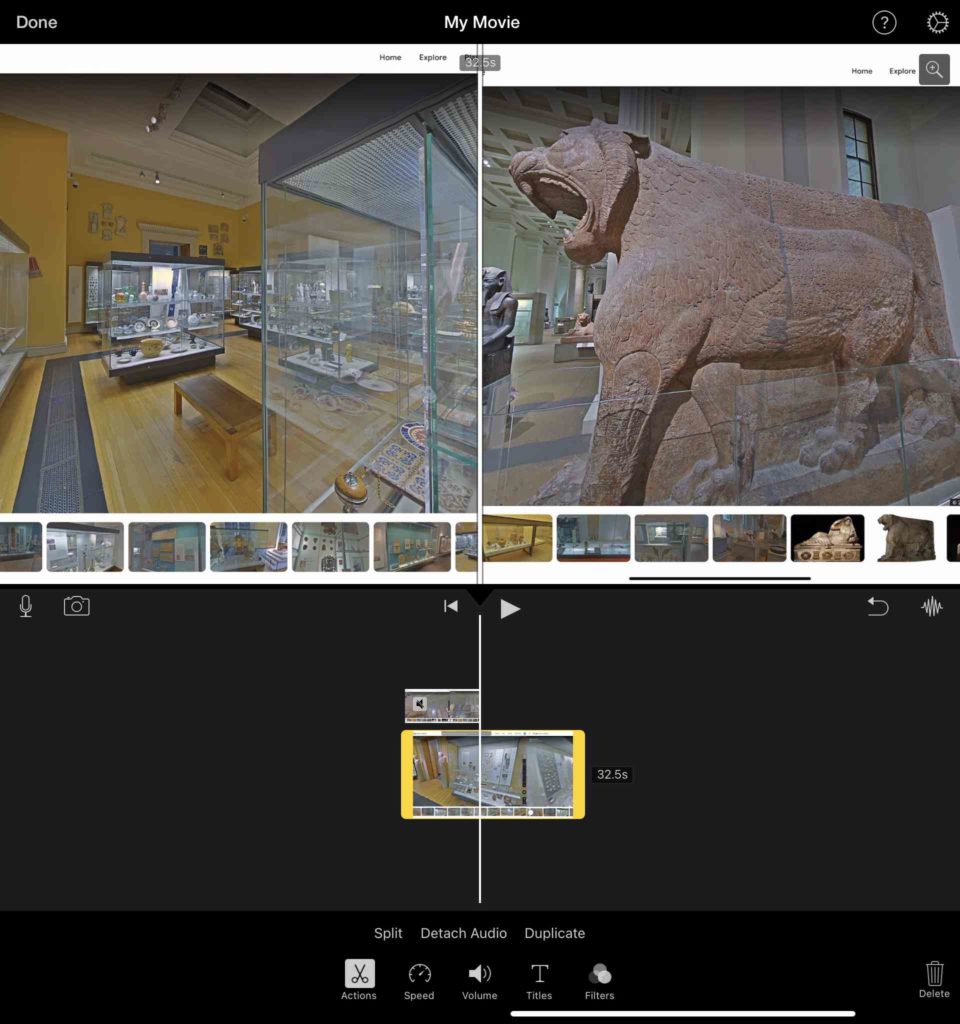
iMovie Editors Workspace

Viewer Area
Any video you have imported into your iMovie project will play here
Timeline Area
Timeline / editing area represents your final program, from left to right in time. This area is used to cut, delete, trim and add clips together
Media Content Area
Media content area is where you can add additional clips, images, sound files from your iPad straight into your timeline.
Viewer Area
This is the are where you can preview your iMovie clip. You can also take photos, record videos and sound clips directly from this viewer area. You will also have a “Play” button, tap this to play the timeline. You can also use your finer to swipe around the timeline to move forwards backwards in time.
Timeline Area
The timeline shows thumbnails that represents frames from the video clip. Beneath your clip, you will see a blue area that is a visual representation of the sound connected to the clip.
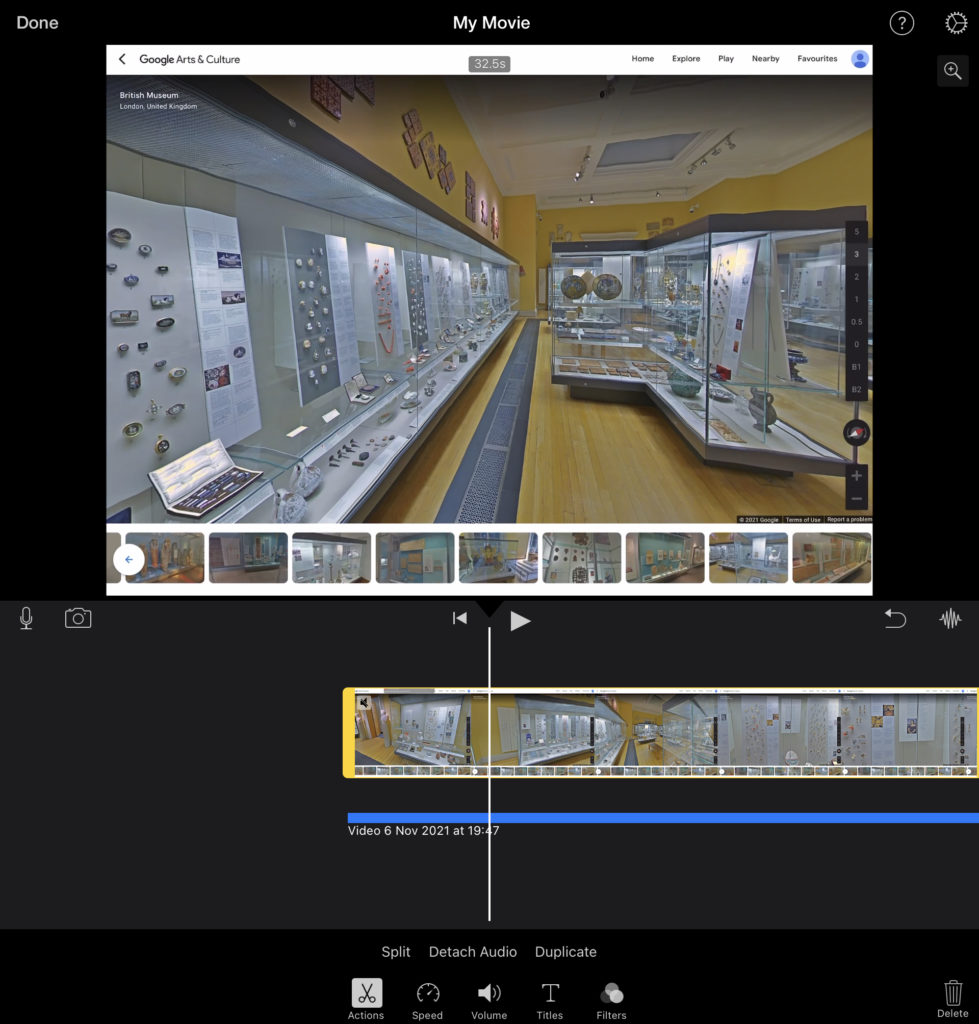
Additional Timeline Effects
When tapping on a clip, additional options at the bottom of your timeline will appear.

Split
by placing your clip in the area of the white line on the timeline, this option will split your clip into two separate clips. From here you can add images, clips or sound files in-between the original clip
Detach Audio
Tapping this option will separate the audio file from the video clip. This is useful if you wanted to replace the original sound file with a custom made one from your iPad or other sources.
Duplicate
Duplicate will make a copy of your original clip and add it to the end of your clip.
Speed
By adjusting the orange bar that appears within the Speed tab, you can adjust how fast or slow a clip plays. The closer it gets to the turtle, the slower the clip, the closer it gets to the rabbit the faster the clip will be.

Freeze
Freeze allows you to pause either the whole clip or a portion of the clip if you wanted to talk over a certain section of the video.
Add
The Add button allows you to add sections within your clip that have different speed functions. you can adjust this by using the yellow tab that appears on your clip.
Reset
The reset button removes the previously made changes you made to your original clip. This is particularly helpful if you have made a mistake and want to go back a step.
Volume
The volume tab allows you to adjust the level sound comes from your clip. You can increase the sound or completely remove it and add your own sound as a separate layer.

Titles
Clicking on the Titles tab, brings up a selection of Title styles to choose from. These can be added as overlays to your clips, or as transitions in-between clips.

Filters
Tapping on the Filters tab will bring up a wide range of different types of filters to add to your clip.

Media Content Area
In the media library, tap the “Video” tab and you will be presented with a list of video clips stored on your iPad.
Tapping on one of the clips, brings up 3 options.

This option allows you to add additional clips, images and sound files to your timeline

Tapping this option allows you to preview the clip before adding it to your timeline. This is particularly helpful if you have different versions of the same clip.

This button gives you the ability to add advanced options when you import a clip into your timeline.
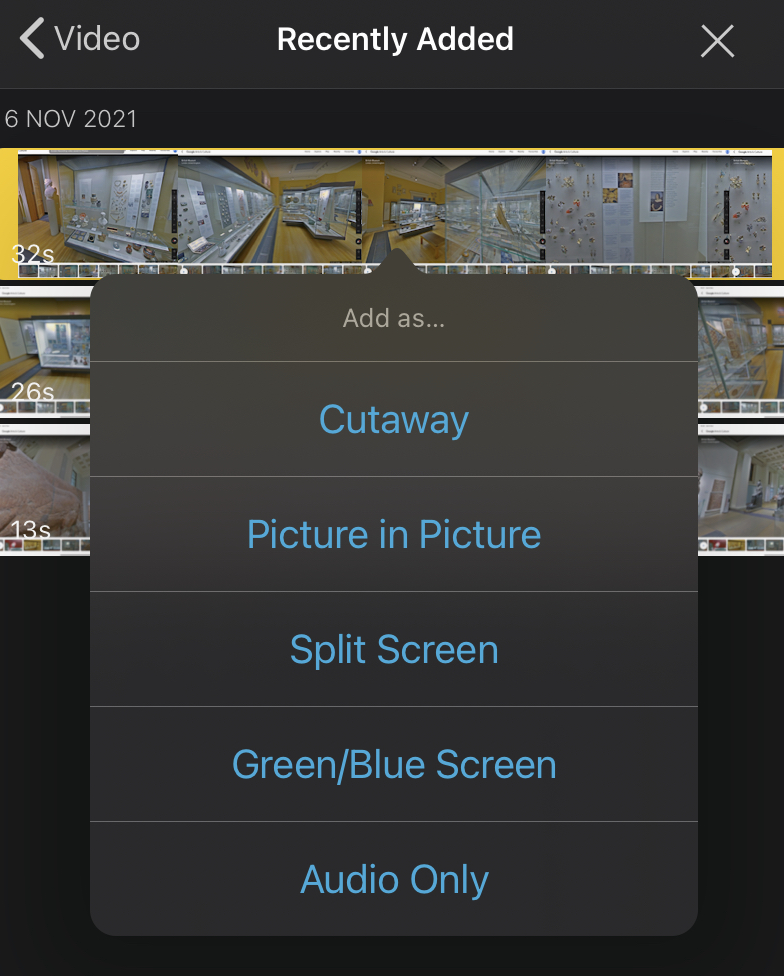
When tapping on the “More Options” button, a new menu will appear. Let’s go through some of these options.
Cutaway: This option adds an overlay layer to your original clip within the timeline. An overlay can be anything, an image, another clip, a sound file.

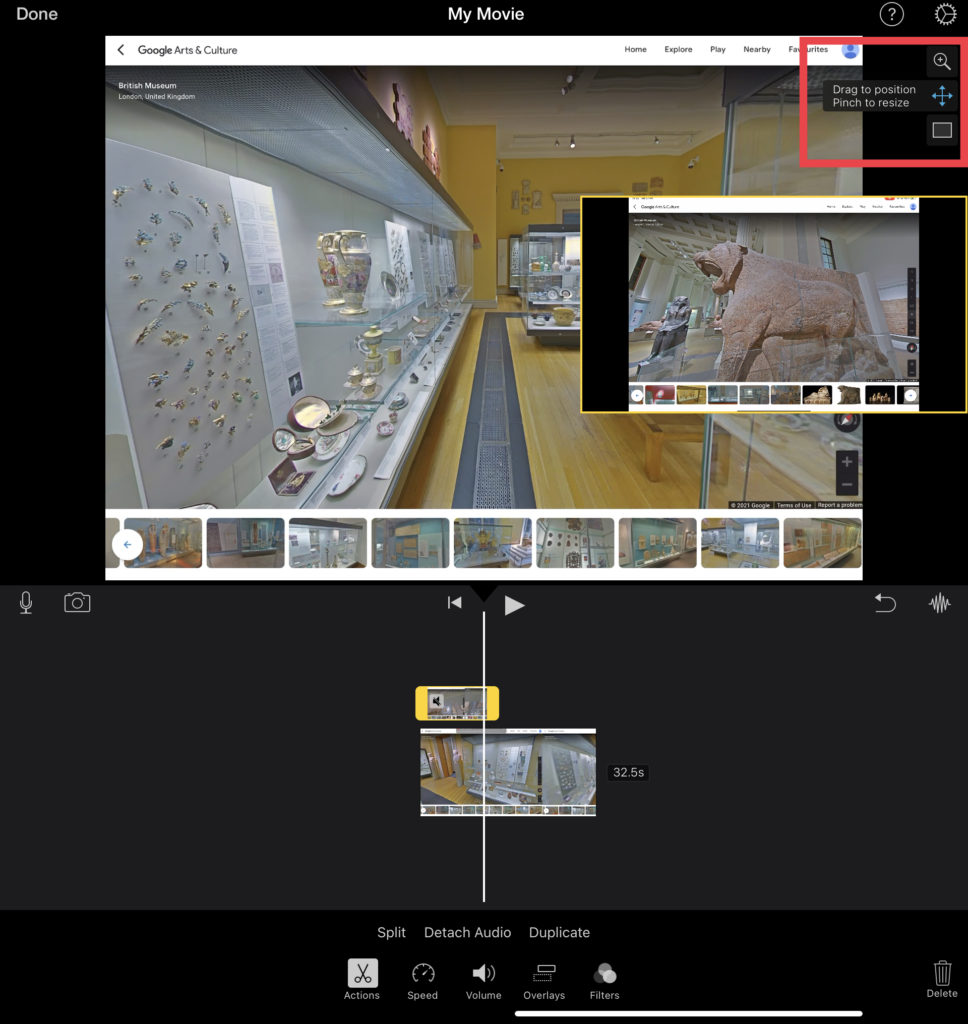
Picture in Picture: This option adds another layer to your timeline which allows two videos to be played simultaneously in a single clip.
There are additional options such as a Zoom option, you can move the Picture in Picture clip into another position and you can add a border to your clip.
Split Screen: This option allows you to have two clips side by side one another. This is similar to the Picture in Picture function. This option can be particular useful if you’re doing a comparison video.
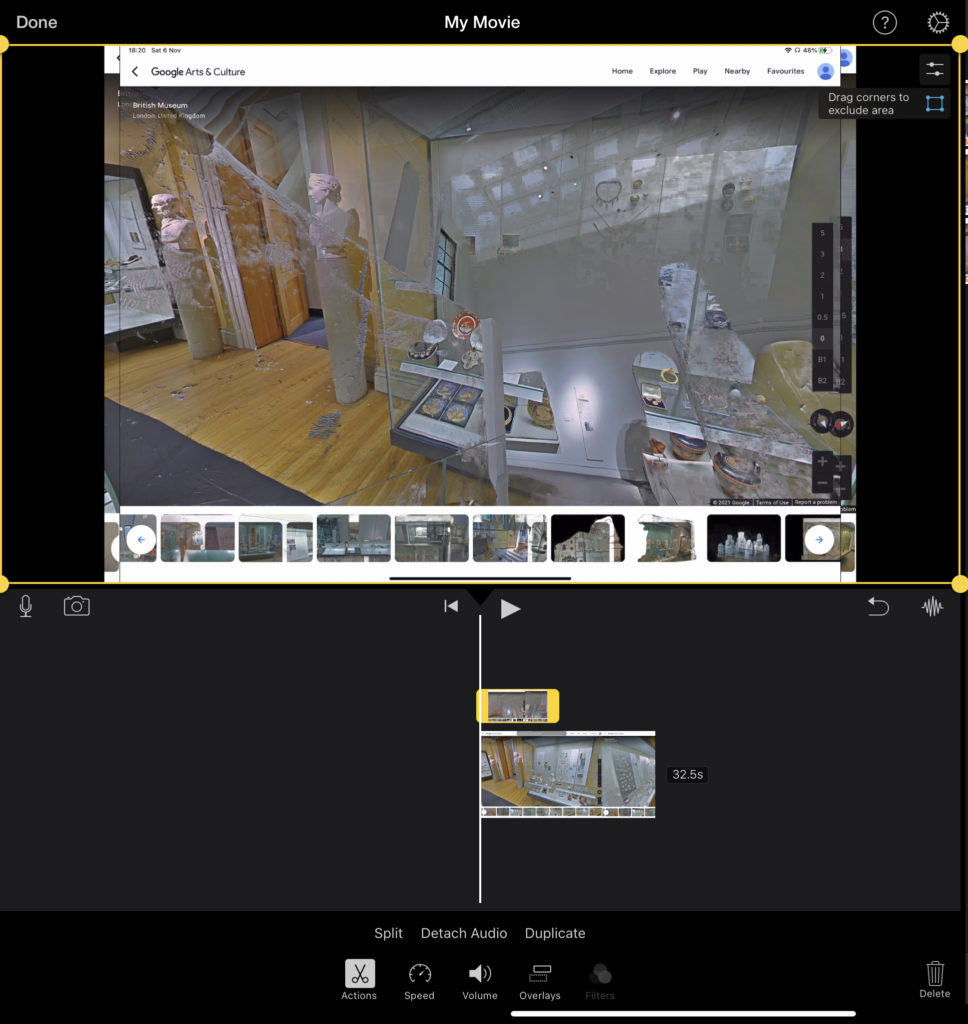
Green/Blue Screen: With the green-screen effect in iMovie, you can superimpose a video clip over a background video clip, photo or other image. First, record your subject in front of a green or blue screen. Next, add that clip above the background clip in the iMovie timeline. Then, use the green-screen effect in iMovie so the background clip is visible behind your subject
Audio: This option allows you to add your own audio to a clip. This option is perfect for adding an ambient sound to a clip to draw emphasis to a scene.
With this audio layer, you have all the options you would have with any other layer.
Adding Background Music
If you wanted to add background music, or a Christmas jingle, you can tap on the Audio tab within the Media Content Area.
From here you will have a couple of places to choose from. You can find all kinds of sound effects, sound samples, music, or even your voice recordings here.
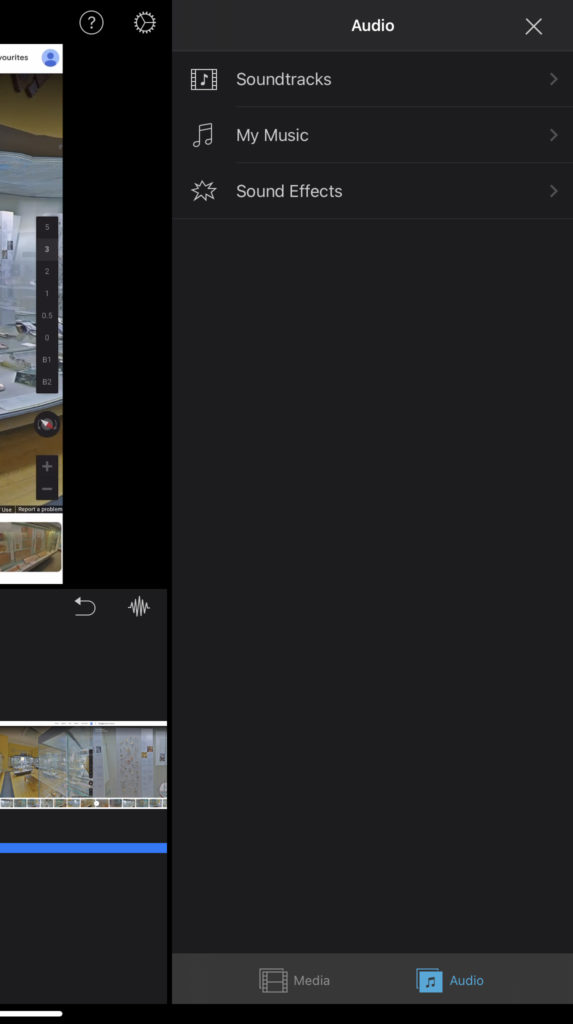
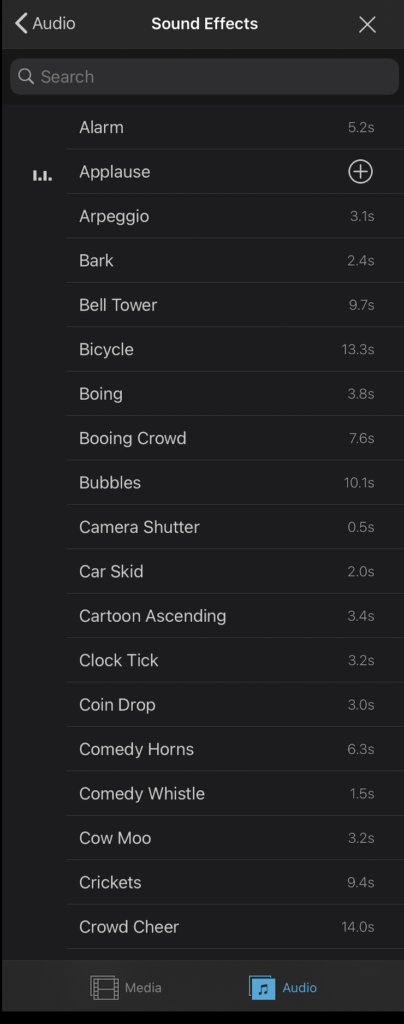
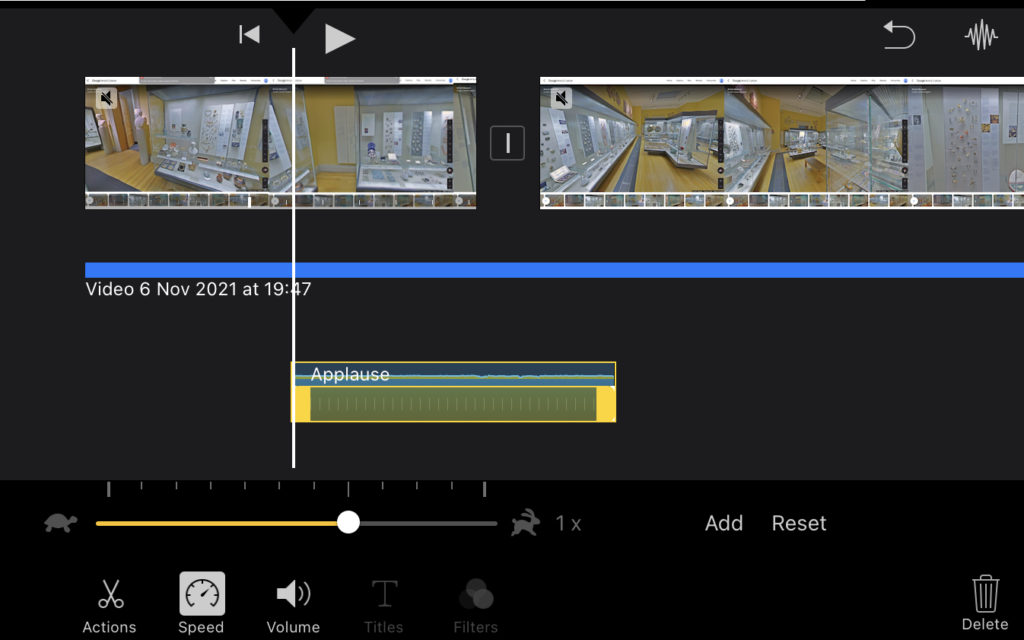
Here we have selected Sound Effects and then the Applause effect. We then tap on the + symbol to add this to our timeline.
You will now see your soundtrack as a separate track below your video clips. You can tap the clip to trim it down or change the volume level.
If you want to re-arrange clips on the timeline, simply tap and hold a clip and you will be able to drag it wherever you want it to be within the timeline.
Saving and Sharing your Clip
Once you’re happy with the final product, it is time to save and share!
Within your project, click on the “Done” option which is located on the top left hand-side of the screen.
There are numerous ways to share your video, from OneDrive, Google Drive, AirDrop, iCloud, the list goes on. Let’s take a look at a few of these options.


At the bottom of the screen, you will find a “Share Content” button. Tapping this will bring up a sub menu with various options that you can choose from.
Save to OneDrive or Google Drive
Here you can see a wide range of apps you can import your video into. For now, we will choose OneDrive. Tapping on the OneDrive icon this will bring up another screen.
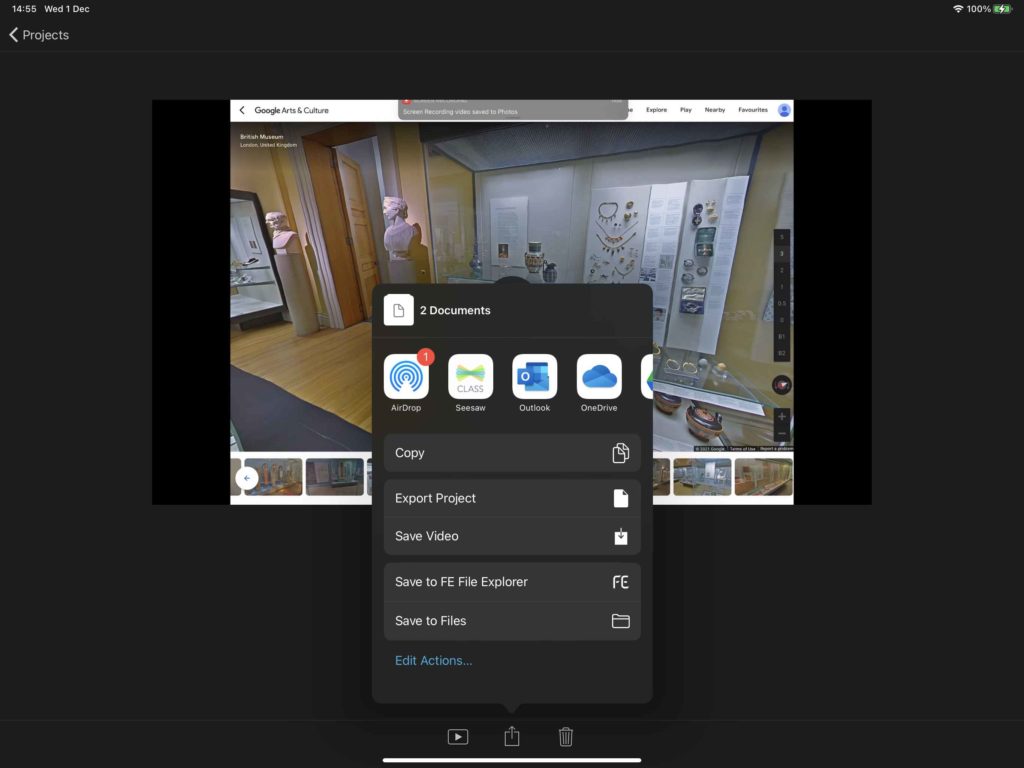
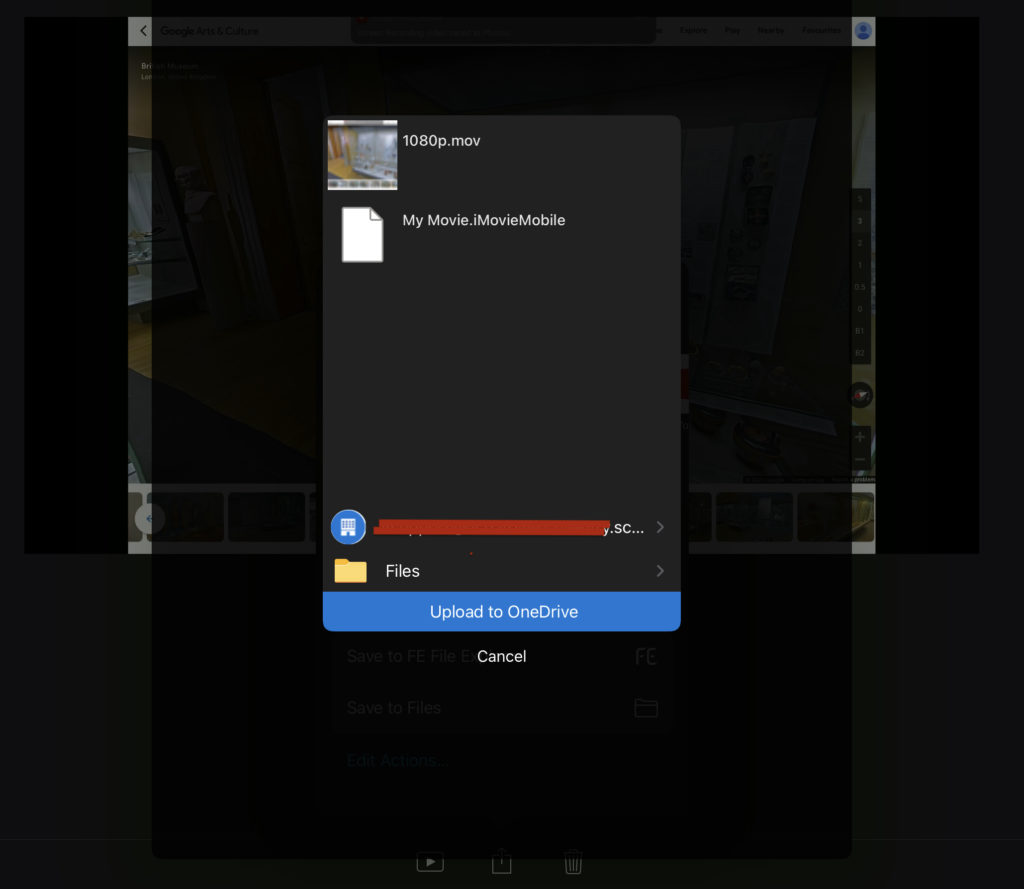
From here you choose to either upload directly to the root of you OneDrive folder, or you can choose to place it within a folder of your choice.
To upload to your Google Drive, the steps are similar as above. Instead of choosing OneDrive, tap on Google Drive.
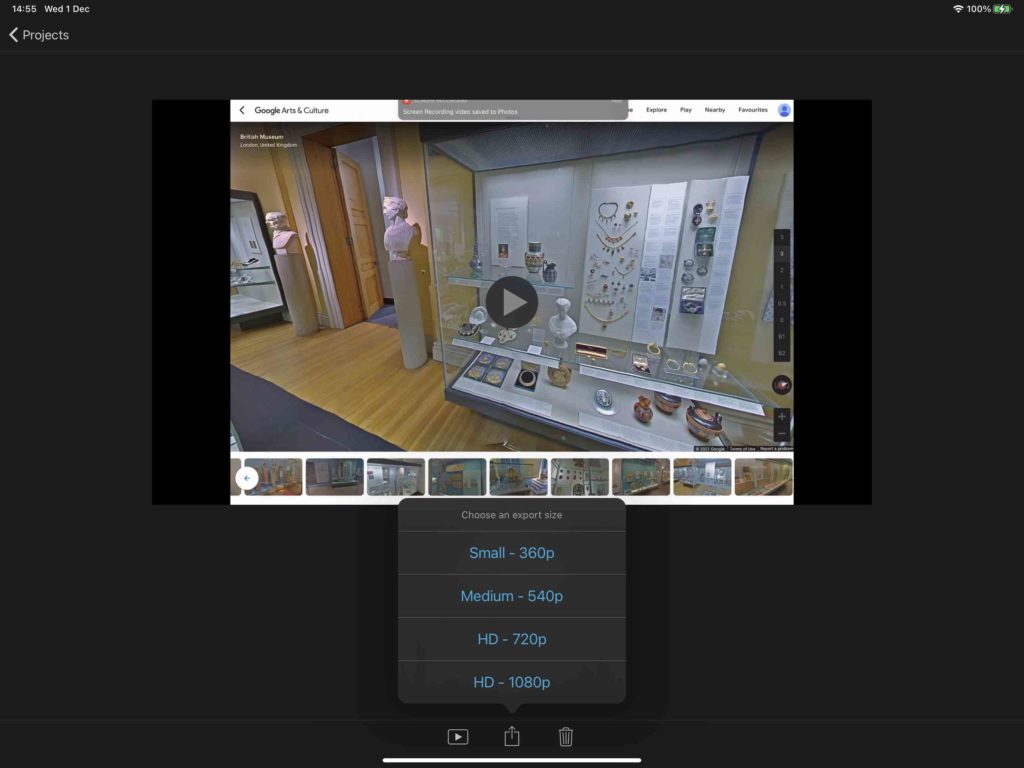
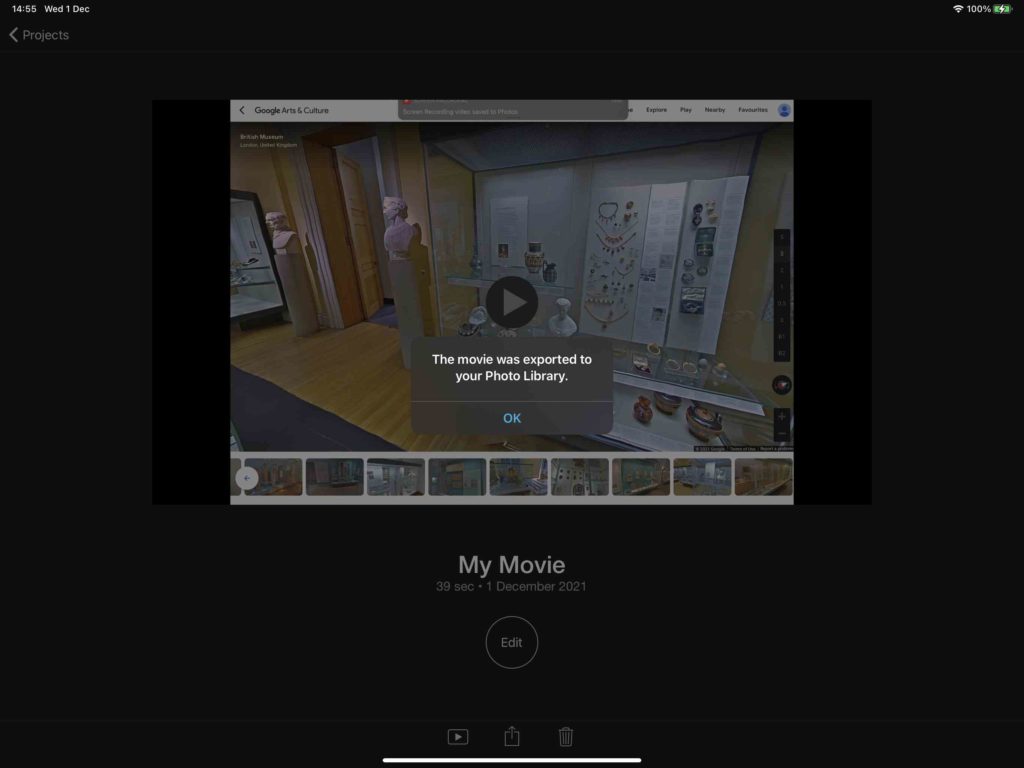
Save Video to Camera Roll
To save your video to your iPads camera roll, tap on “Save Video” and choose the video quality. A good choice would be HD – 720p. Once you have exported the video to your camera roll, you can now find it within the Photos app.

Free Resources
Download a free storyboard template
Conclusion
There we have it, we hope you find this guide useful. You can always download a free PDF copy of iMovie iPad App Guide to share and refer back to at a later date.
Feel free to check out our other resources at https://hybridmedia.io/blogs