In this edition of Explain Everything Whiteboard Guide, we’ll be having an ‘overview’ look into Explain Everything Whiteboard and the different tools, features, and uses of the app with a focus on educational contexts. Our goal is for this book to be a comprehensive handbook for Explain Everything and that also may provide some new ideas for using the app in the classroom and with your coworkers.
In this guide, we will be going through some of the tools that are available within Explain Everything Whiteboard and the meaning behind each icon so you can become a Explain Everything Whiteboard power user.
Home Screen
On the Home Screen you can access the core functions of Explain Everything in a simple way. You can immediately create a new project, invite others and set up a real-time collaborative session. You can also join a sessions initiated by somebody else and manage or share an existing project.
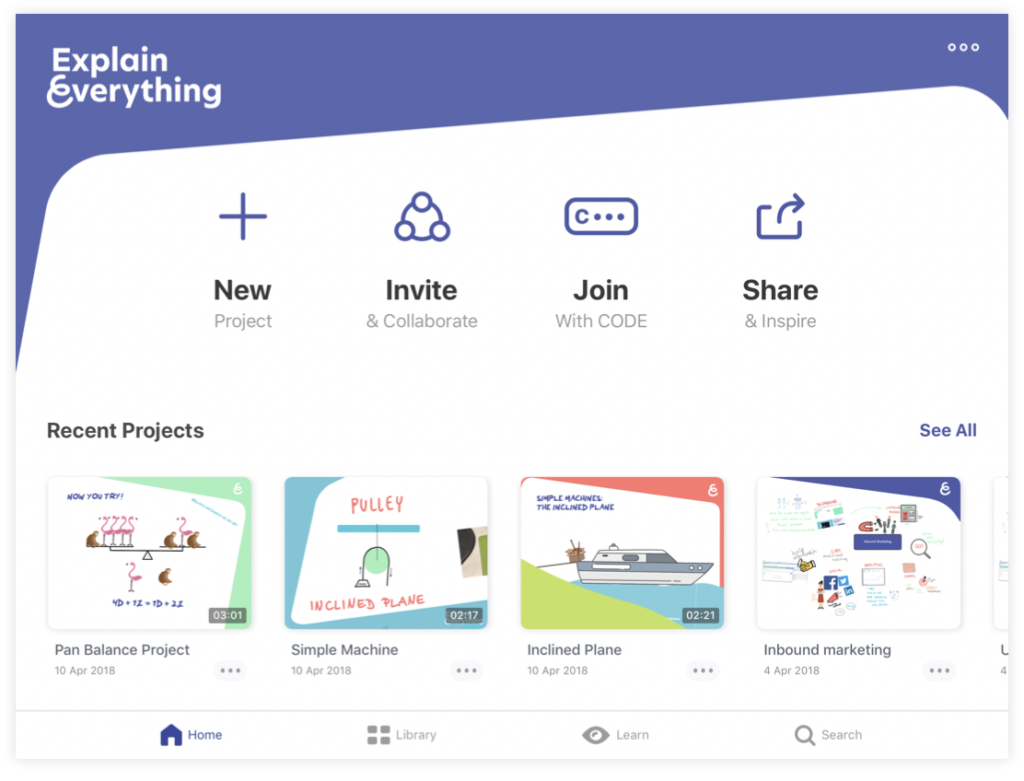
The New Project button lets you start by creating a new blank project in landscape or portrait mode. You can also begin a project from a template or import various files from the cloud and use your own pictures or documents. Collaboration and Sharing will be described in separate chapters. On the Home Screen you can access your recent projects. You can also access the Learn section that will walk you through crucial areas of using the app. Make sure to check them out!
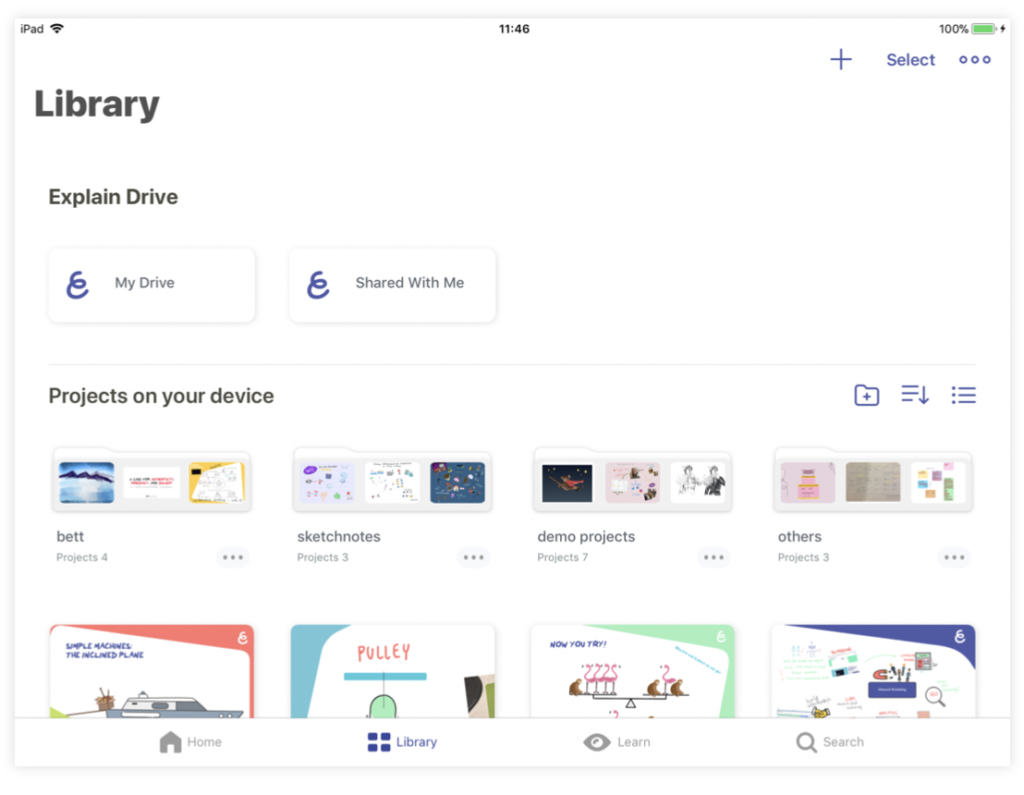
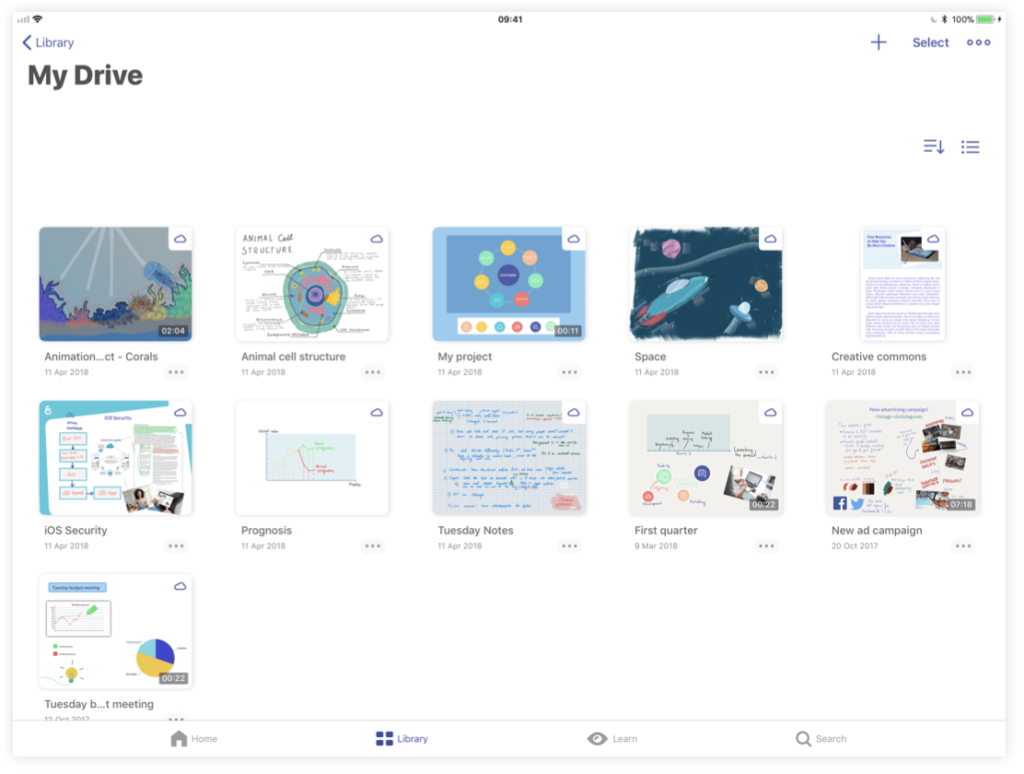
Library
Go to the Library tab to see all of the projects you’ve created. You can access projects saved on your device as well as projects you store on your Explain Drive. If you’re looking for a simple way to have your projects organised, you can create folders. In order to create one, tap and hold your project’s thumbnail and move it on the top of another. This will allow you to merge projects or create a new folder.
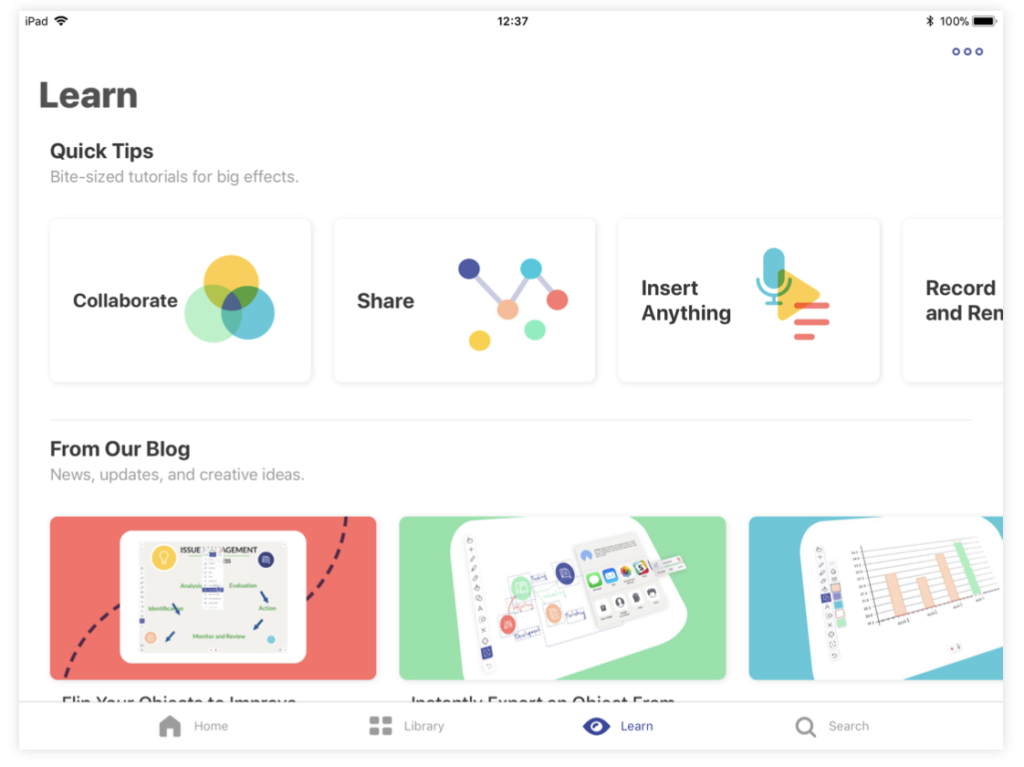
Learn
Watch several tutorials and tips to master Explain Everything. Check out news, updates and ideas from our blog. Still looking for more? Go to the Knowledge Base section and take a look at our Help document and enroll in the Explain Every thing Academy. You will learn how to use Explain Everything to innovate getting a message across – from your mind to the eyes and ears of your audience.
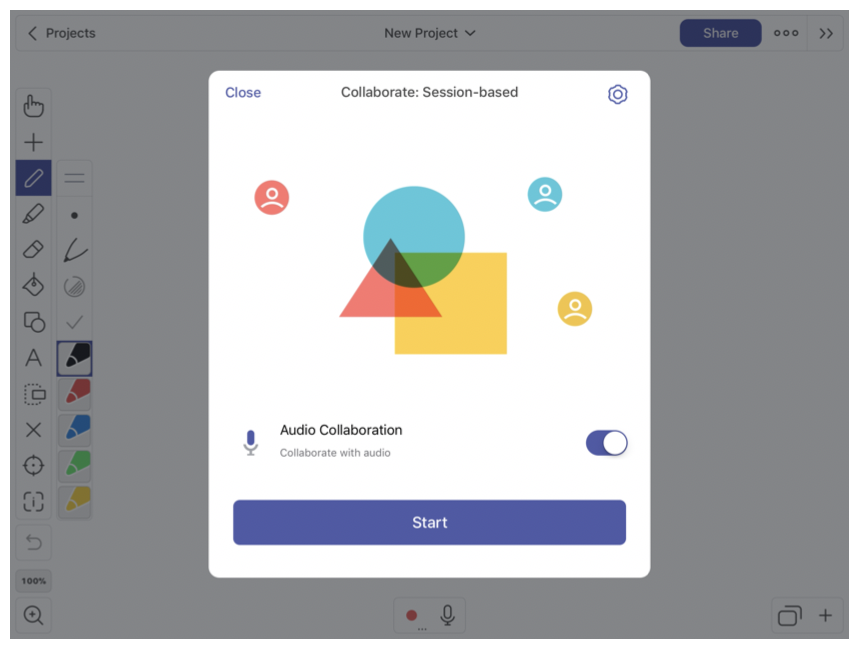
Invite & Collaborate
Choose the Collaboration tab to see projects broadcasted on your local network that you can join. If you want to join a collaborative session using a join CODE, enter it in the upper right corner.
Open Explain Drive to browse, watch, and download projects created worldwide. All projects uploaded to the portal remain editable project files, which if shared publicly anyone can download and remix. Find a project by searching by name or using a project’s unique CODE.
Access My Drive to see all the projects uploaded by you to the portal. You can organise projects by creating folders, which can be also shared with others.
Design Tools

Hand Tool
Choose the Draw Tool to draw and annotate on the screen. Tap and hold the icon to change pen thickness. The drawing color is chosen in the color picker. You can determine both stroke and fill colors.
Switch between drawing styles to give your projects a unique touch. Toggle the moveable Ruler and use it to draw precise lines. Tap on the Ruler symbol again to hide it.
Draw Fill: Connects drawn lines and fills the drawing with a color selected in the Color Picker under the Fill tab. Once filled, the drawing becomes an object.
Hand Tool Gestures
Complete Drawing: Turns the current drawing into an object and allows you to continue drawing or writing. After an object is created, a blue frame appears around it. Drawings also become objects automatically when a different tool is selected, except when selecting Highlighter.
Inserting various types of media from your iPad and other sources.

Add Media

New Picture: Opens the Camera to take a new photo that is then added to the canvas. The Image Editor will appear after taking the picture that will let you scale, rotate, and crop the image or remove its background with the Instant Alpha before inserting it onto the canvas.

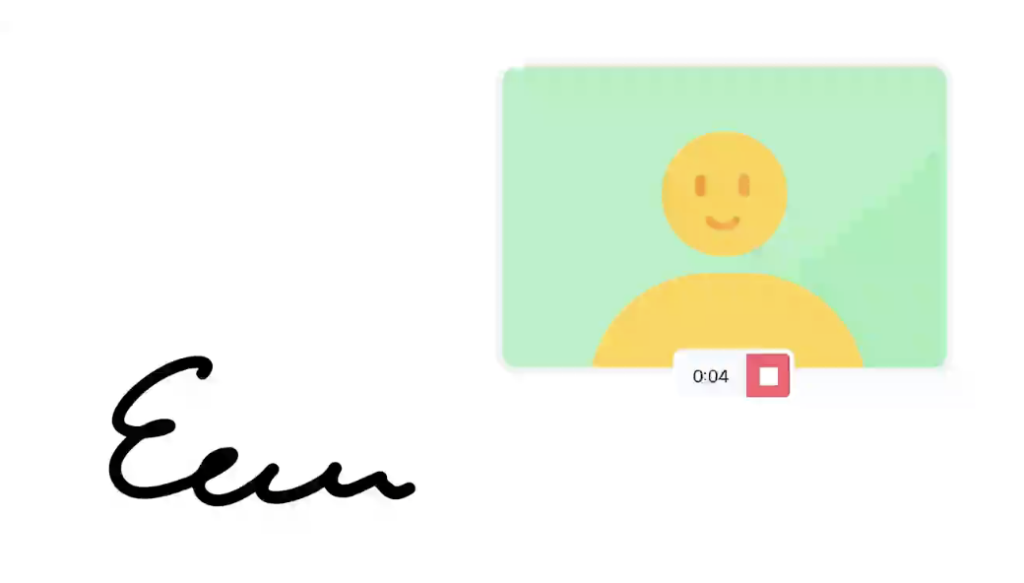
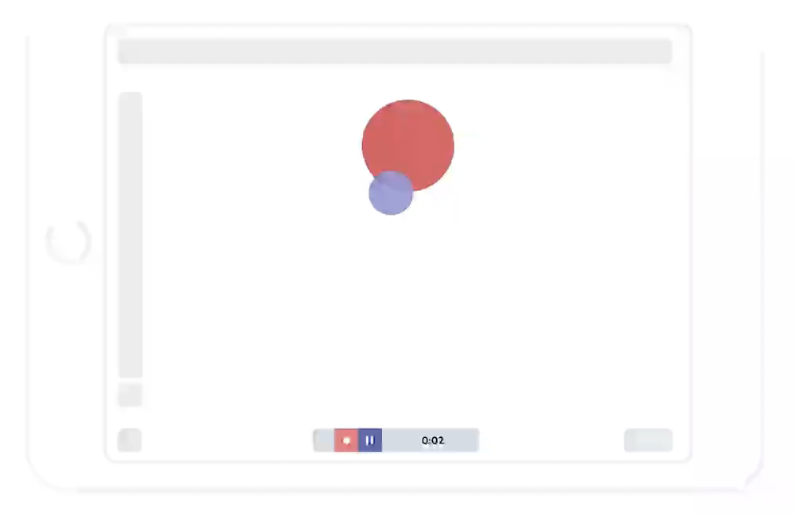
New Video: Will insert an empty video to the canvas. If you are already recording, you have to press the record button at the bottom of the video object to start recording. If you are in pause mode, pressing the global record at the bottom of the screen will simultaneously start recording the video object.

New Browser: Insert a fully functioning web browser onto the canvas. Tap the browser to activate it. Press the eraser icon in the top right-hand corner to clear annotations.
Note: Inserted browsers have limited recording capabilities (e.g. Explain Everything will not record a YouTube video within a web page). If you see that there are some problems on specific websites, please use the Quicksnap button in the upper right corner, to capture the moment you want to be shown during playback.

New Audio: Adds a new audio object to the canvas in the same way you would create a new video. Press the record button under the object to start recording the sound. This sound file will behave independently from the global project recording button in the control bar on the bottom.

File: Insert any file types onto the canvas. Choose the source of the file from the sources panel.
New Equation: Insert a new text object with a special math keyboard that allows you to create math formulas.

Existing Image/Video: Inserts an existing image(s) or videos onto the canvas. Multiple images can be imported at once. When importing a single image from one of the sources, the Image Editor will appear.
You can start playing the video while recording globally – and all your actions will be recorded. You can change the audio volume, scrub the video backwards and forwards or pause it – all while recording.

Clipart: Insert high quality images from the Explain Everything clipart library. Tap a clipart to add it to the canvas. You can also add a custom clipart to your library with the Inspector Tool.

Image From Web: Search for and insert images and photos from OpenClipart.org, an open community driven collection of free clipart.
Placeholder: Insert a multimedia placeholder object. Tapping on a placeholder that has been inserted to the canvas will open an import menu with the corresponding media.

Existing Sound: Will open the iTunes menu from which you can choose a sound file from your iTunes library. The inserted sound file can be controlled just like an inserted video.

Draw Tool

Switch between drawing styles to give your projects a unique touch.

Complete Drawing: Turns the current drawing into an object and allows you to continue drawing or writing. After an object is created, a blue frame appears around it. Drawings also become objects automatically. when a different tool is selected, except when selecting Highlighter.
Choose the Draw Tool to draw and annotate on the screen. Tap and hold the icon to change pen thickness. The drawing colour is chosen in the colour picker. You can determine both stroke and fill colors.
Toggle the moveable Ruler and use it to draw precise lines. Tap on the Ruler symbol again to hide it.

Draw Fill: Connects drawn lines and fills the drawing with a color selected in the Color Picker under the Fill tab. Once filled, the drawing becomes an object.

Highlighter behaves just like the Draw Tool but has automatic transparency.

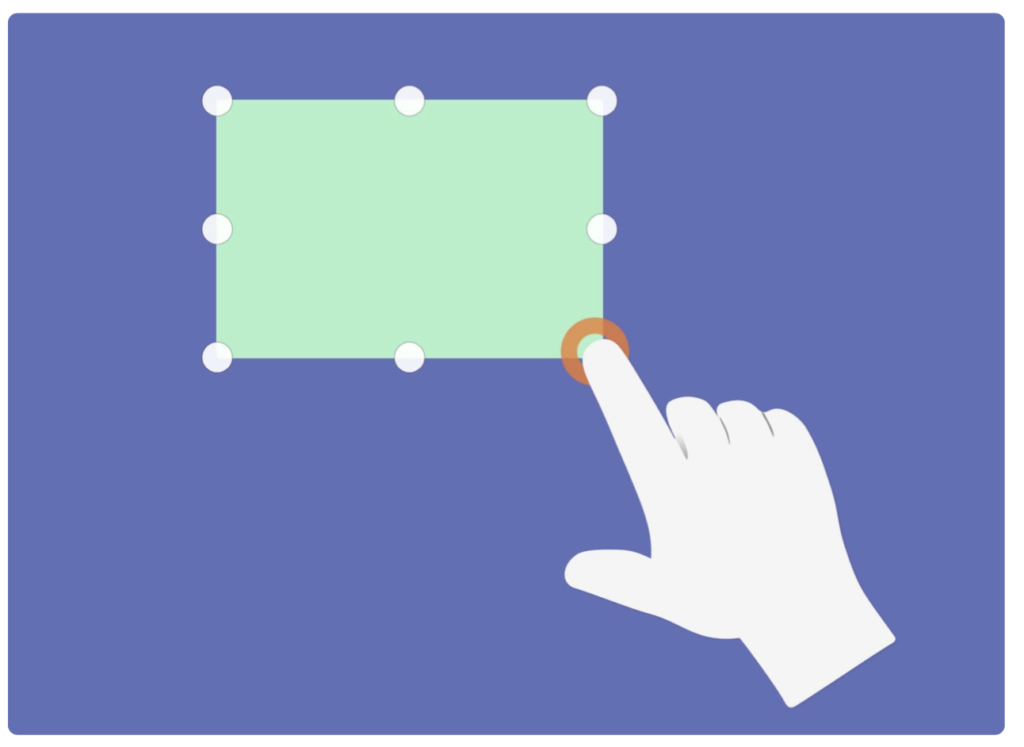
Shape Tool: Tap to select the current shapes and lines. Tap on the icon again to choose other shapes and lines, shadow and border width, or switch to Freeform Shapes mode. Choose colors and transparency via the Color Pickers. Tap and drag on the canvas to draw the initial shape or line object.

Fill in objects with selected colors. Use the Color Picker to select color and opacity.

Freeform Shapes: With Freeform Shapes selected you can draw on the canvas and the drawings will convert to the shape object that most closely matches.

The Eraser tool has three different modes:

Erase Only Active Drawings: In this mode you will erase only lines part of the active drawing.

Erase All Drawings: Erase all layers of the drawings, this includes not only active drawings but drawing objects as well.
Erase All Drawings: Erase all layers of the drawings, this includes not only active drawings but drawing objects as well.
Record
Front and Rear camera resolution: Sets the resolution of video recorded by the iPad camera. Lower resolutions will result in a lower quality video, but projects will compress much faster during exporting.
Recording quality: Frames per second: Set your project recording frame rate to 30 or 60 frames per second (FPS). 30 FPS is set as default. 60 FPS causes animation and transitions in your project to be smoother during recording.
Browser capture frequency Seconds: Set how frequently an inserted website object will be captured during recording. When set to OFF only automatic captures will be visible during recording. Automatic captures are performed when a link is clicked and while scrolling.
Mirror front camera video: Flips the video recording horizontally.
Timer display: Select whether the Timer should display the recording duration of the current slide or of the whole project.
Automatic smooth zooming in recording: Set to ON to enable automatic Zoom smoothing during recording.
Microphone: Mute mic while playing inserted video: When recording while an inserted video is playing, the iPad microphone picks up the sound from the video creating an echo effect. This option, when set to ON, mutes the iPad microphone while a video is playing, though it also means that audio narration can’t be done at the same time. When this setting is OFF, you can reduce the echo effect by using headphones while recording – or turn down the volume of the iPad speakers (or use the volume control on the video itself to turn down the sound from the video).
Audio Fade In for external mics: When set to ON this option will mute the very beginning of each audio recording so that any ‘pops’ caused by some external microphones are edited out.
Recording
All the interactions on the screen can be recorded. Tap the Record button on the bottom of the screen to begin recording audio and actions on the screen.
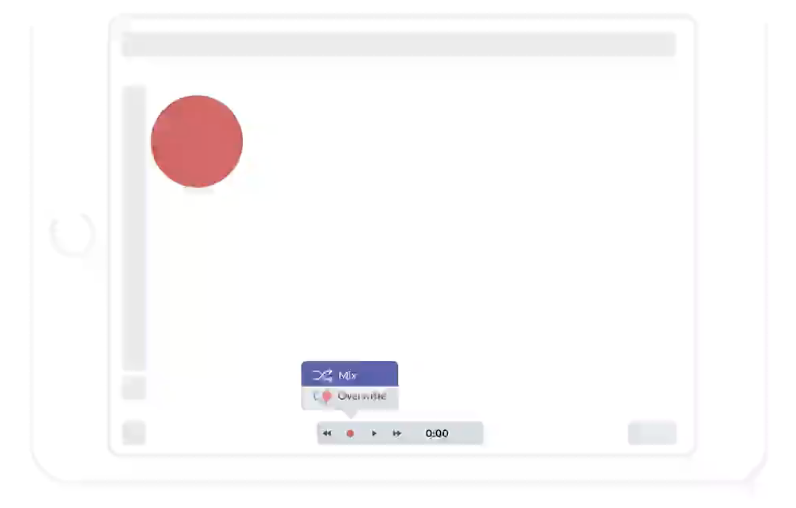
Record: Begin recording from the current time. Press while recording to pause/stop. If any video inserts are used, you can separately set their preferences in the Record tab on the Settings menu. For newly recorded videos, it’s possible to change the video resolution and quality and whether the front camera should be mirrored. Press the recording button to choose the recording mode: Overwrite or Mix.

Overwrite: when selected, a new recording will replace all existing clips in unlocked tracks after the current time. You’ll be shown a confirmation popup each time you start recording in this mode.

Mix: selecting this option will cause new recordings to create new clips along already existing clips in the video track and overwrite the part of recording in the audio track. A ‘+‘ symbol will be present on the record button when this mode is selected.

Play: Playback the recording on the current slide. While recording, this becomes a pause button.

Play fullscreen: Tap and hold the Play button to reveal it. It plays back the entire project from the first slide to the last in full screen.

Rewind: Go to the beginning of the recording on the current slide.

Fast Forward: Go to the end of the recording on the current slide. Additional recordings can be added to the end of a slide.

Mic Mute: Mutes the microphone. It’s invisible by default. It can be switched on in the Record tab on the Settings menu: Show MIC MUTE button.
Timer: Displays the current time within a slide. Tapping it will display the timeline, which can be scrolled backwards and forwards. The timeline consists of two parts – the video track and the audio track. The video track displays the movement of objects, drawings and other actions that were recorded.
The audio track displays the corresponding audio wave file for reference.
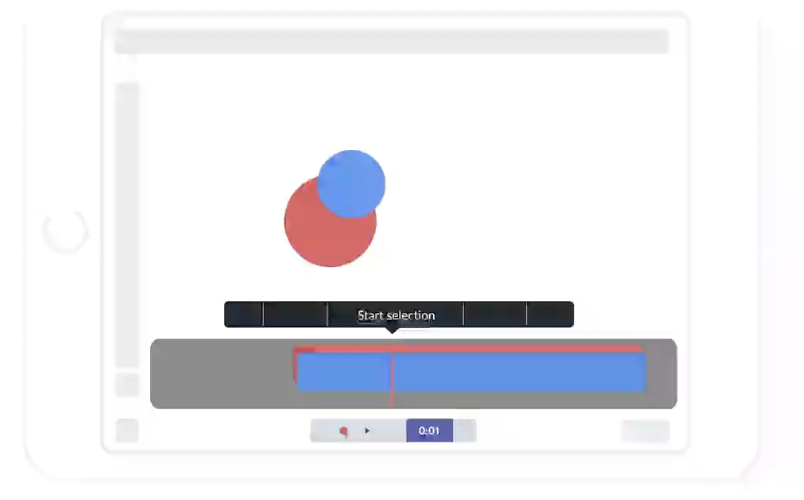
Timeline Editing
You can refine and adjust your Explain Everything recordings with the Timeline Editing menu. To do that open the Timeline and touch and hold on a clip or the playhead.
Start selection: Lets you select a part of the timeline starting from the playhead’s position. Scroll the timeline to modify the selection. A set editing options will appear after a selection is made.
Delete: Clears the selected part of the recording.
Delete and compact: Removes the selected part of the record- ing and joins the two remaining parts together.
Smooth: Makes the object and zoom movements more fluid on the selected part of the recording.
Tip: To remove a single clip from the Timeline, touch and hold on it and choose Delete.
Speed up: Increases the playback speed on selected part of the recording. You can set the playback speed to 2x, 4x, 8x, or 16x of the original speed. If you want to change back to the original speed, select the sped up part of the Timeline, choose Speed up and tap 1x.
Note: Please keep in mind that the Speed up changes both the video and the audio tracks playback speed.
Export as video: Shares the selected part of the recording as a video file.
Export as GIF: Shares the selected part of the recording as an animated GIF file.
Delete all clips from now on: Removes the recording starting from the playhead to the end.
Split: Divides a clip into two separate clips at the point of the playhead.
Fade in audio: Adds one second of silence that fades into sound at the beginning of selected audio clip.
Explain Everything Whiteboard in Education
Interactive Learning
One of the key features of Explain Everything is the ability to record visuals, motion, and audio, all which are impactful when presenting and sharing ideas. When students capture understanding, their teachers not only see the responses to a problem but also the entire thinking process behind it. Gaps in understanding emerge as do areas of strengths, both providing opportunities to focus in on them. Not every student likes to speak to a group – recording an explanation gives another way for those types of students to have a voice. They can reflect upon their understanding, listen to themselves and add what they might have missed at first. Explain Everything allows for splitting the recording process into parts so you can record audio and video separately.
By taking advantage of Mix Recording it’s easier to stay crystal clear during explanations.
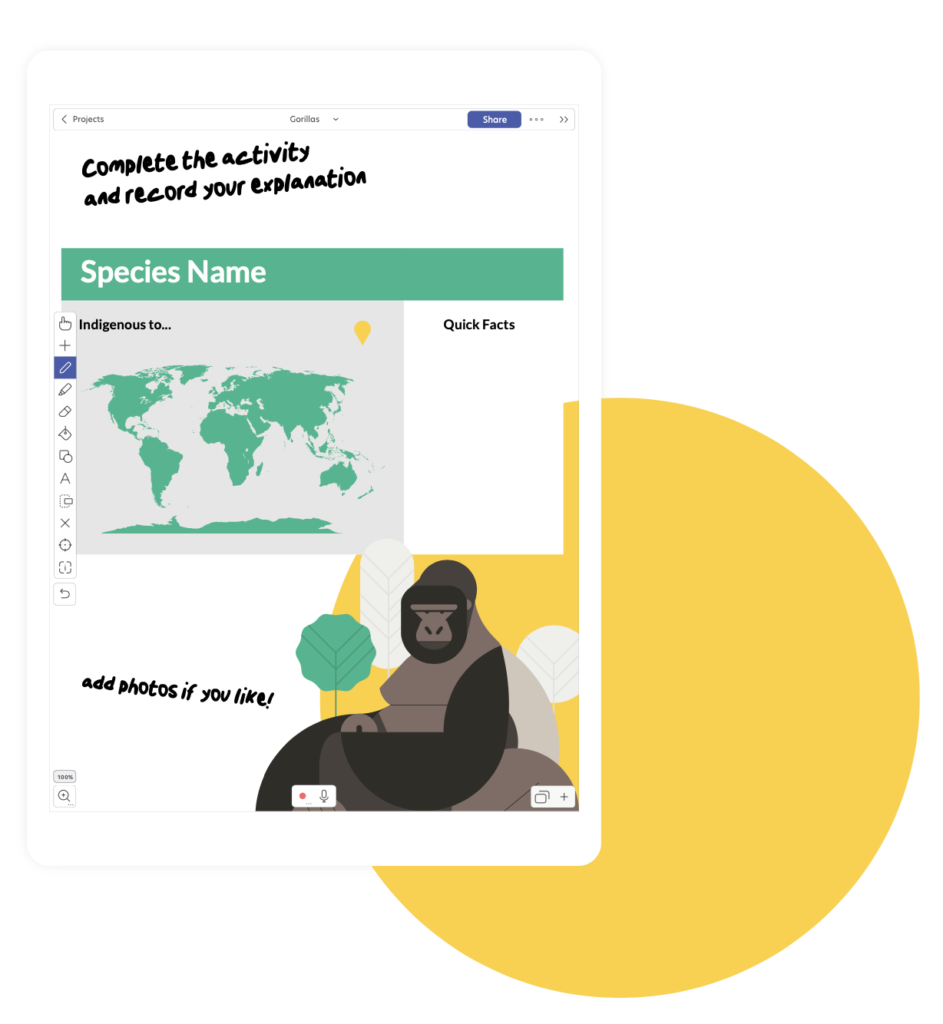
Explain Everything lets you create templates to speed up your processes and make sharing ideas and information with your students easier. One simple way of creating activity templates is by using placeholders. Placeholders are objects in Explain Everything that you can insert into a project and then later tap to add desired content (images, files, video, audio, and clipart). Placeholders allow you to maintain consistency in your projects. They can be found within the Insert tool. Once you tap on a Placeholder, choose the type of media you want it to add in the future. You can resize the text box placeholder in the bottom right corner and adjust its size on the canvas. Once your template is created, save your project and share it with your class. Everyone will be able to work on individual copies of the project, using the placeholders to add content within the template. Of course, not all activity templates need to be built from placeholders. You can insert any image, picture or text and have your students to work with them!
Instruct in Real-Time
Create presentations that move at the modern speed of learning. Use video, notation, and audio recording to bring your instruction to life. Insert existing photos, videos or documents that are always at your fingertips. Take a picture directly in the app and use your surroundings to build a better bond with the audience. Use Infinite Zoom to focus on the tiny details on your canvas and zoom out to present larger context. Make sure to draw attention to your key ideas. Want to show information found on web? No need to leave the app! You can insert a web browser and scroll through a page. You can even crop parts of it and continue working on them offline.
Create instructional videos
Using video in the classroom has a lot of benefits. It can produce authentic learning opportunities for students and encourage them to research. Videos humanises the online experience by letting students get to know their instructor as a real person, not an abstraction. A significant benefit of video is giving students an opportunity to view complex procedures as many times as they need. Instructional videos can be used not only in online classes, but also in face-to-face environments to introduce new skills, knowledge or activities to be learned or reinforced. Below are just a few types of instructional videos that might be helpful: welcome video, video modeling, lecturette and tutorial.
Welcome video: Can be used to introduce students to you and your course. They may be published online to be viewed prior to class or shown in the classroom. It’s a great opportunity to let your students get to know you better. You can ask your students to prepare welcome videos too, and get to know them as well!
Video instruction: Helps learners acquire new skills by viewing a video. Record all your interactions and explain step by step how to complete a task. At the end, give your audience a similar task to complete imitating your steps.
Mini-lessons: Mini-lessons are condensed versions of lectures. They can be introduced to present new ideas followed by content-based exercises in the classroom. They can be a good way to recap knowledge and give your students a short summary of recently introduced material.
Tutorial: Tutorials are step-by step “how to” instructional videos that teach a specific skill or technique. They are detailed demonstrations offering specialised knowledge on a certain topic, often recorded in sequences.
Demonstrating Understanding
Students as Teachers
Strengthen leadership and collaboration skills by giving students the tools to create and share their own tutorials, animated stories, and presentations. Technology has deepened the ability for us to teach one another, and animation has played a significant part of it. Explain Everything is a perfect platform for any student to become a teacher! From teaching peers in class to helping learners across the globe, animating learning through Explain Everything is a perfect way to empower that inner educator found in all of us. Explain Everything can be used across all subjects allowing learning to be animated, exported, and ready to share with the world. Since most people are visual learners, animation becomes a more accessible form of having a problem presented.
Furthermore, once an explanation of concept is recorded, we can play it back and come back to the most significant parts of the explanation. Explain Everything gives is simple and intuitive and is used by students of different ages. In order to adjust to the youngest users, there is an option of the Simple Interface which limits the numbers of tools.
Document and Reflect
Explain Everything provides teachers and students with an easy way to document learning and reflect upon it. Explain Everything integrates with all of the most frequently used cloud destination, so students and teachers can seamlessly import any kind of files. These can be papers, presentations, videos, or just photos taken around the learning environment. Even if a document is not available digitally, simply take a picture of it and bring it into Explain Everything! Once work is on the canvas, a teacher or student can reflect upon it. One way to give feedback is to create a video. Once the recording is started, use the Zoom tool to get closer to a specific section, analyse, and comment on it. Highlight parts of text, annotate the document and of course, speak to the author of the content (which sometimes can be yourself!).
Conclusion
There we have it! We hope you enjoyed Explain Everything Whiteboard Guide, we hope it’s given you some inspiration on implementing this inside of your classroom!
Feel free to check out our other resources