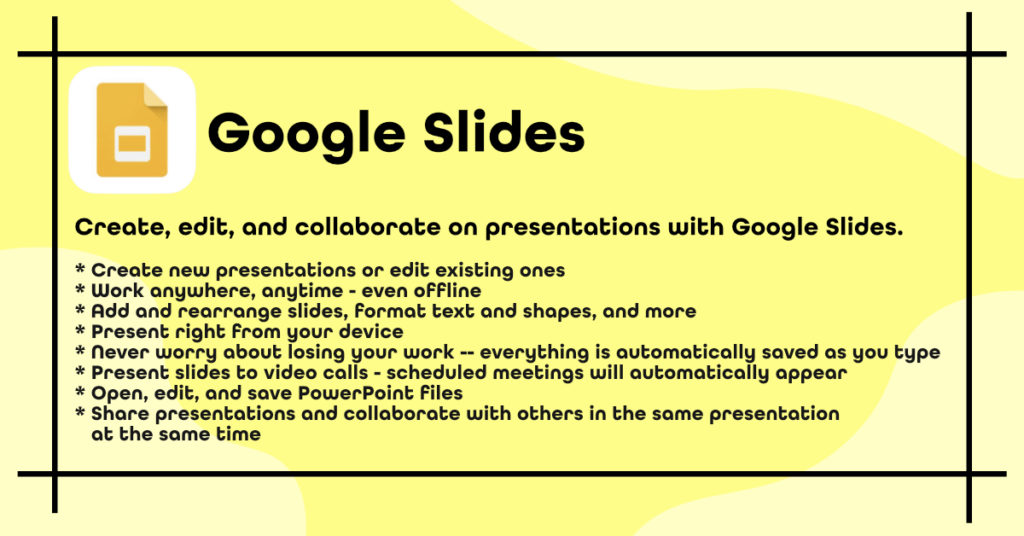
Google Slides is a powerful tool for presentations. It helps you prepare convincing and attractive presentations for your classroom and adds emphasis to what you’re trying to convey.
We hope you find you the Google Slides Guide useful and as always, you can download a PDF version to refer back to at a later time at the bottom of the page.
Let’s get started with the Google Slides Guide!
Accessing Google Slides
Clink the link to be directed straight to Google Slides. You may be required to log into your Google account.
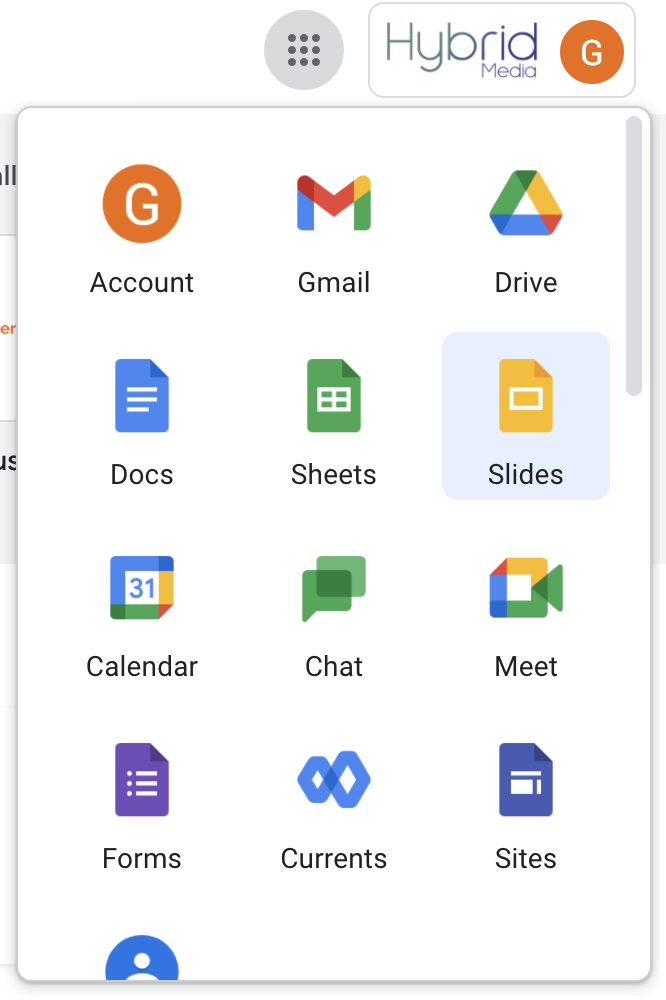
By clicking on the “nine-dot” menu square, and then on the “Slides” icon. A new tab will open and you will be redirected to Google Slides.
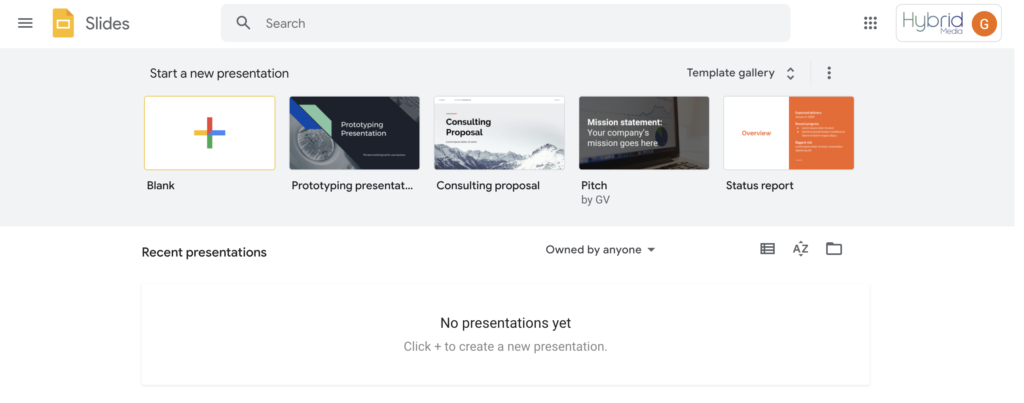
The default page you will be redirected to will give you a few options to choose from.
Since we’re just starting out, we’ll be clicking the “Blank” template.
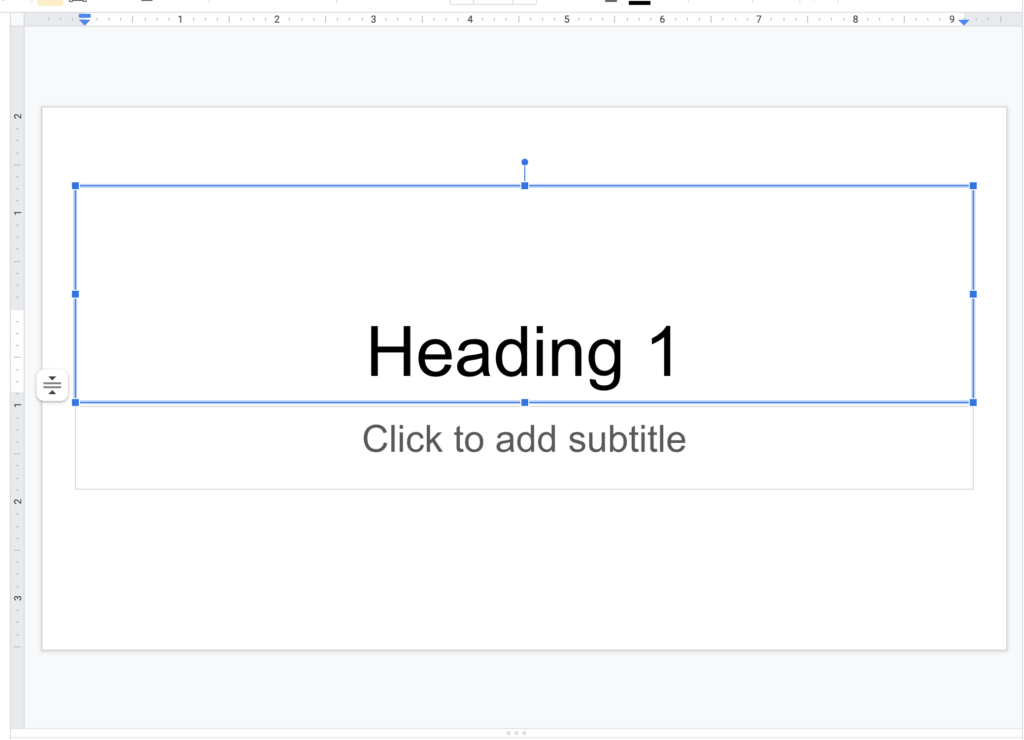
The image on the left will be the default screen you will see when using the “Blank Template” option. Let’s go through some of the options.
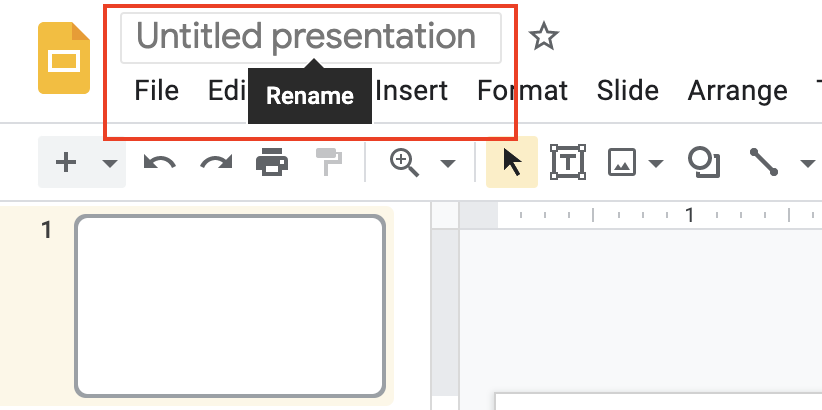
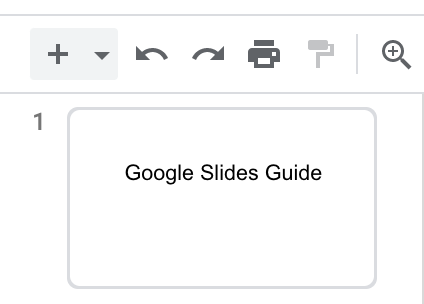
Naming your slides
Place your cursor in the textbox as indicated.
Type in the name you wish to give the presentation and press ENTER.
Adding content to your slides
Adding text is very easy. All you have to do is click on the textbox and start typing.
Once you’re done, place your cursor in the next text box or click anywhere on the screen.
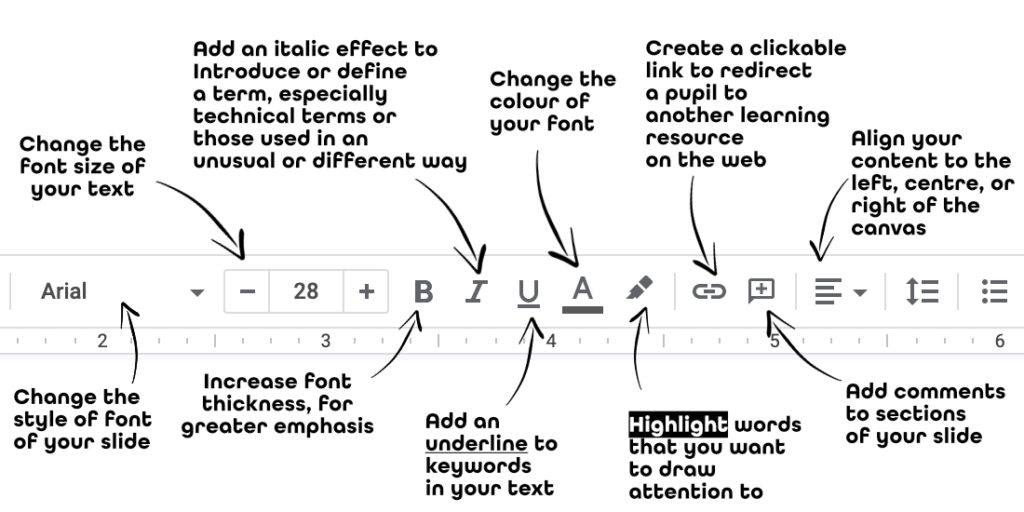
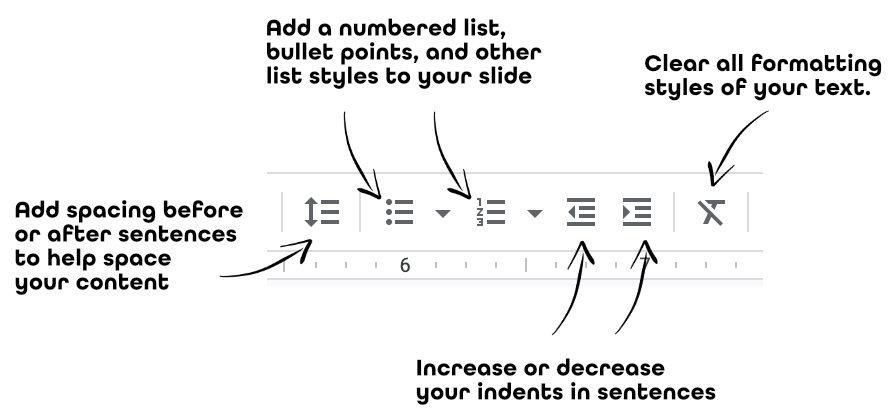
Adding font style to your slide
When clicking inside either section of your slide, your tool bar will change to the following.

Let’s go through each option below.
Adding additional slides
There are two main ways to add a new slide to your presentation:
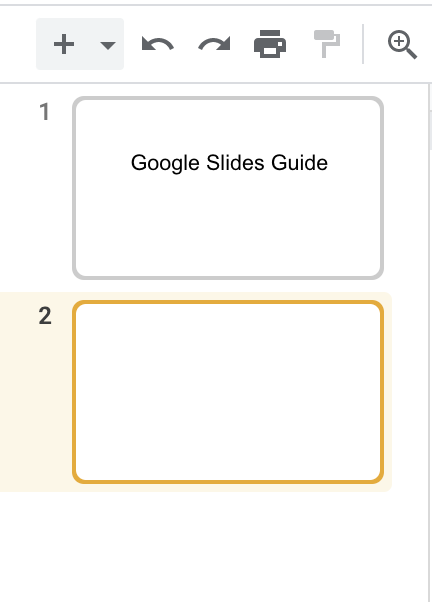
On the Google Slide Toolbar, you will come across a “+” sign. Clicking on this will add a new slide to the navigation.
Once you have clicked “New Slide” you can see your new slide in the slide navigation window.
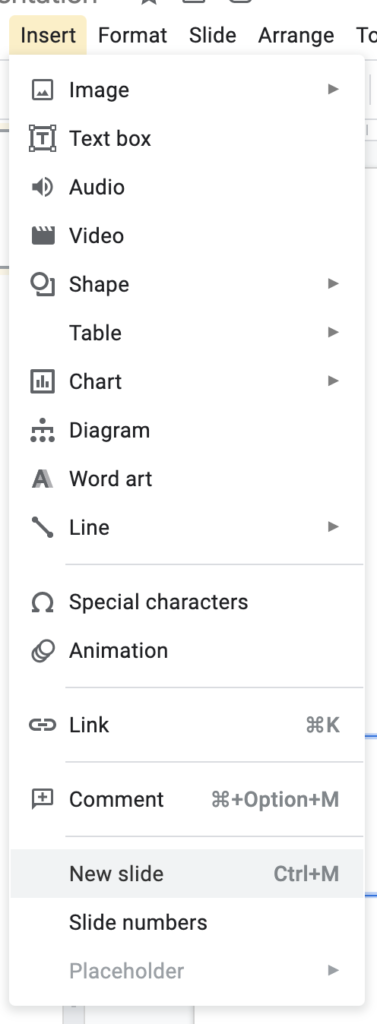
The other way to add a new slide, click on the “Insert” option on the toolbar, and when the submenu appears, move to the bottom of the menu and click on the “New Slide” option.
Changing Background Colour
Changing the default background of your presentation to make it visually appealing is very important. To do so,
Select the ‘Slide’ button, and then click on ‘Change Background’

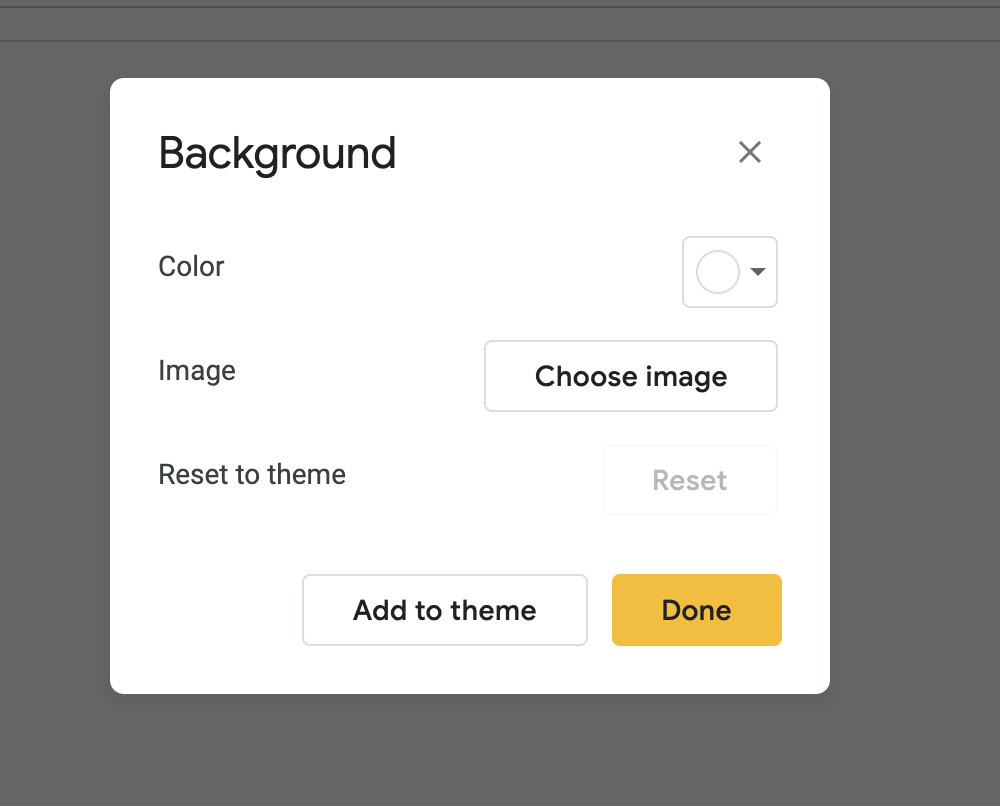
Now, you can select your desired colour, or you can upload an image to use as the background.
Applying a layout
To change the layout of your presentation, the following steps are to be followed:
To change the layout of your presentation, the following steps are to be followed:1.
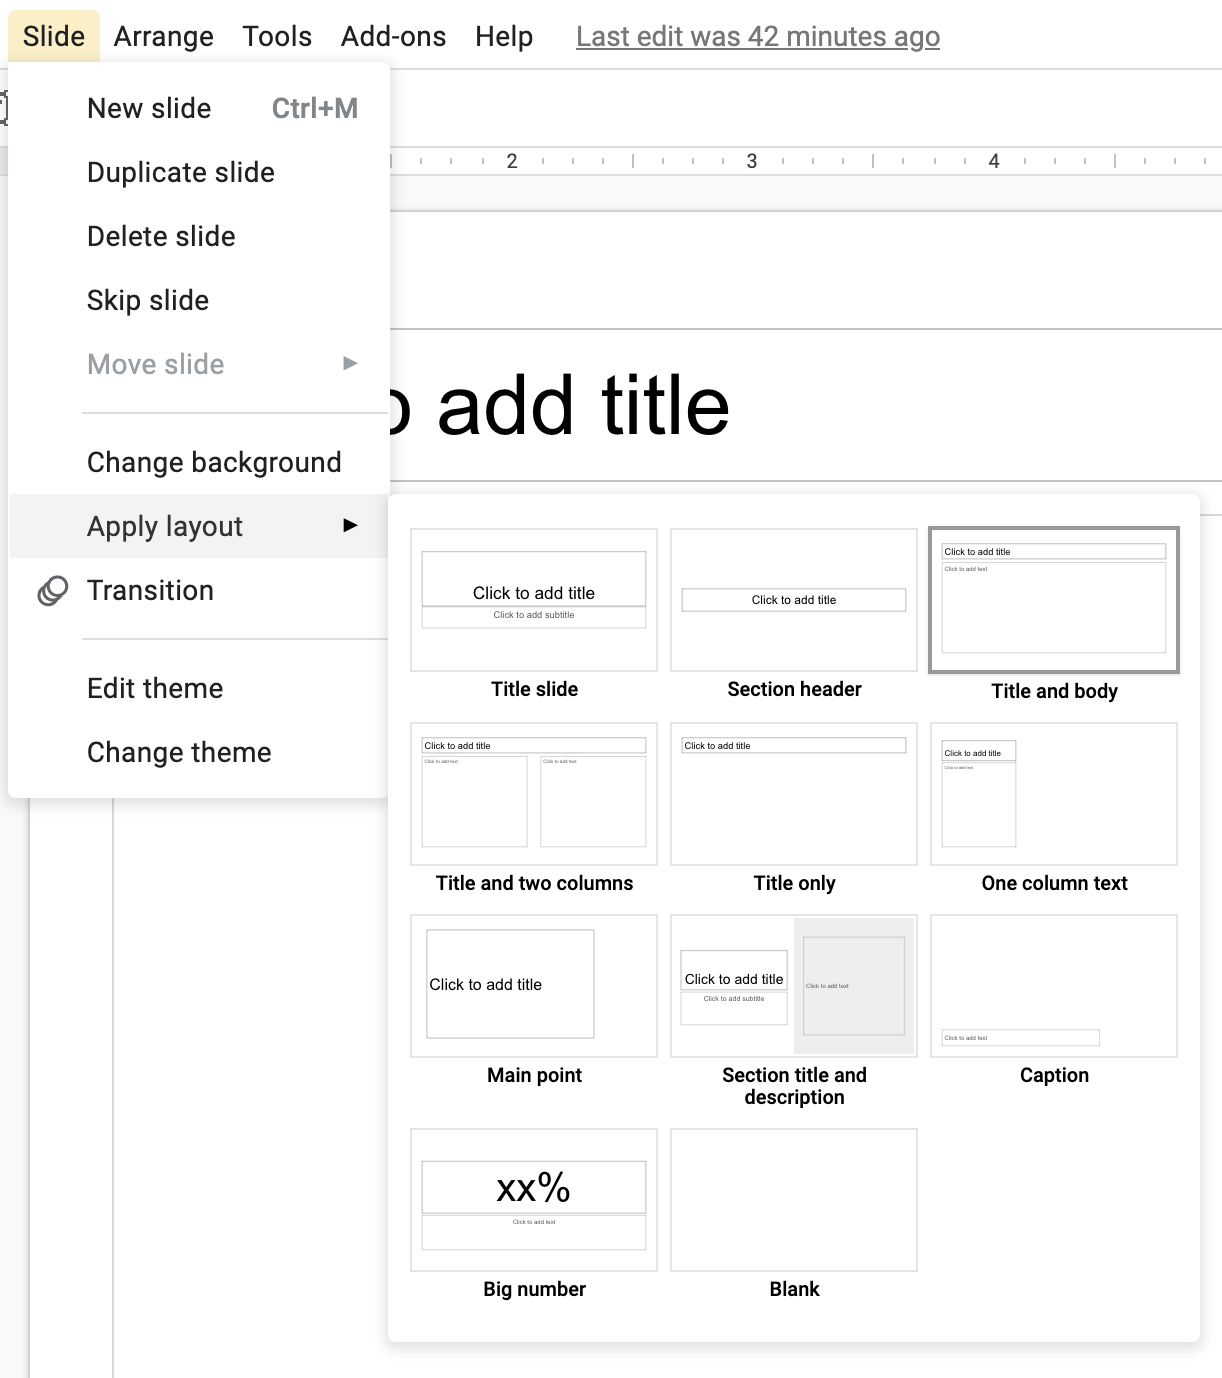
- Select the “Slide” button, and then click on “Apply a layout” option.
- As you can see, there are several layout selections that can be made
- Click on the layout you want to use, and the presentation will be updated accordingly.
Changing the theme
The default theme may be a little bland for some people. To change that,
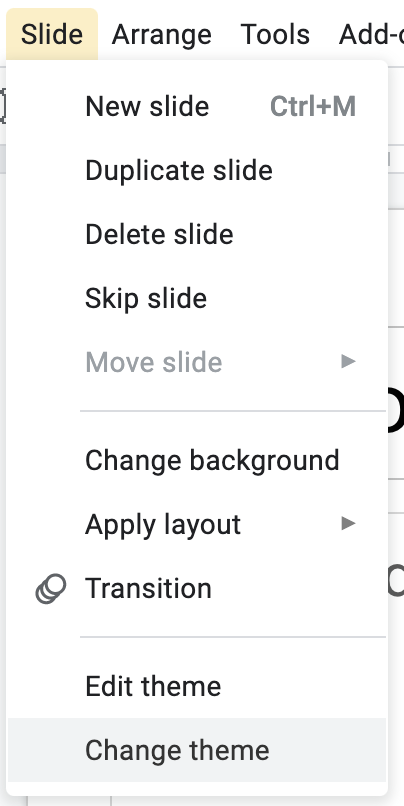
Select the “Slide” button, and then click on “Change Theme“
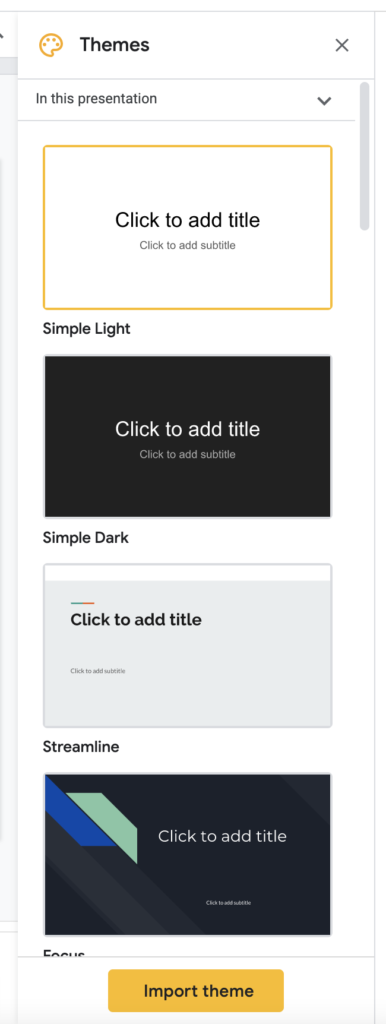
A “Themes” tab pops up on the right with several options to choose from
Select the theme you like, and the presentation will update automatically.
Applying transitions
Transitions are an important part of a presentation. They make it more fun and interactive for your class.
To apply transitions to slides, or objects in your presentation,
Select the “Slide” button, and then click on “Transitions“
A “Motions” tab pops up on the right.
To add/edit the transition between slides, under the “Slide Transition” heading, select the transition you desire. You can also choose to apply that transition to all the slides in the presentation.
To add/edit the transitions of objects, like text or images in the slide, select the image or text in question, and choose the transition that you desire under “Object Animation” of the “Motion” tab.
There are several options to choose from, including the type of transition, and when you want it to start.
Once you have made the selections, the changes will be updated automatically. You can also review the transitions by clicking on ‘Play’.
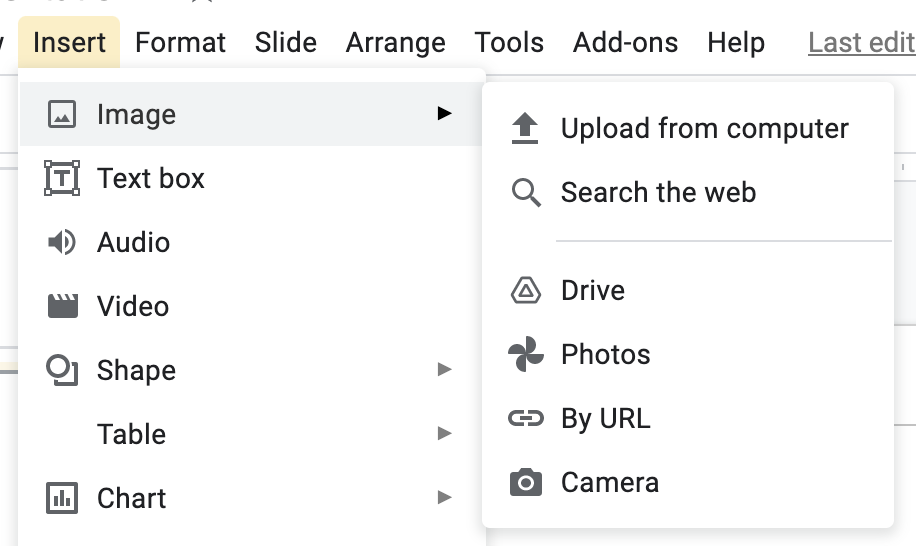
Adding images
Visual aid is an important part of every presentation. To add images to your presentation,
Select the ‘Insert’ button, and then click on “Images“
There is a choice of either uploading the image from the computer or from the web.
Once you have selected the image, the image will be placed on the slide. Its position can be changed by selecting the image with the cursor and moving it to the desired location.
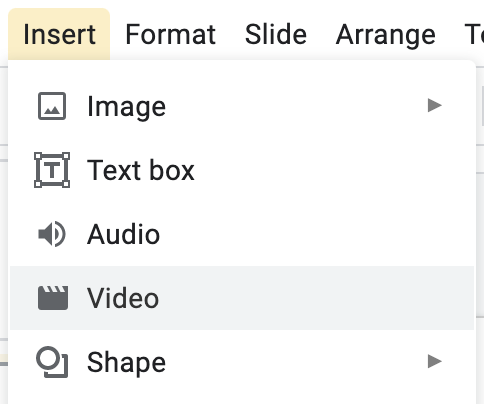
Adding videos
To add videos to the presentation,
Select the ‘Insert’ button, and then click on “Video“
Now, the video can be selected by searching in the search bar provided, or by pasting the URL of the YouTube video you wish to add to the presentation
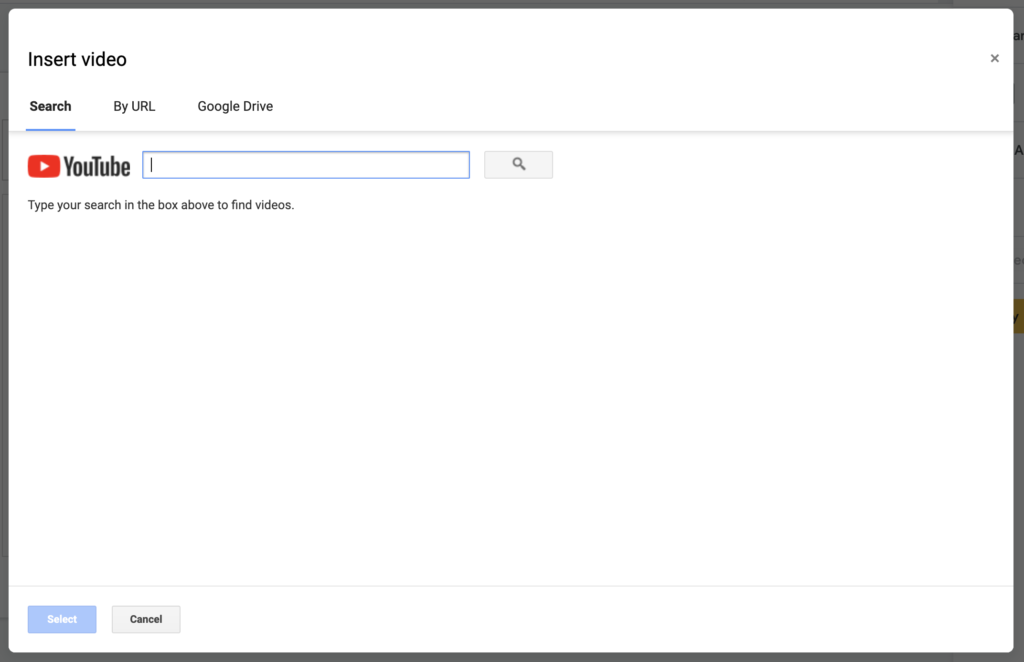
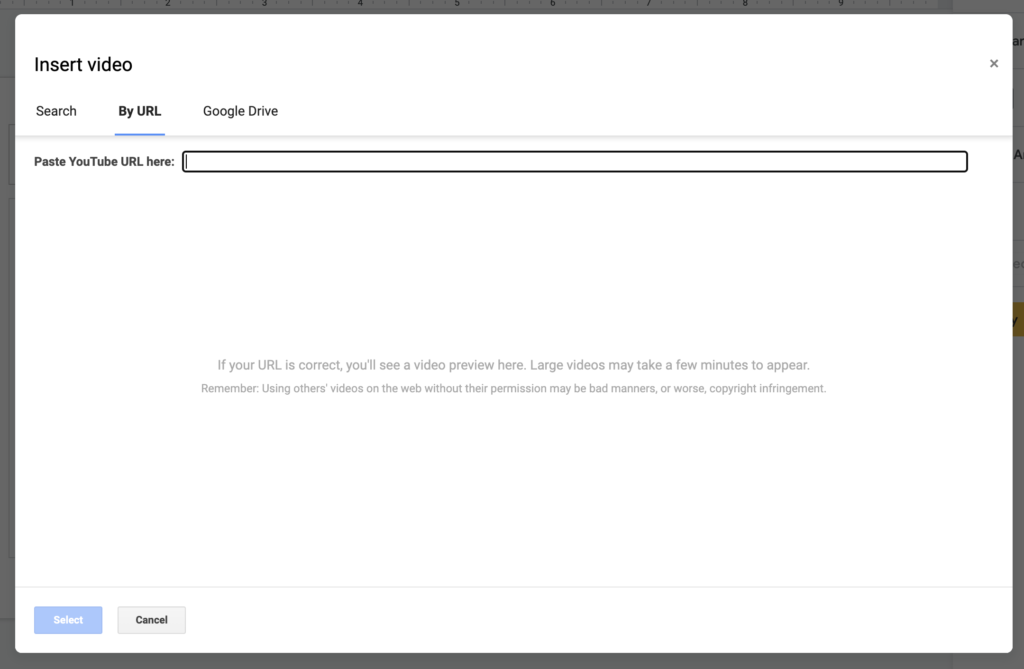
Here, you can search for any video that is on YouTube. When you start typing in the search field and search, a list of videos will appear that you can choose from.
Select the video you wish to add, and click “Select“. The video will now be placed in the presentation.
You can also import a video from other sources, such as Vimeo, or a video hosted on your Google Drive account.
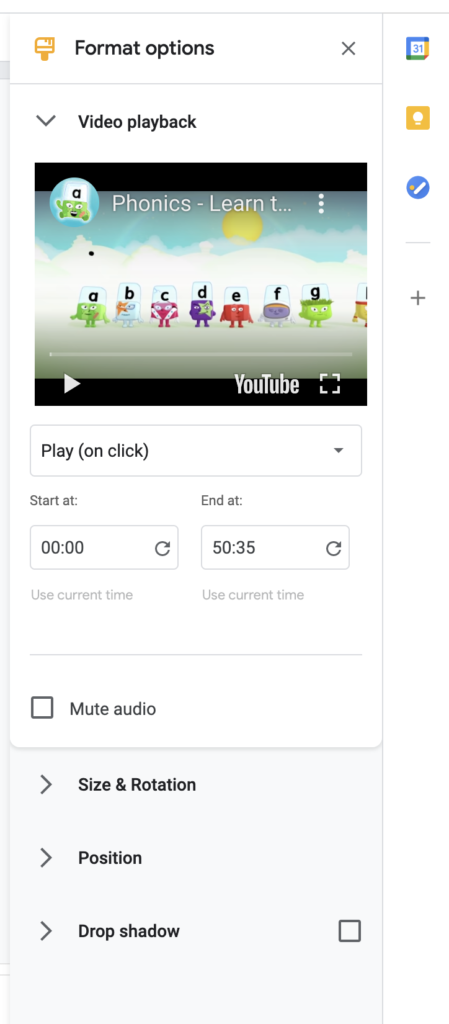
There are several options available for formatting – You can
- Change the Video playback time, or mute audio
- Change the size and position of the video
- Add shadows
Once you have made the required changes, it will be updated in the presentation.
Adding audio
To add audio to the presentation, first the audio file must be in your Google Drive
Select the “Insert” button, and then click on “Audio“

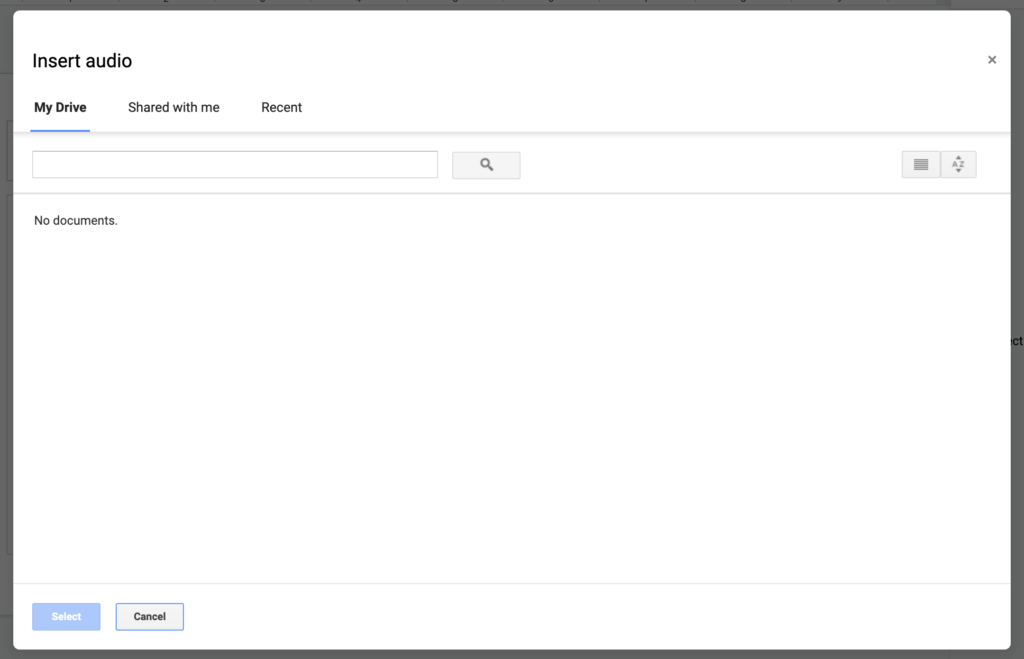
Choose the audio file from your Google Drive
Adding shapes
To make the presentation more interesting, shapes can be added.
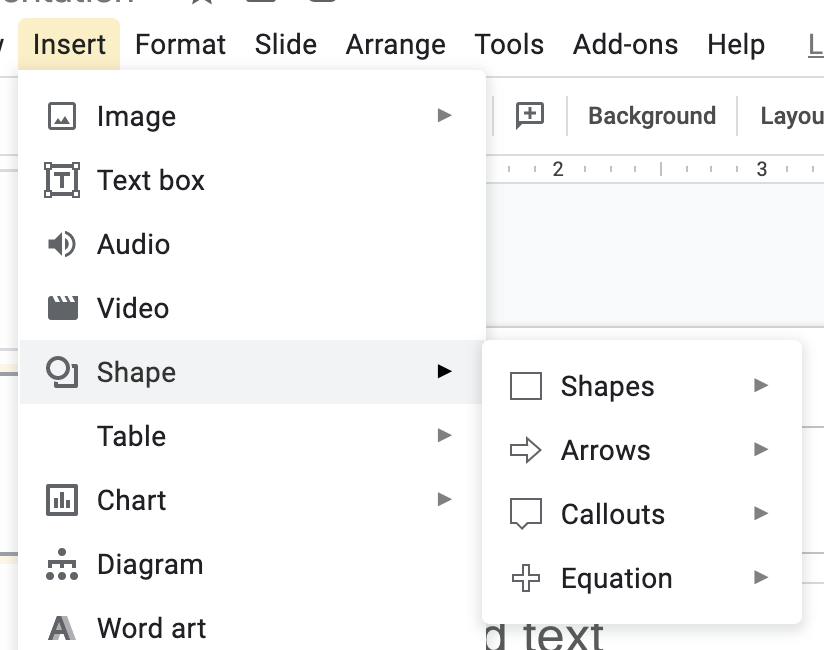
Select the “Insert” button, and then click on “Shape“
There are several options to choose from. Select the shape you want,
and it will be pasted in the presentation, where its shape and position can be changed.
Adding diagram
Several technical presentations require the use of Diagrams. To add them,
Select the “Insert” button, and then click on “Diagram“
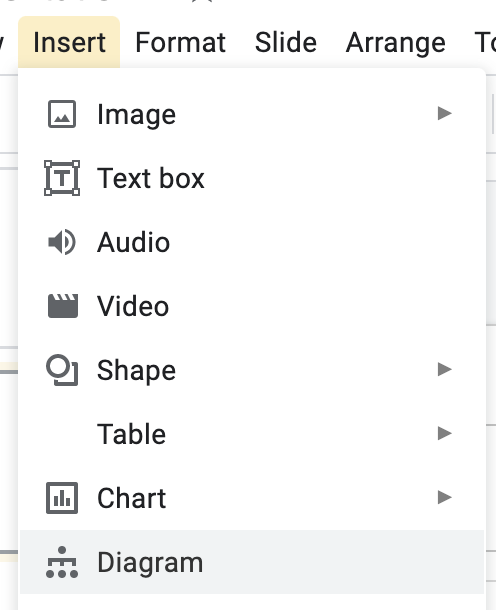
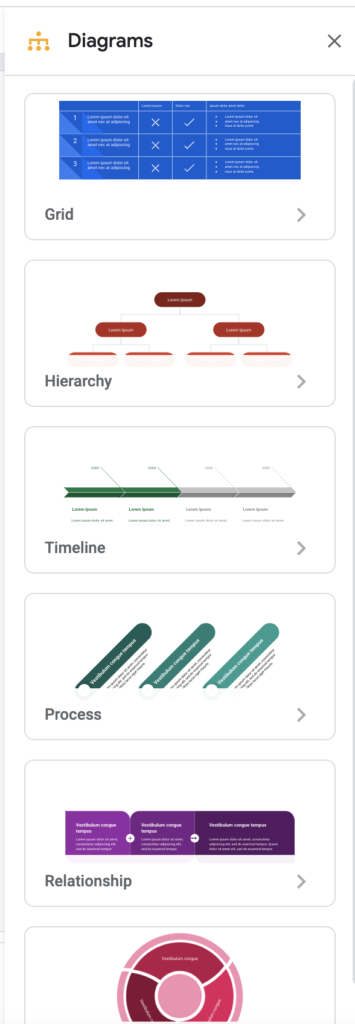
A “Diagram” tab pops up on the right, with several diagram options. Select the diagram you desire, and it will be pasted in the presentation.
Our Presentation is now ready, let’s focus on the few presenting applications of Google Slides.
Presenting the presentation
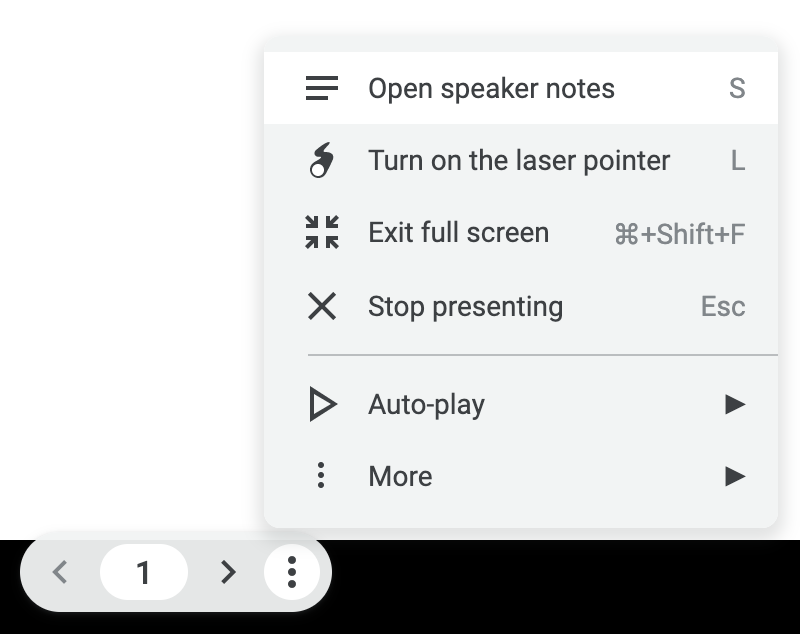
On the top right hand corner, click Present. For best results, present with Google Chrome.
From the current slide, the presentation will now become a full screen

The tools available while presenting are:
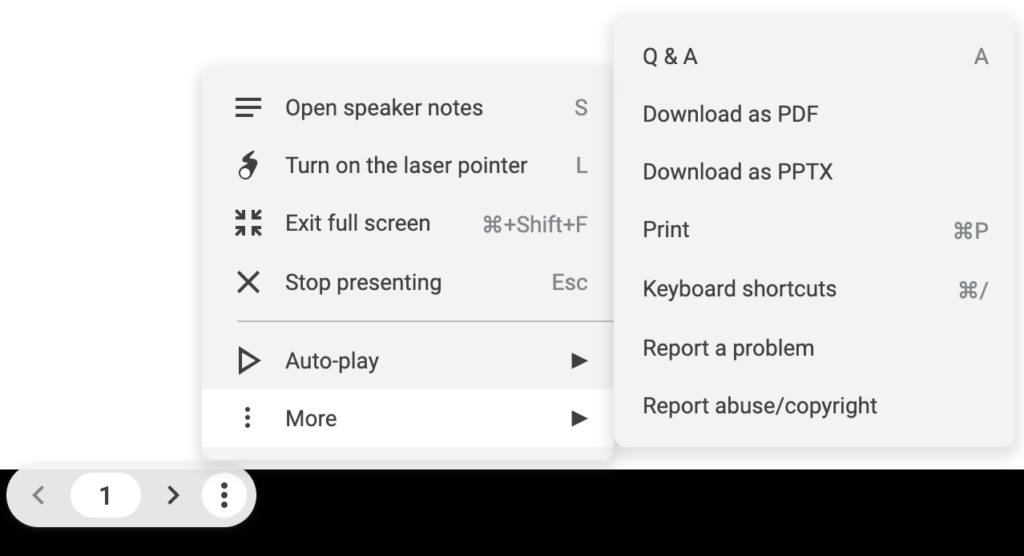
Live Q&A: Presenters can start a live Q&A session with an audience during a presentation with Google Slides. You can present questions at any time, and people can ask questions from any device.
Notes: To view the Speaker Notes (Addition of speaker notes is covered next)
Pointer: If you prefer presenting from a computer, Google has a new laser pointer feature that overlays a red dot with a trailing line, just like a real laser pointer following your cursor
Captions: The closed captions feature is available when presenting in Google Slides. It uses your computer’s microphone to detect your spoken presentation, then transcribes—in real time—what you say as captions on the slides you’re presenting.
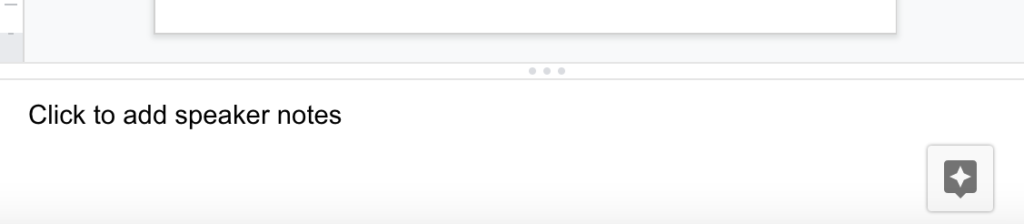
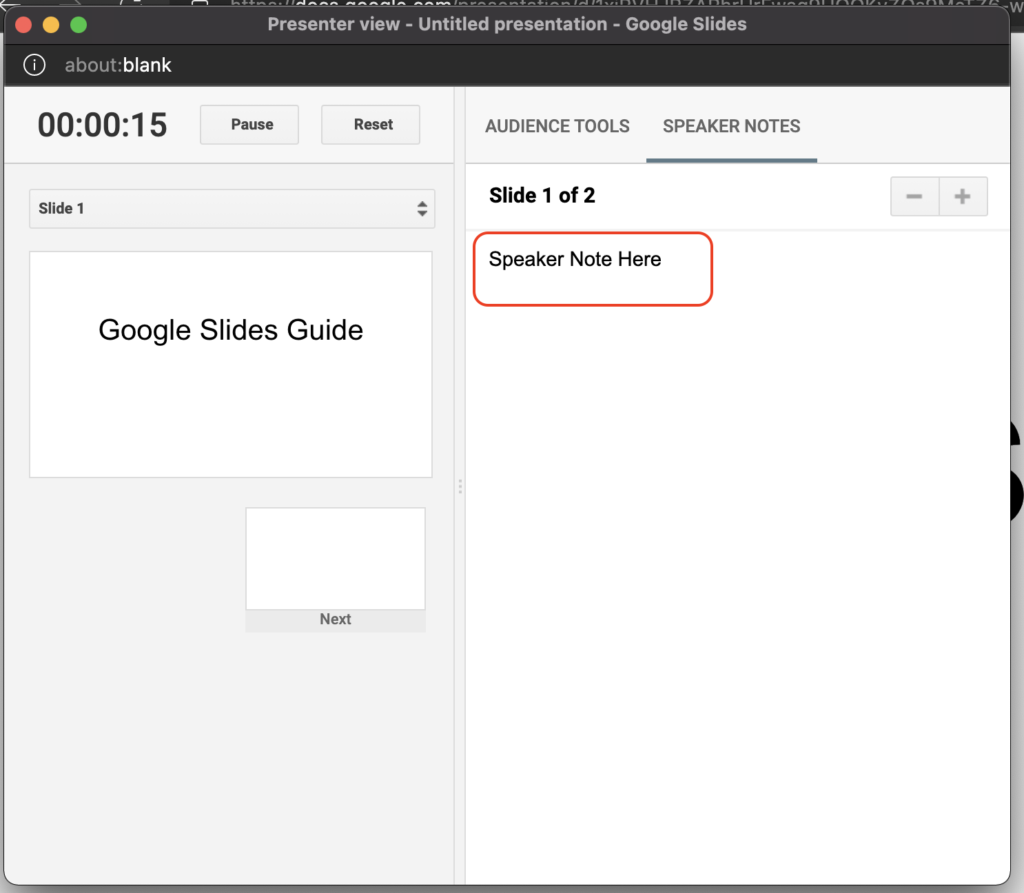
Speaker notes
Speaker notes are short summary points to the slides which the presenter can refer to while delivering the presentation.
We simply enter the text in the textbox named “Click to add Speaker Notes” below our slide.
In the top right corner, next to “Present,” click the Down arrow.
Sharing your presentation
To share your presentation with other staff members or pupils select the yellow “Share” button on the top right.

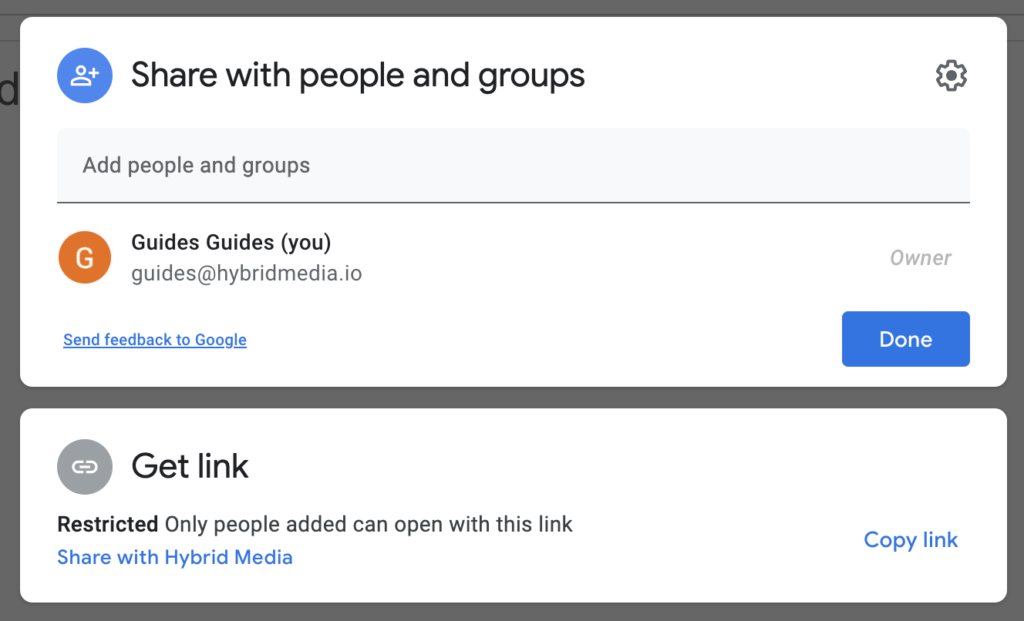
Type in the email IDs of people you want to share it too.
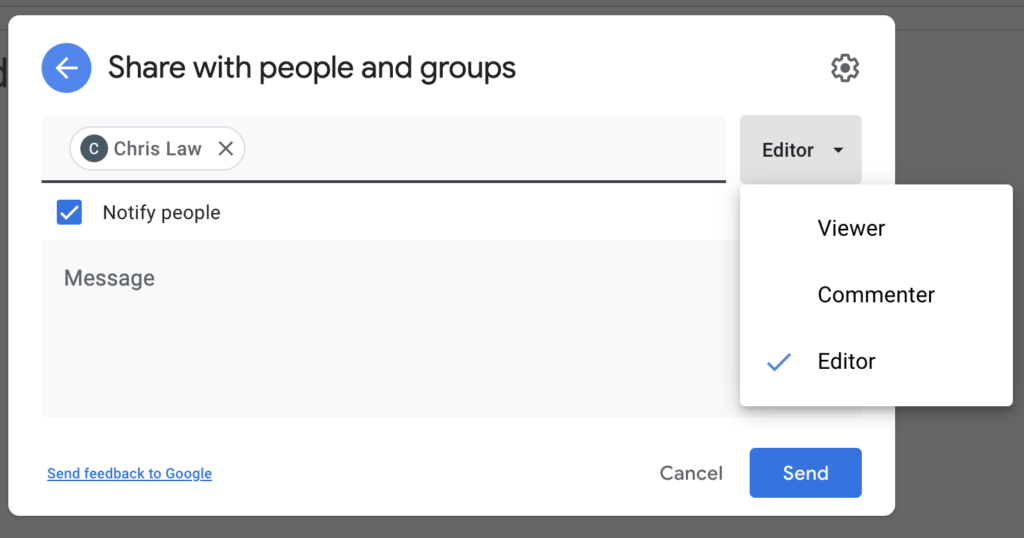
Next, it’s time to decide the level of access to grant:
Viewer: Only allowed to view the document and not make changes or add comments.
Commenter:Allowed to add comments to the document but not make changes.
Editor: Allowed to make changes and add comments.
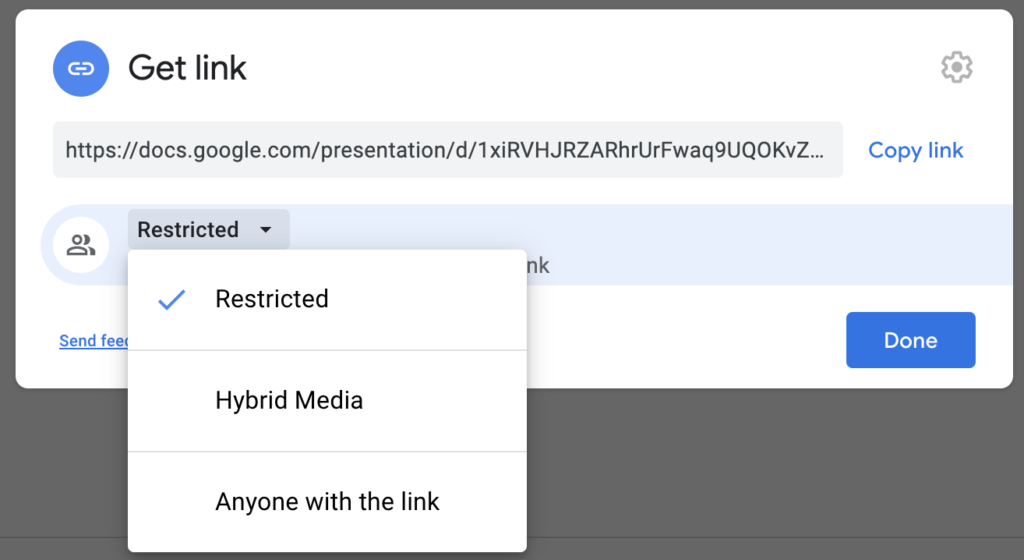
Apart from adding the names of people manually, you can also create a link to the presentation by clicking on “Copy Link”.
Here as well, you get an option of the mode of sharing – Editor, Commentor and viewer.
Apart from that, you also have an option to keep the access restricted to the people you have named above, people in your organisation or open for all with the link.
This link can then be shared in the relevant groups.
Once you’re done, hit “Send”
Downloading your presentation
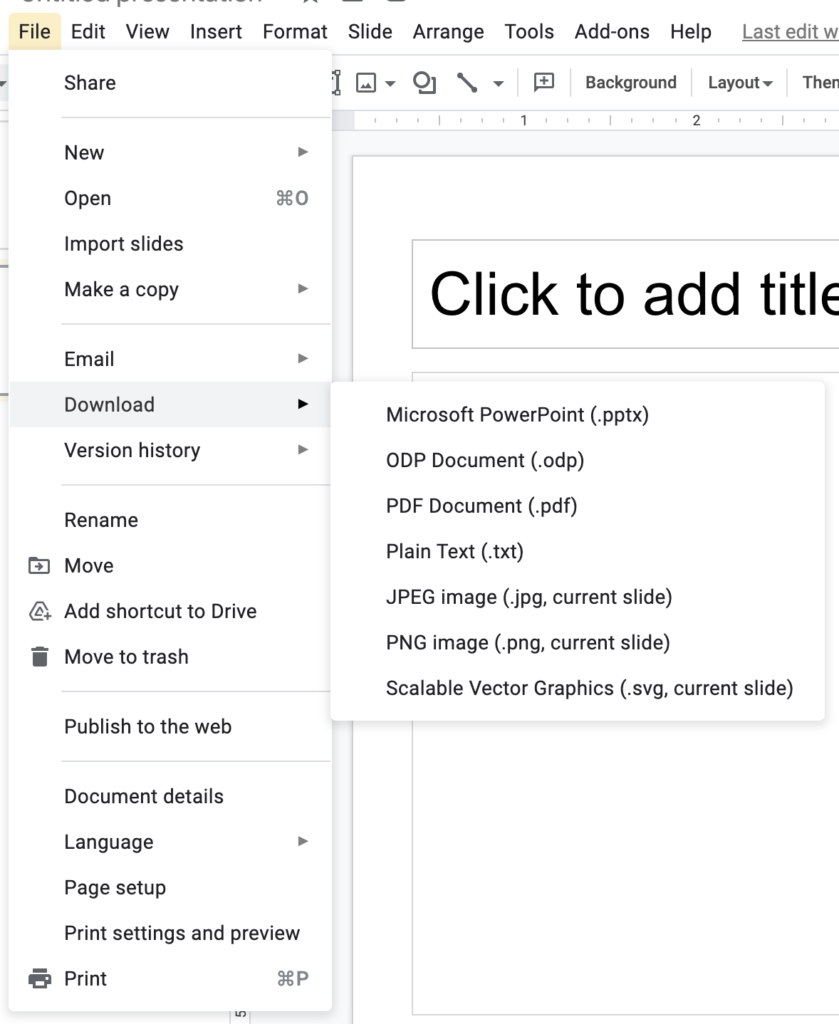
On the top left hand side corner of the document, select “File” and select “Download as”.
Choose a file type. The file will download onto your computer.
.ppt: is a filename extension for downloading the sheet in Microsoft Powerpoint format.
.pdf: PDF stands for “portable document format”. Essentially, the format is used when you need to save files that cannot be modified but still need to be easily shared and printed.
Conclusion
There you have it! We hope you enjoyed following along with the Google Slides Guide, feel free to check out our other guides at https://hybridmedia.io/resources
Also, feel free to download this guide Google Slides Guide