Introducing Apple Classroom
The Apple Classroom app is a powerful piece of software for iPad and Mac that helps you guide learning within your classroom. By sharing work, managing student devices, and supporting both shared and one-to-one environments.
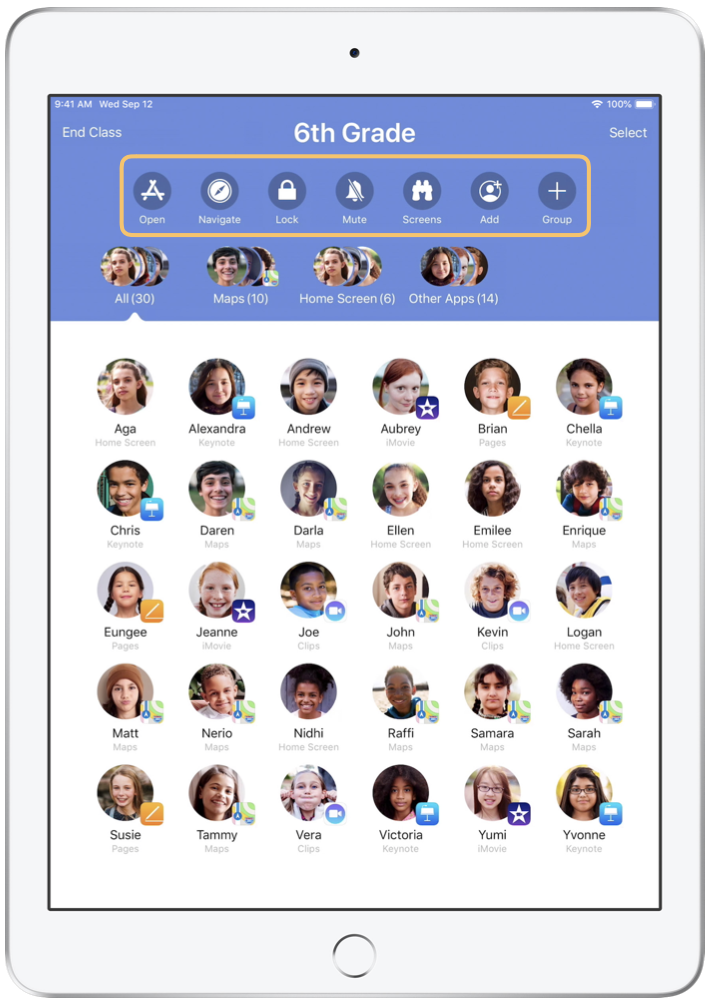
Through the Apple Classroom app, you can launch specific apps, websites, PDFs, or textbook pages on any iPad in your classroom. You can also share documents between teachers and students, or share student work on a TV, Monitor, or projector using Apple TV or using third-party services such as the AirServer App, or the Teacher Reflect App.
Some of the key features include:
- Viewing which apps students are working in
- Mute student devices
- Assign a specific shared iPad for each student
- Reset student’s password
- End of class summary of student activities
This guide will take you through an overview of Classroom. You’ll learn how to get started using the app and discover how to integrate it into daily classroom workflows.
Before you get started
Apple Classroom is available in the App Store and is super easy to set up. There are two ways to configure the Classroom App, you can either create classes manually without IT support or work with your school’s MDM administrator to automatically configure Classroom with roster data for students and classes.
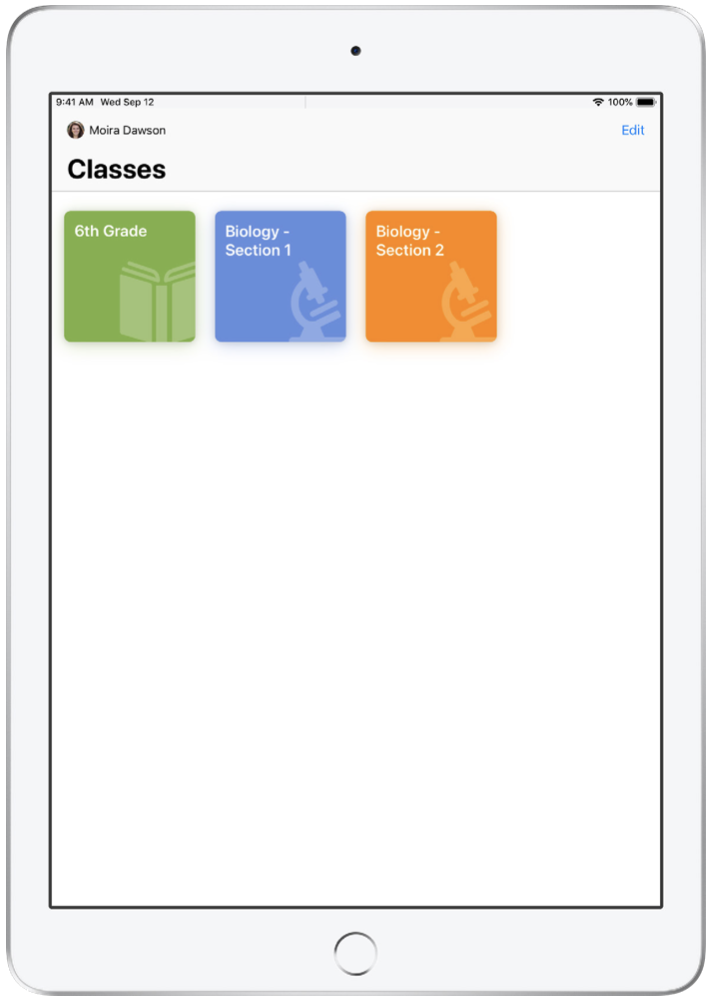
Create your class
With Classroom, it’s easy to set up your own classrooms manually, allowing you flexibility and complete control.

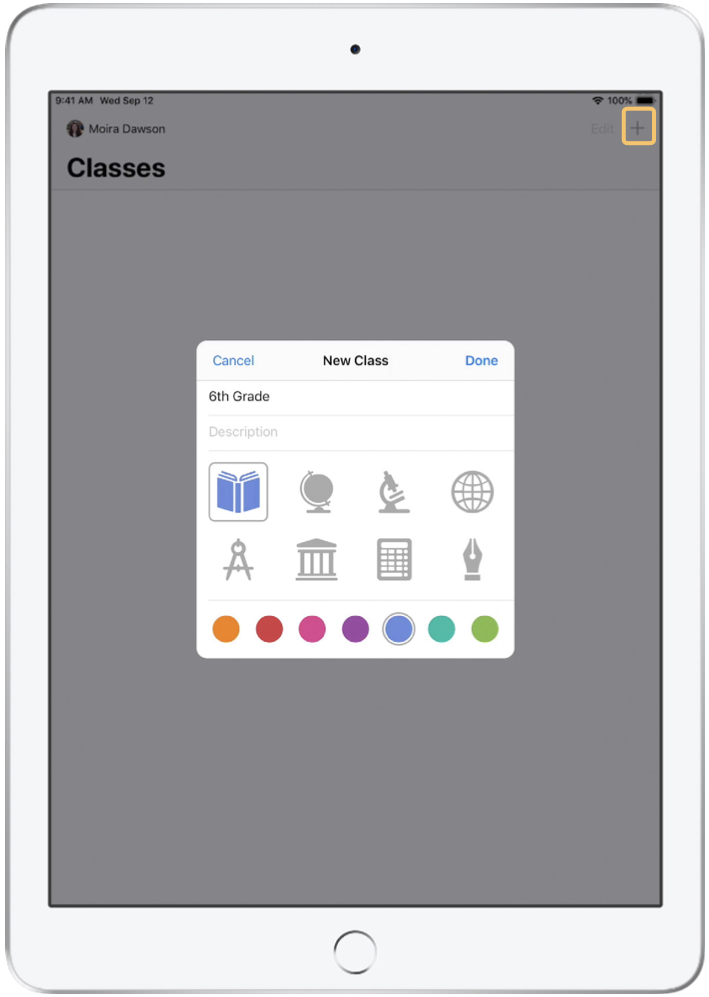
Simply press + to arrange a new class, and assign them a colour and a logo helping you to easily differentiate between classes.
Alternatively, your school’s MDM administrator can set up your classes for you.
Invite your students
Invite your students to join your classes easily, allowing the learning to start straight away.
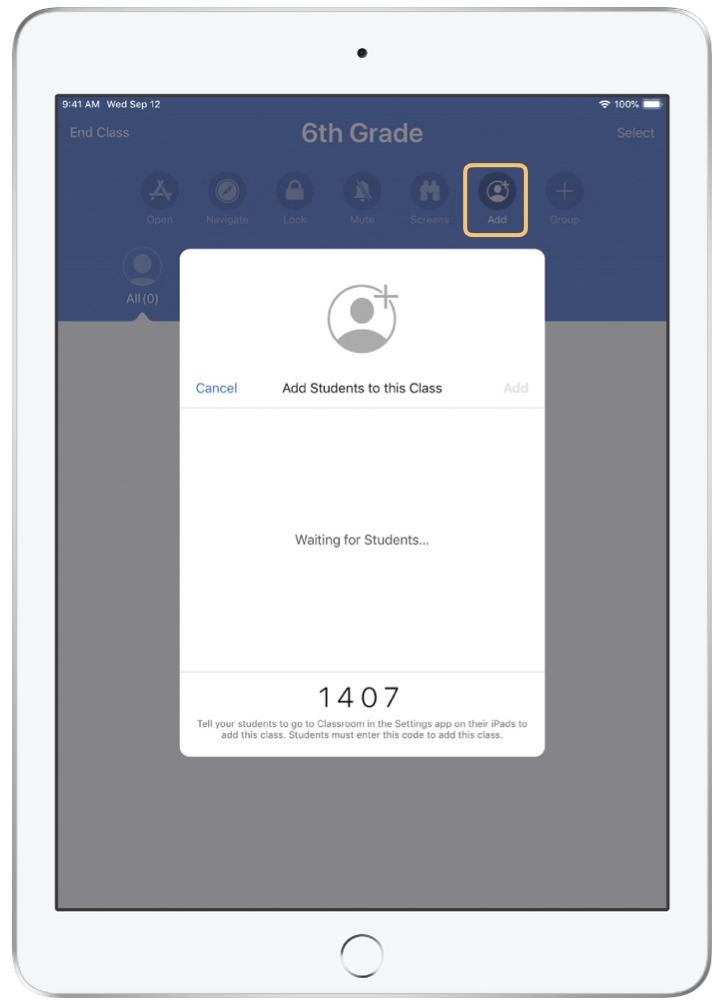
Please note that for Safeguarding reasons, this initial joining process will require close proximity to your students.
Select “Add” and then give your students the invitation code, allowing them to join your class.
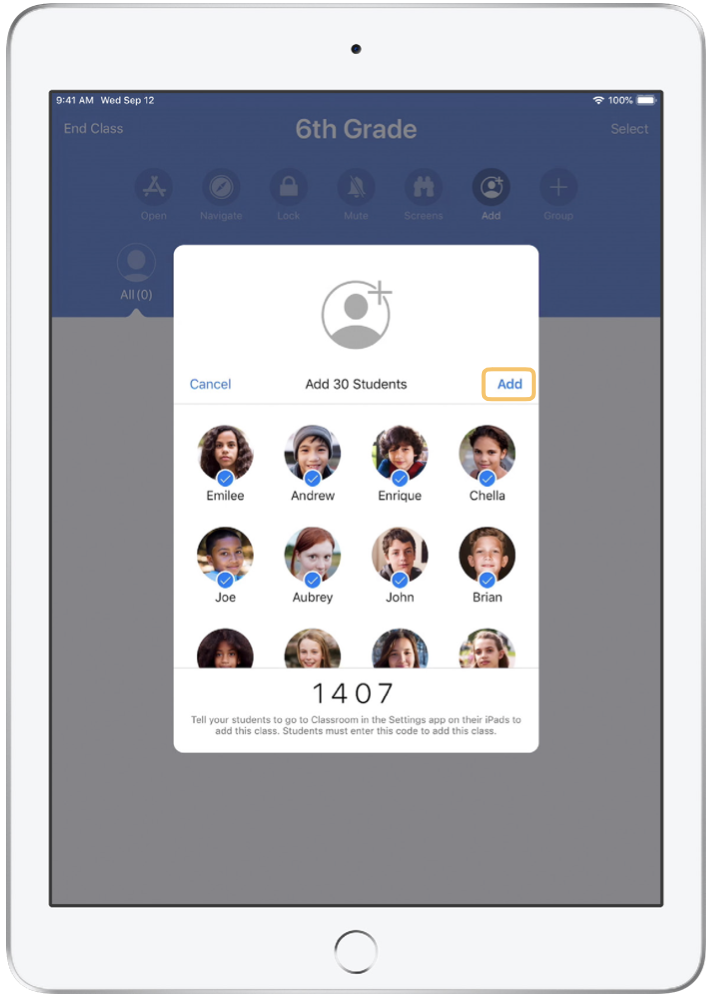
Once you are happy, you can click the add symbol on each student, and they will be accepted into your classroom.
Have students join a class
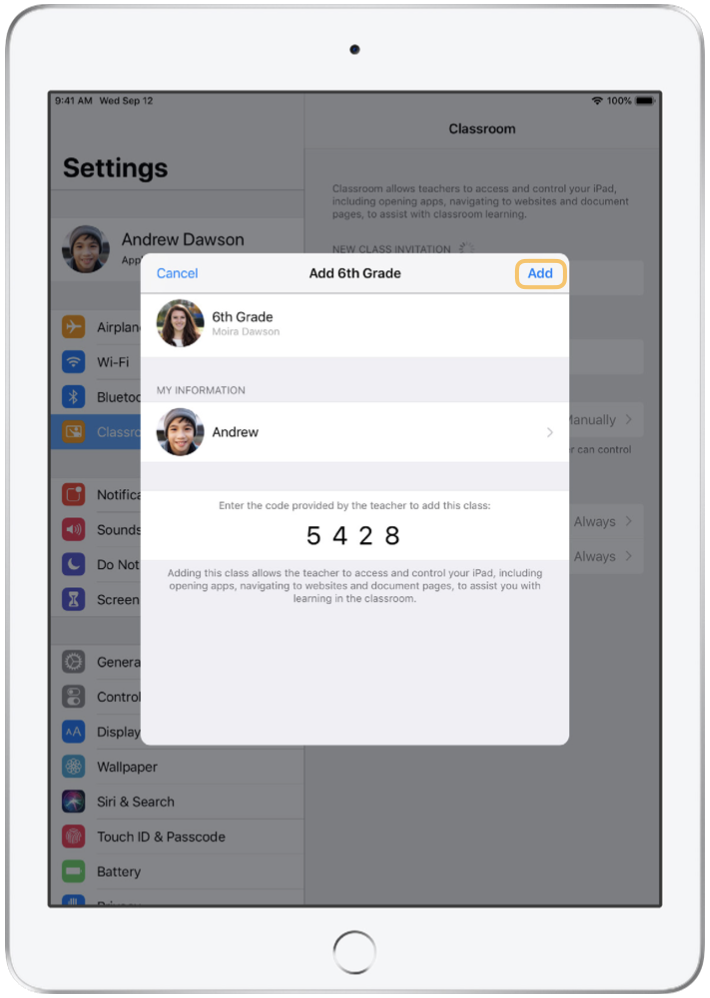
Student View
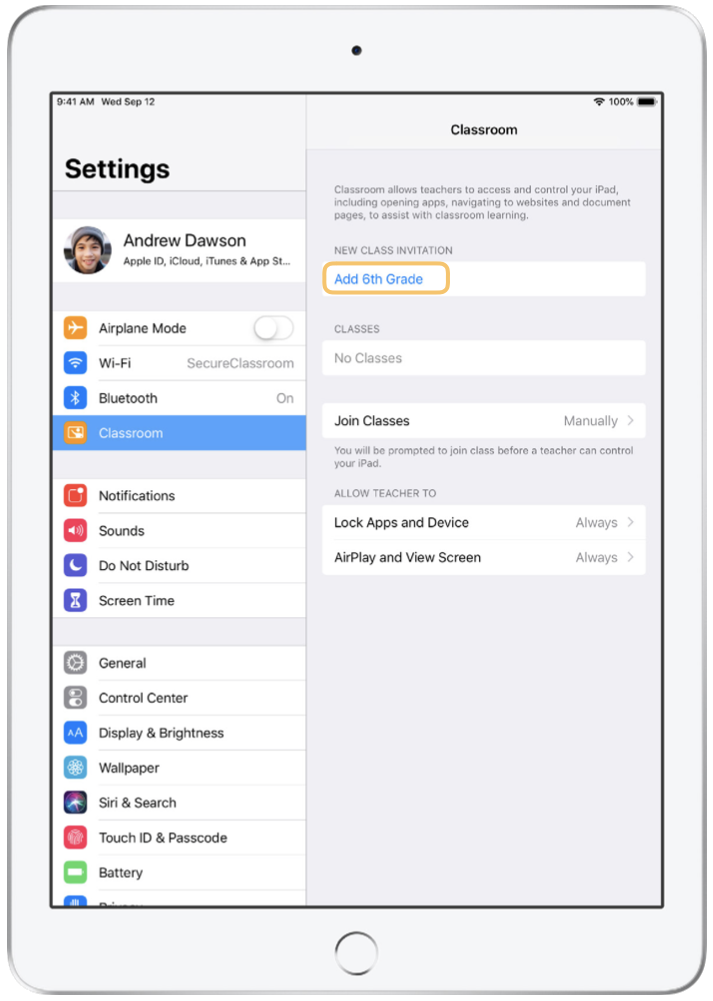
Ask your students to click the link for your new class invitation. When students are joining your class, they can decide how you can manage and access their iPad.
Student View
Student View
Teachers are at this point expected to instruct their students to use the settings that are most appropriate within their individual classroom. This will depend on the number of students, the age, and the needs of the students within your classroom. These settings can also be changed at a later time.
Work with classes created by your MDM
If your school is using a mobile device management (MDM) solution to manage their devices, then your school’s IT department will be able to fully set up and configure your Ipad or Mac. This will reduce setup time in class, allowing you to get straight into the teaching.
Your school’s IT department will use roster data for classes and students and can support the school’s policies for mobile device use by putting appropriate restrictions in place on each of the devices.
Note that the ability to create your own classes is available only when you’re not using MDM.
Settings for students enrolled in your class using MDM are managed by your school’s IT department.
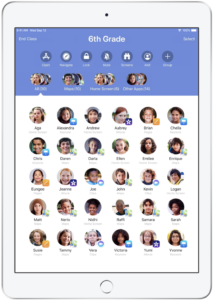
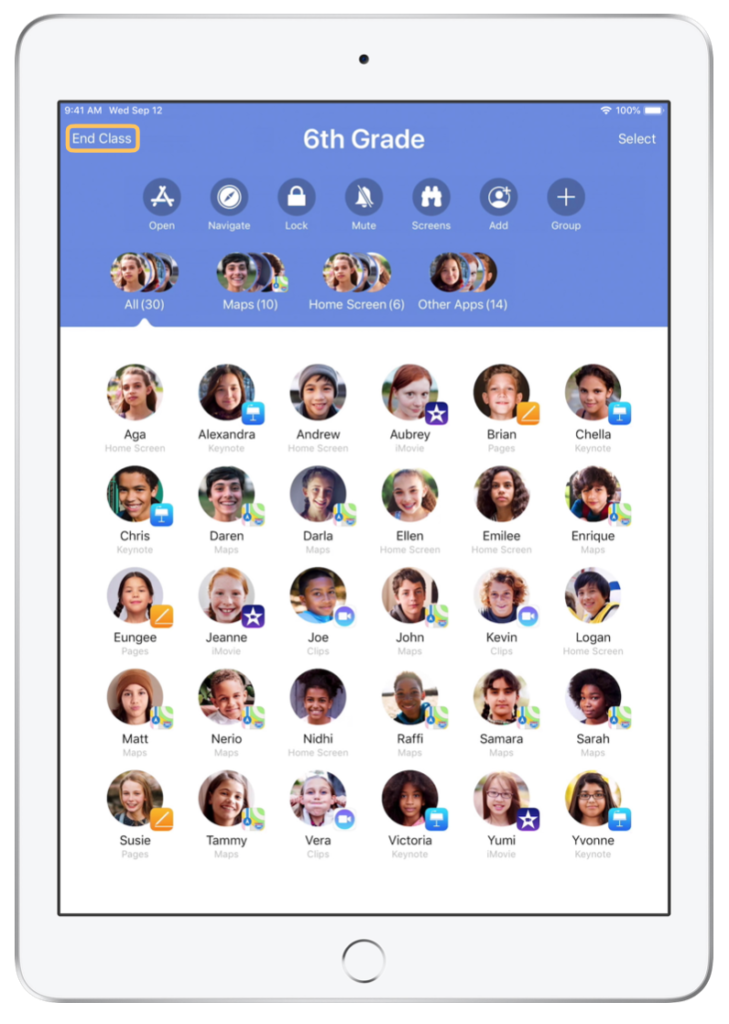
Organise your class
Classroom gives you the ability to create custom groups within your class, allowing you to tailor guidance for a single student, a group of students or the entire class. You can break the class into groups for project assignments, or split up the group based on needs and ability.
This will allow you as a teacher to guide each student’s learning experience, just as you would in your classroom at school.
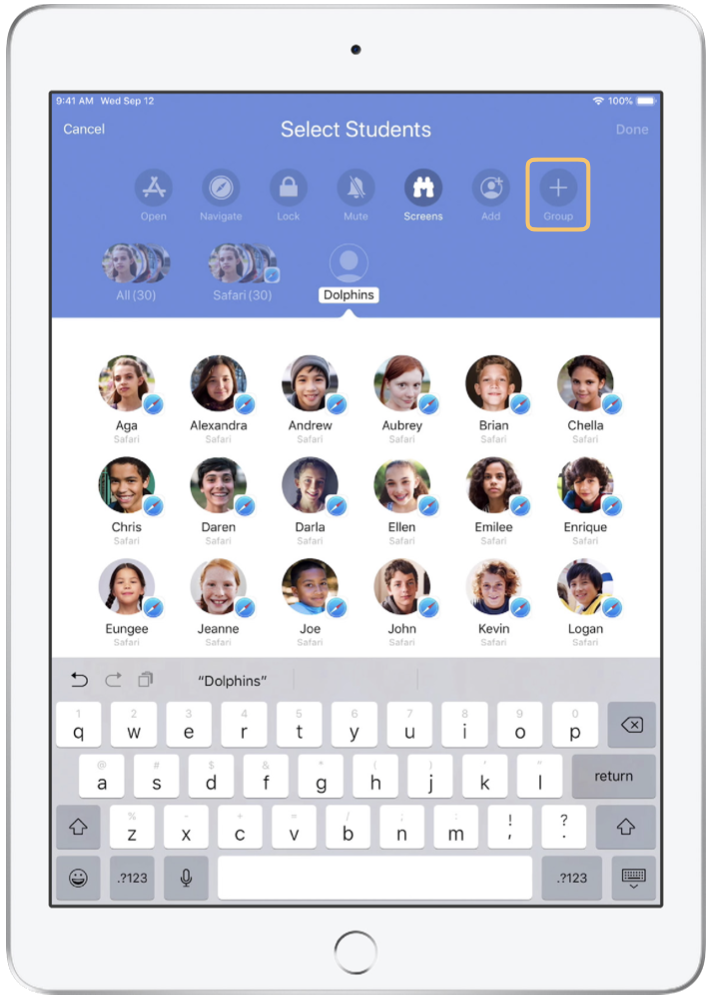
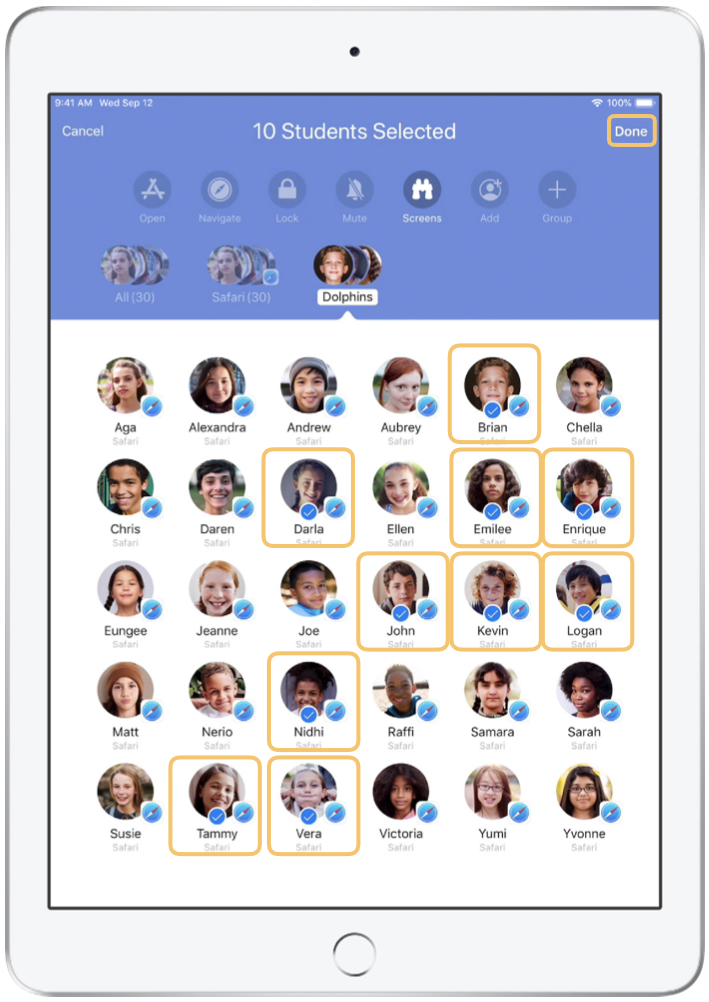
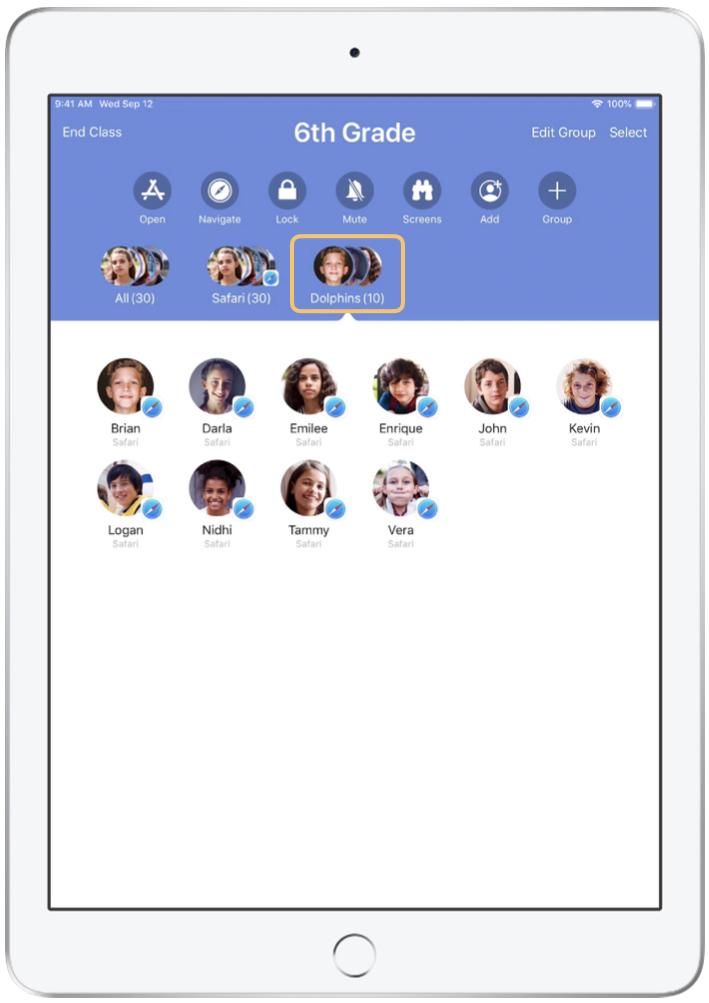
Classroom also creates dynamic groups of students based on which app each student is using.
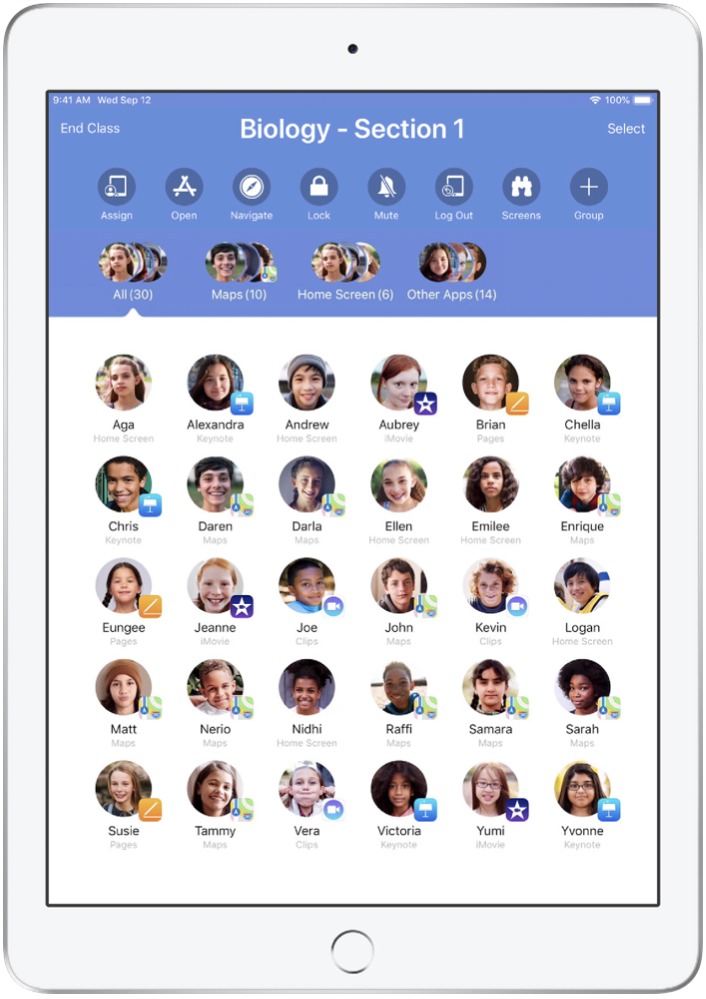
Launch and lock apps
Teachers have the ability to launch a specific app on each student’s device at the same time. You can also lock the iPad into a single app, keeping your students focused and on track.

Note that you and your students must both have the app installed for this to work.
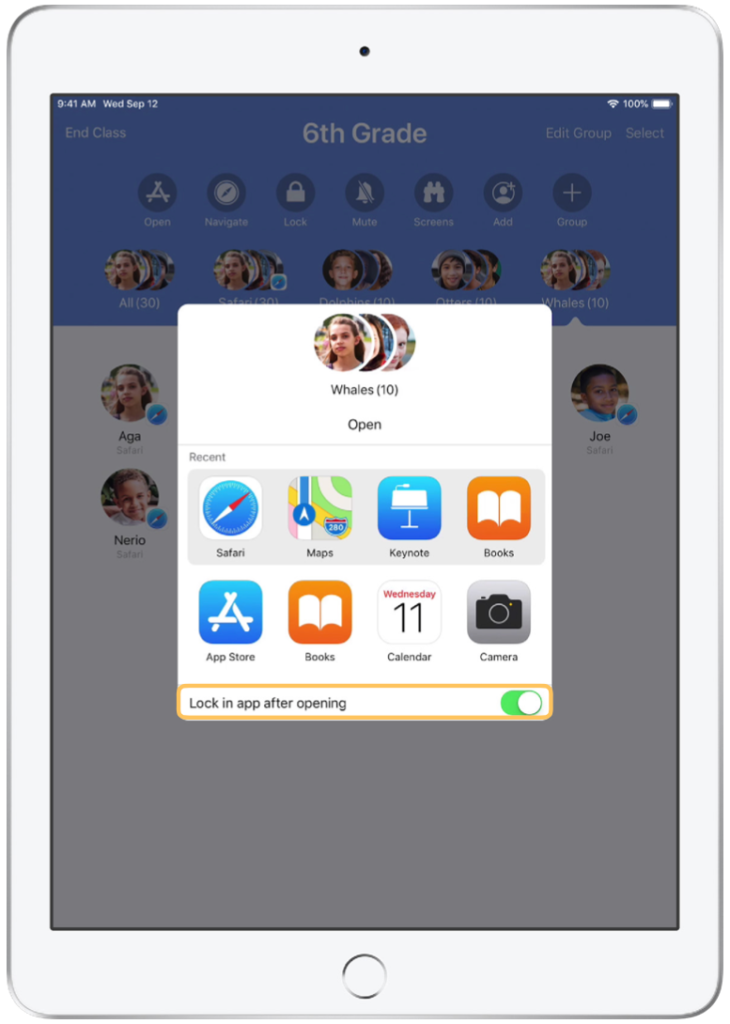
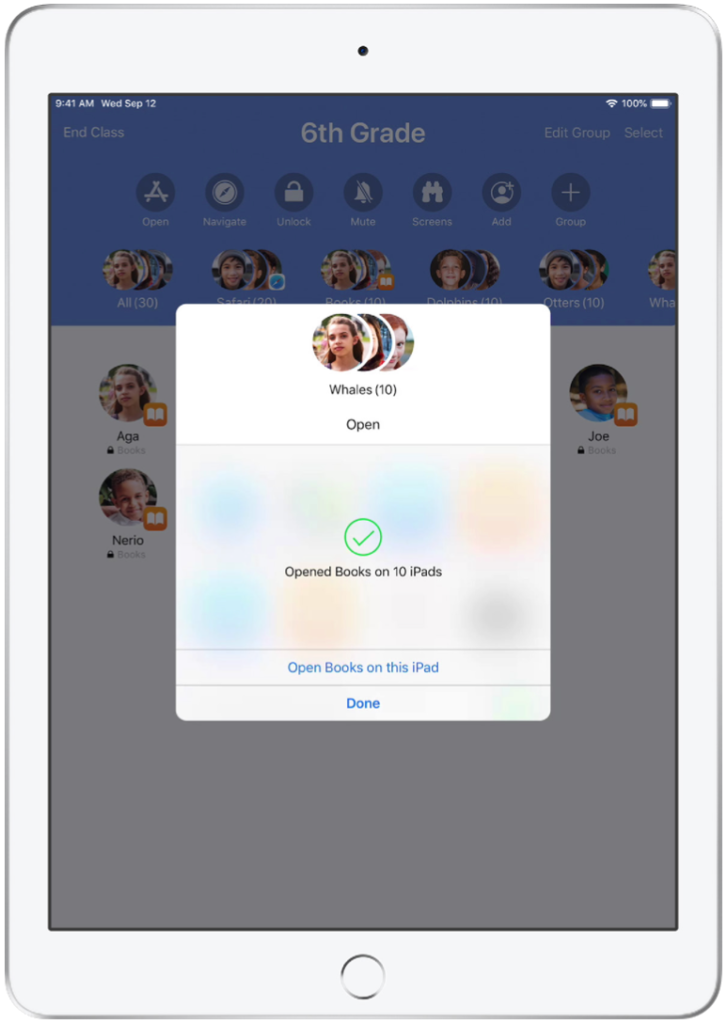
Tap Done, or follow along by opening the app on your iPad.
Navigate to specific content
Classroom lets you navigate students to resources within Apple Books, iTunes U, and Safari, such as a specific web page using a bookmark, posts and materials in iTunes U courses, or a chapter in a book.
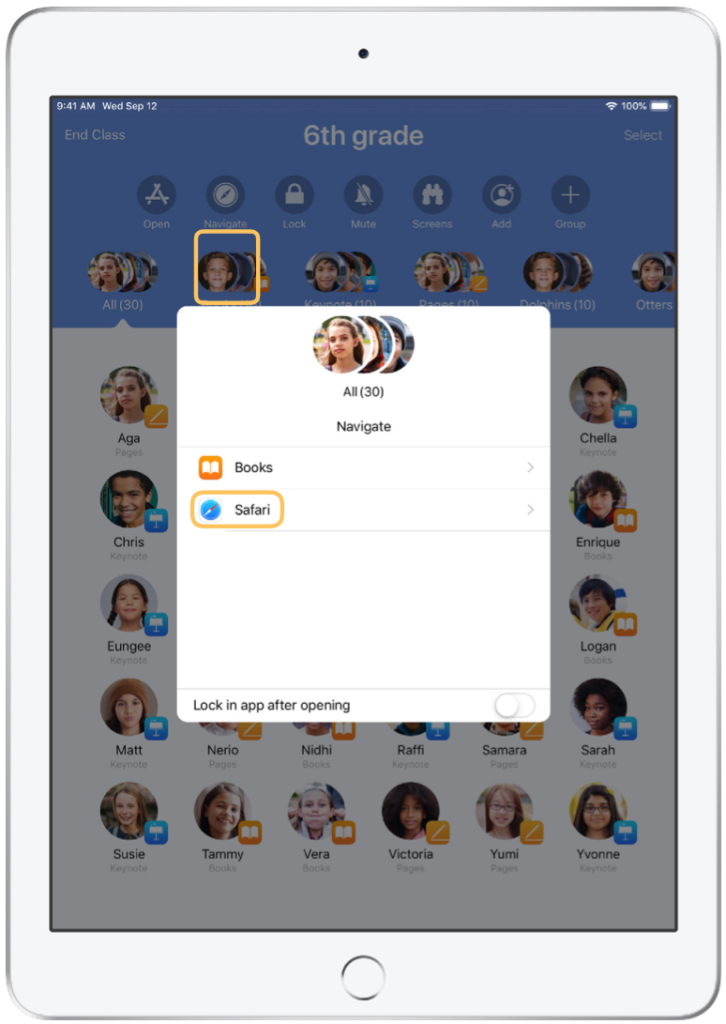
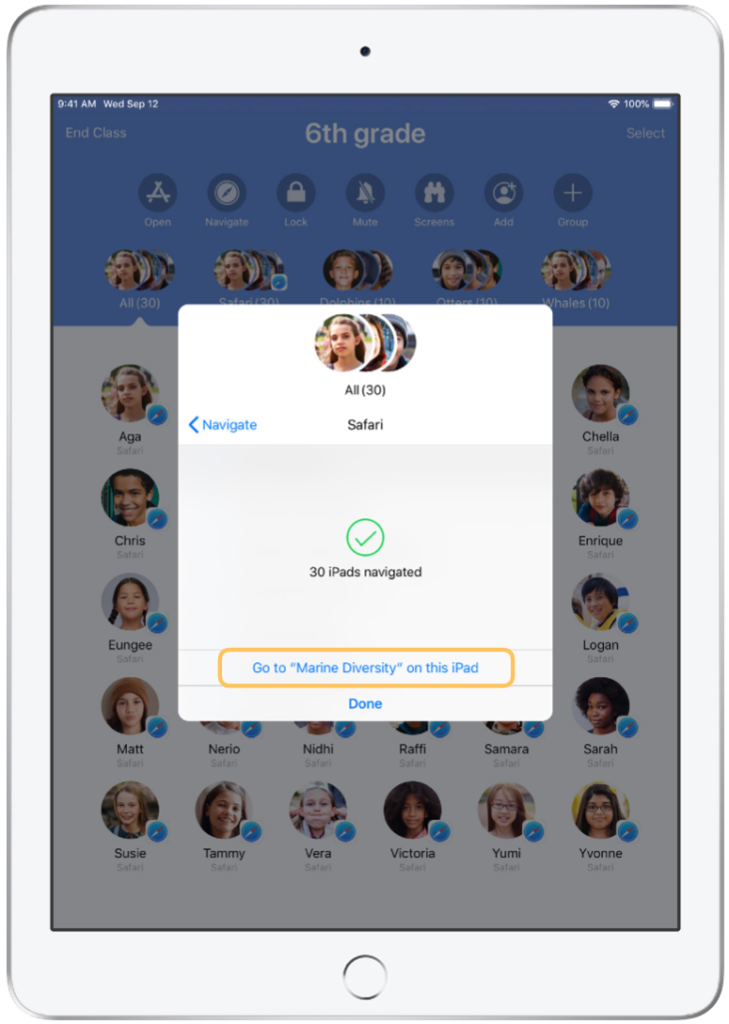
Tap “Done“, or follow along by opening the web link on your device.
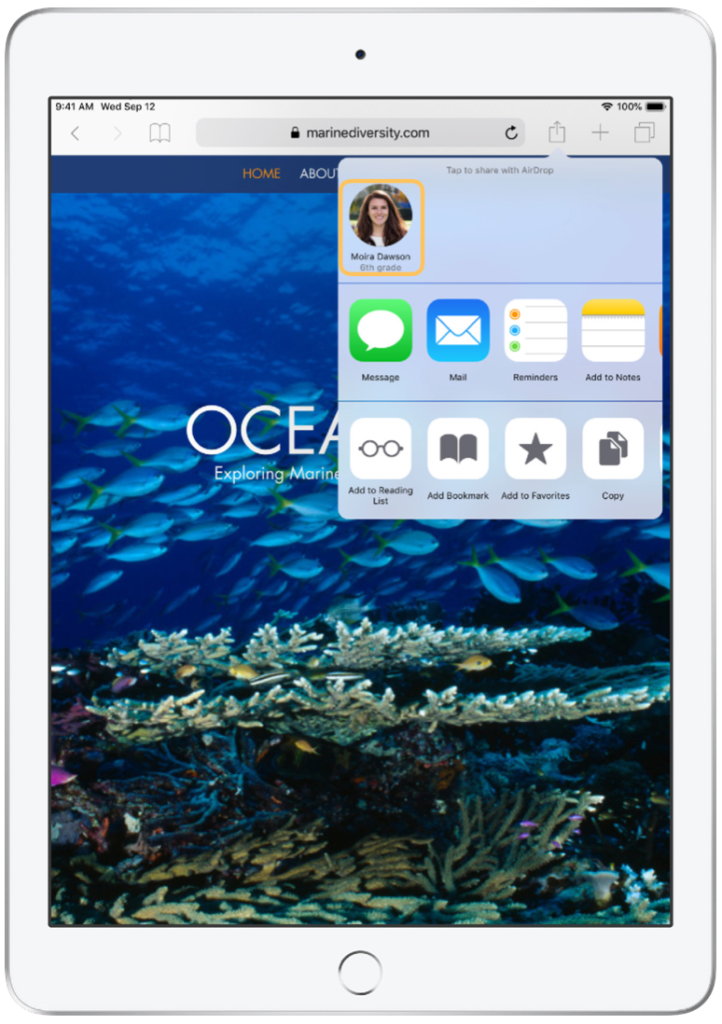
Share documents
Classroom works together with iOS Multitasking, giving teachers a simple way to share files with their students. These files can be in the form of worksheets, presentations or photos and videos.
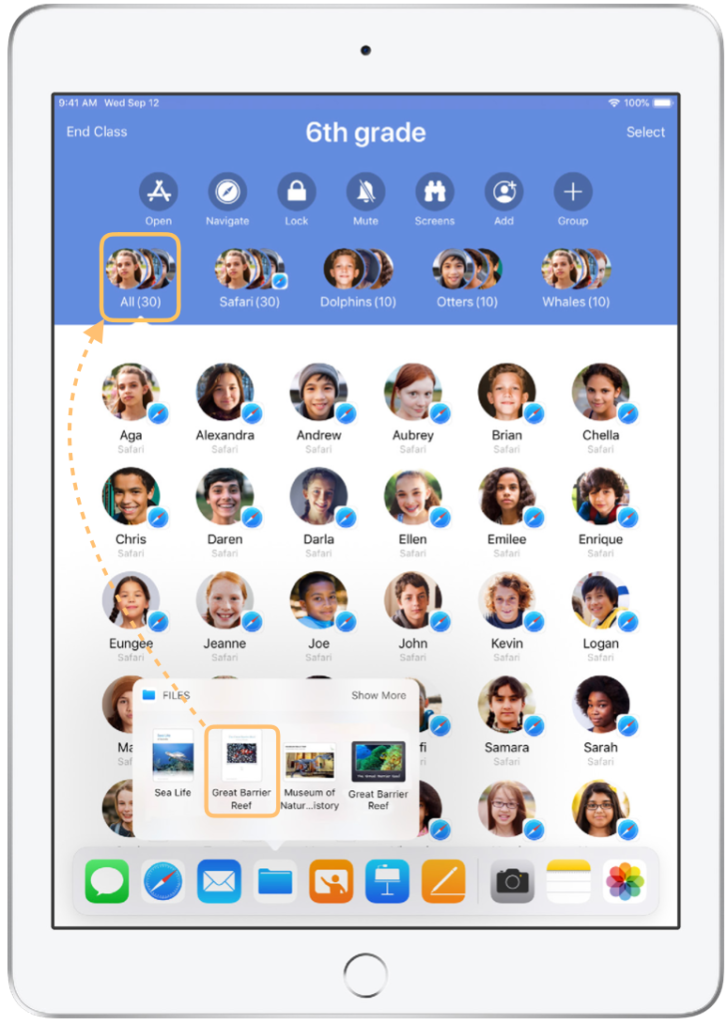
Then drag a document to a single student, a group, or all students.
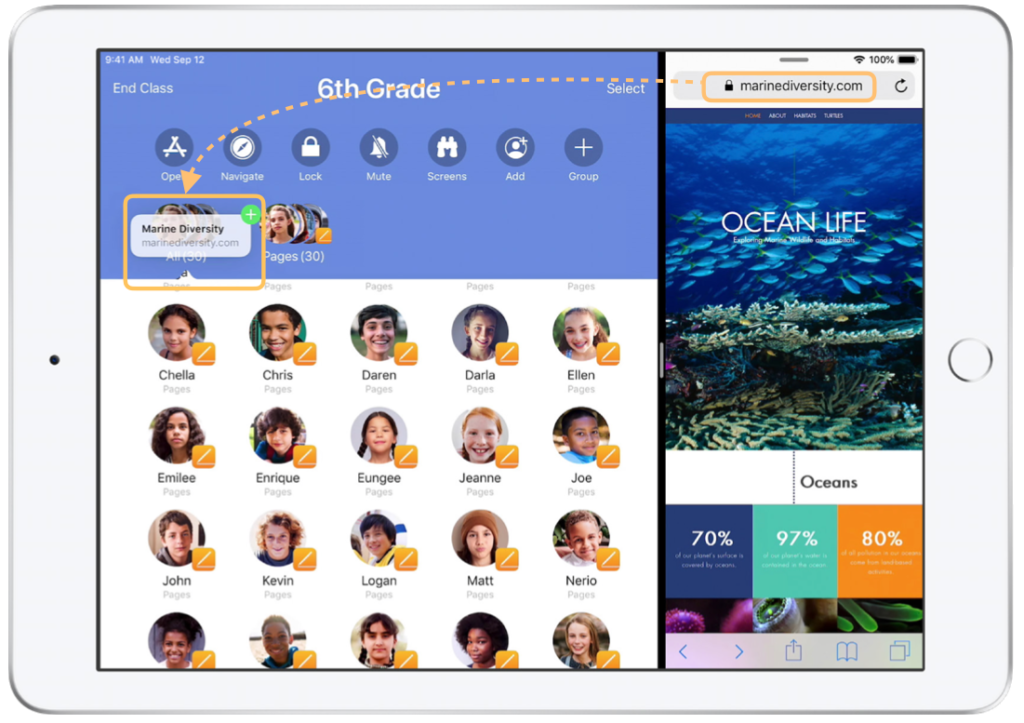
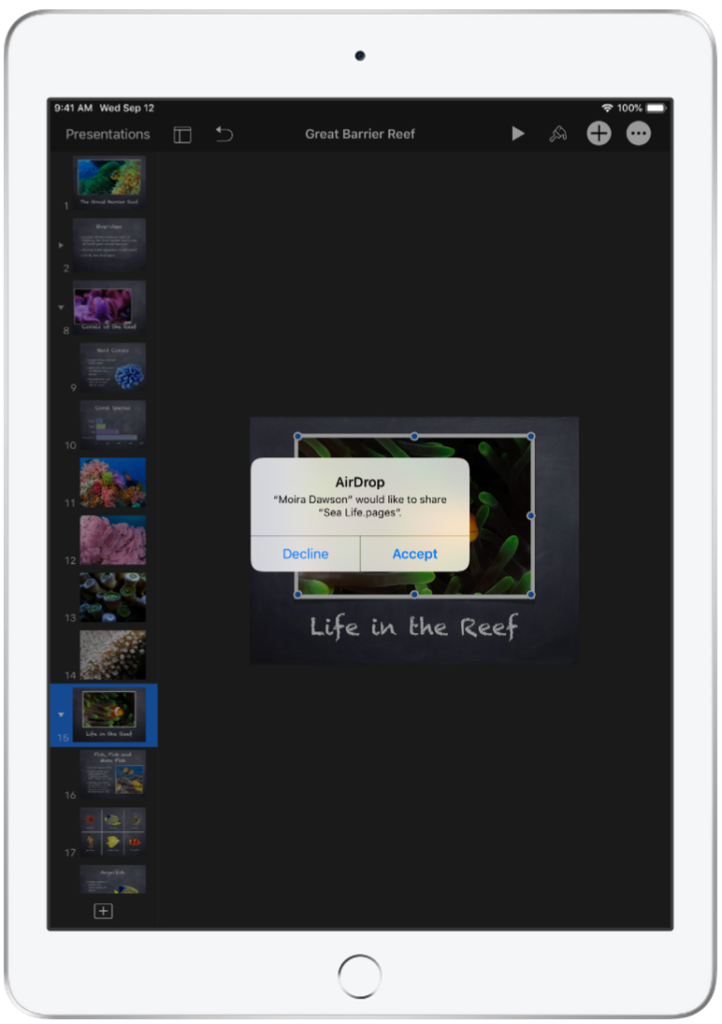
Students can then select the appropriate app to open and save your shared document.
The document will be saved on each student’s iPad.
Receive documents.
The Classroom app allows you to see documents and links that students share with you.
Student View
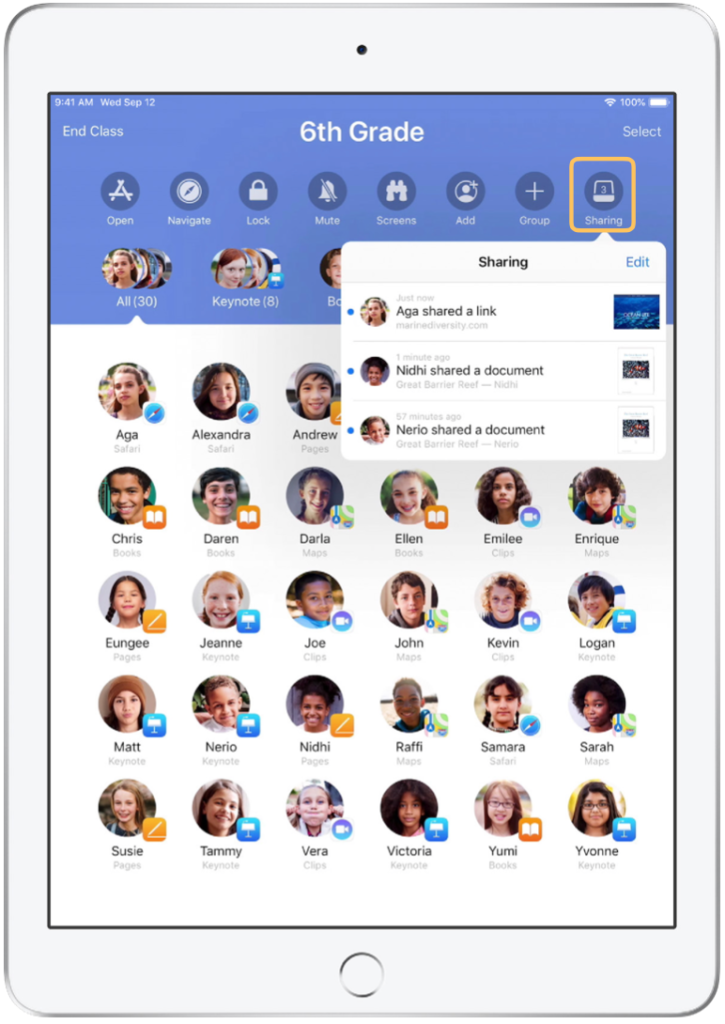
Shared documents will be saved on your iPad or Mac once you open them.
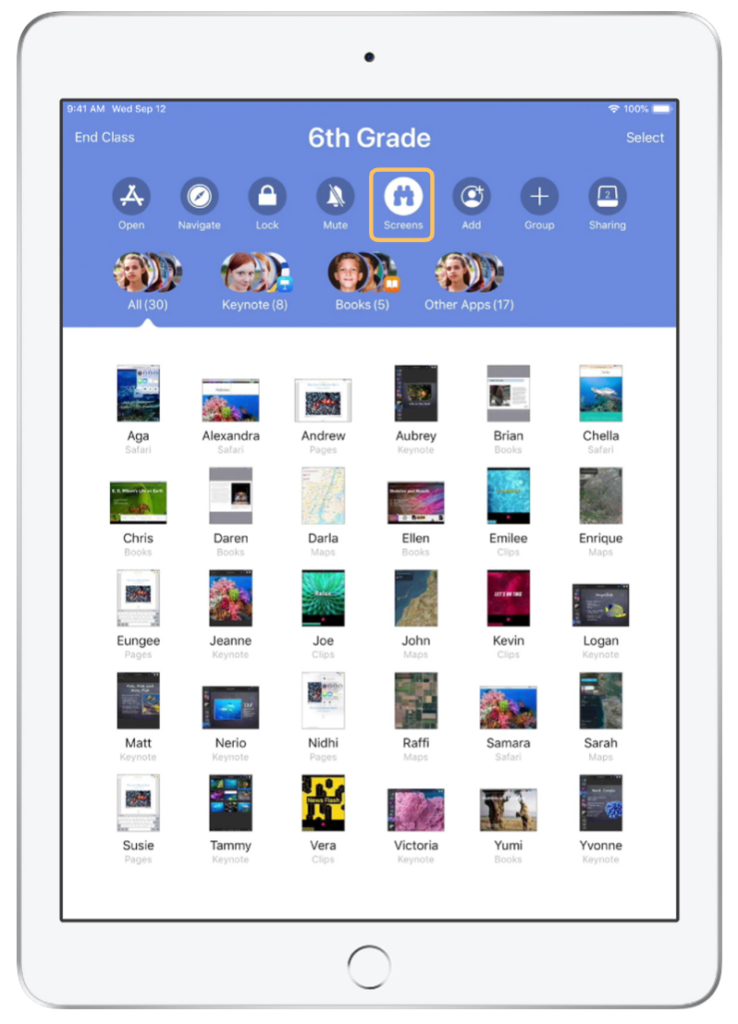
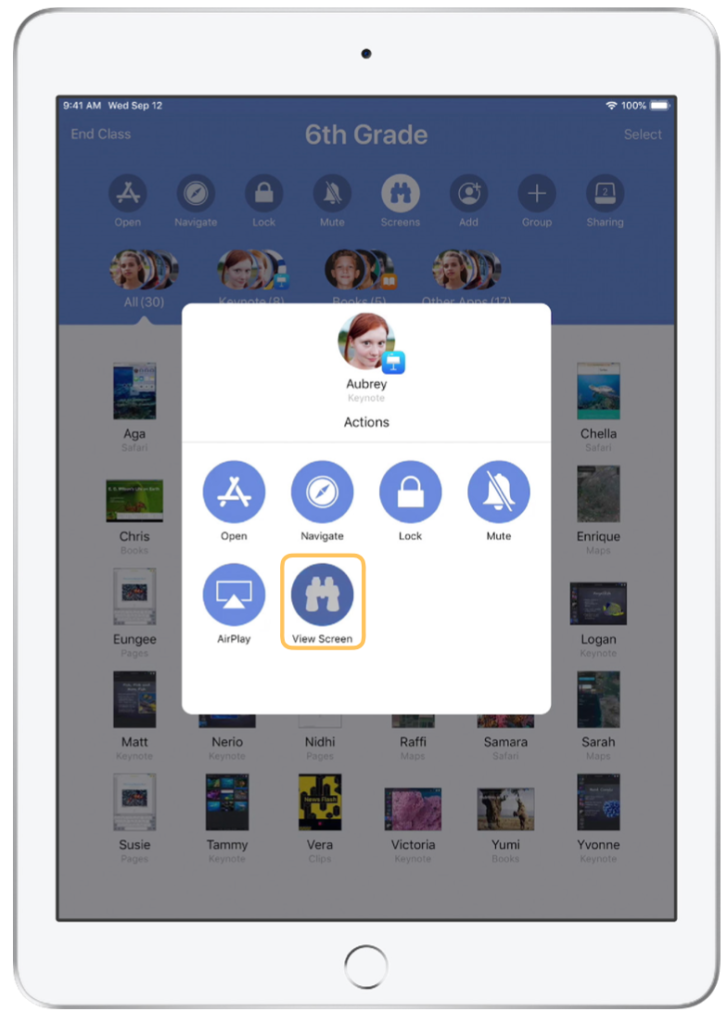
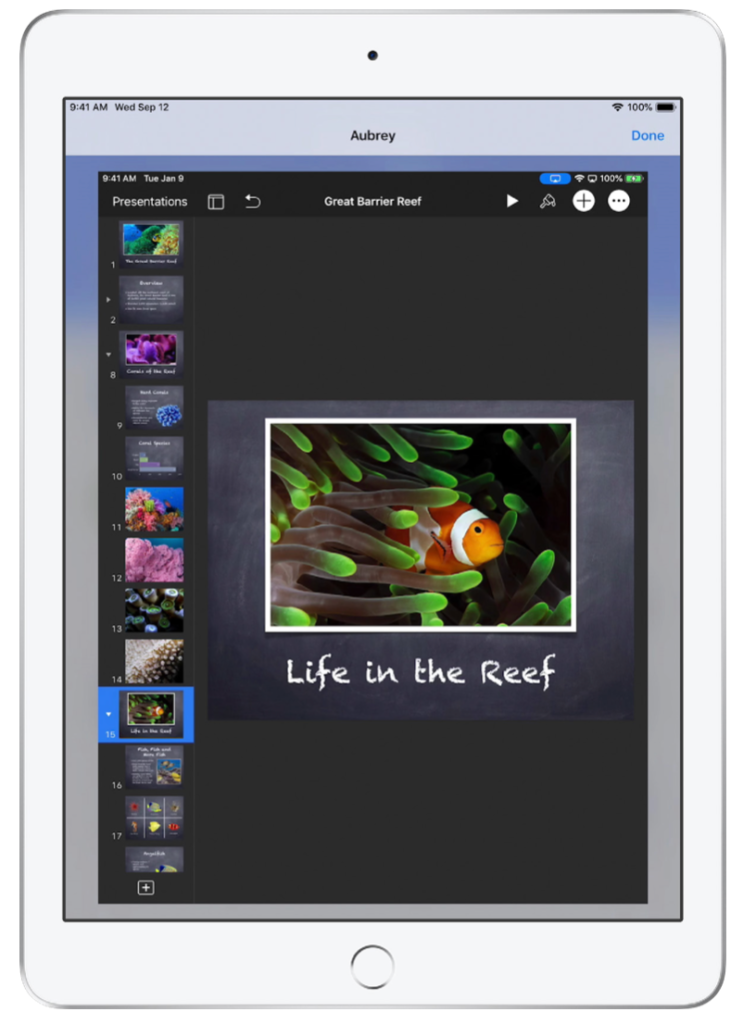
See what your students see with Screen View.
View any student’s screen directly on your device. Check in and see how students are progressing through an assignment or a quiz.
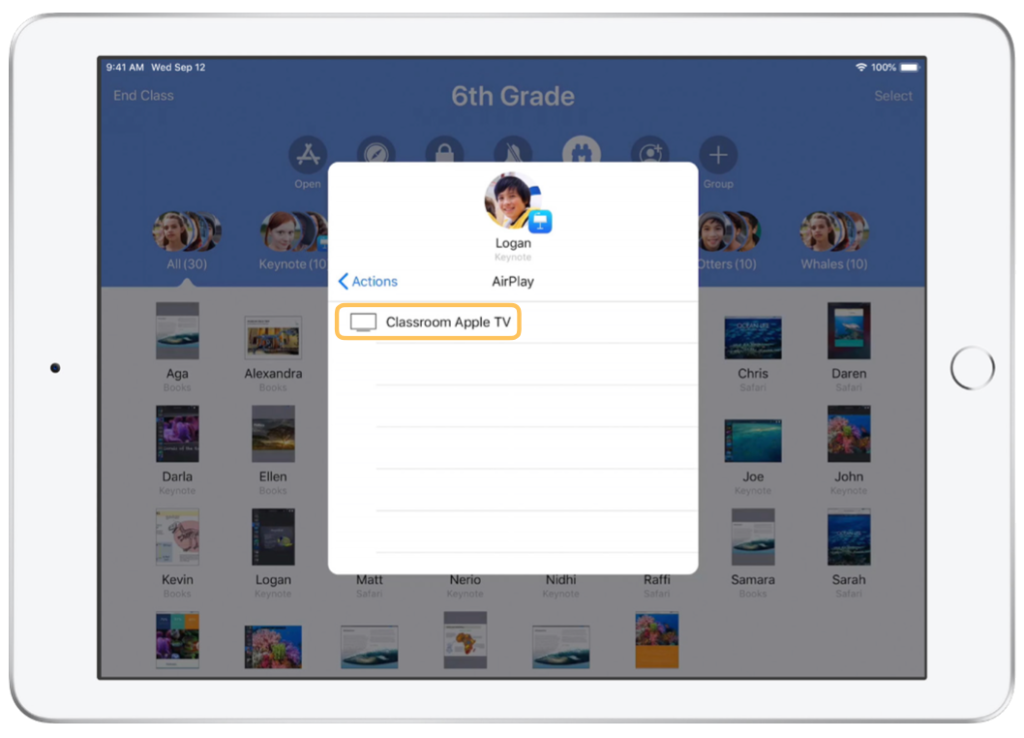
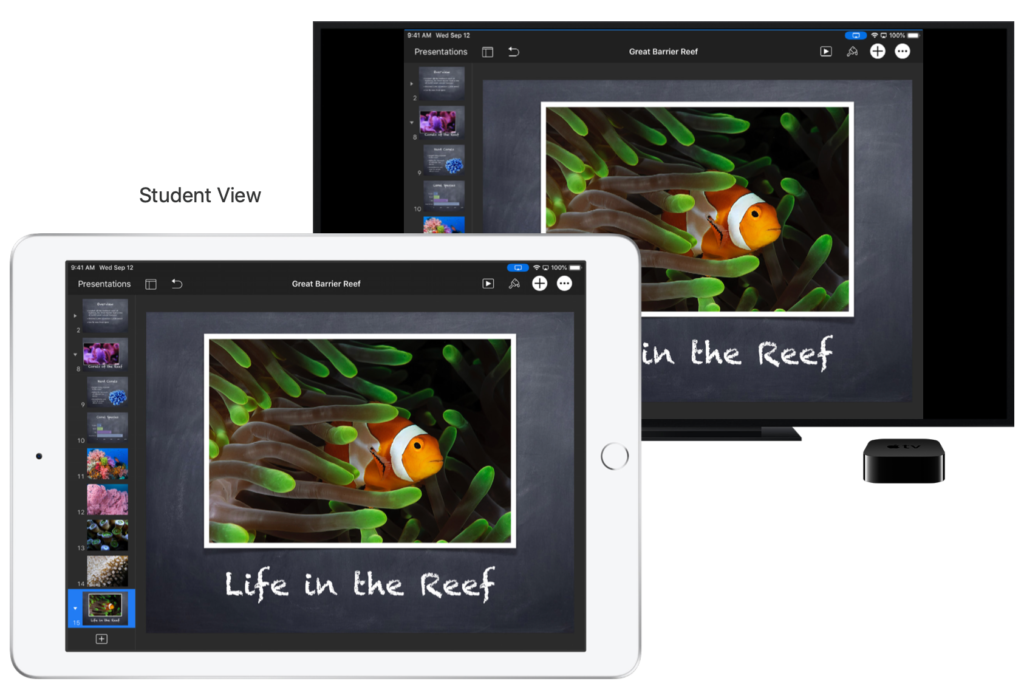
Share student work on the big screen
If your classroom has Apple TV, you can mirror any student’s screen to your TV monitor or projector. It’s a great way to highlight student work, encourage collaboration, and keep everyone involved.
Mute the sound and lock the screen.
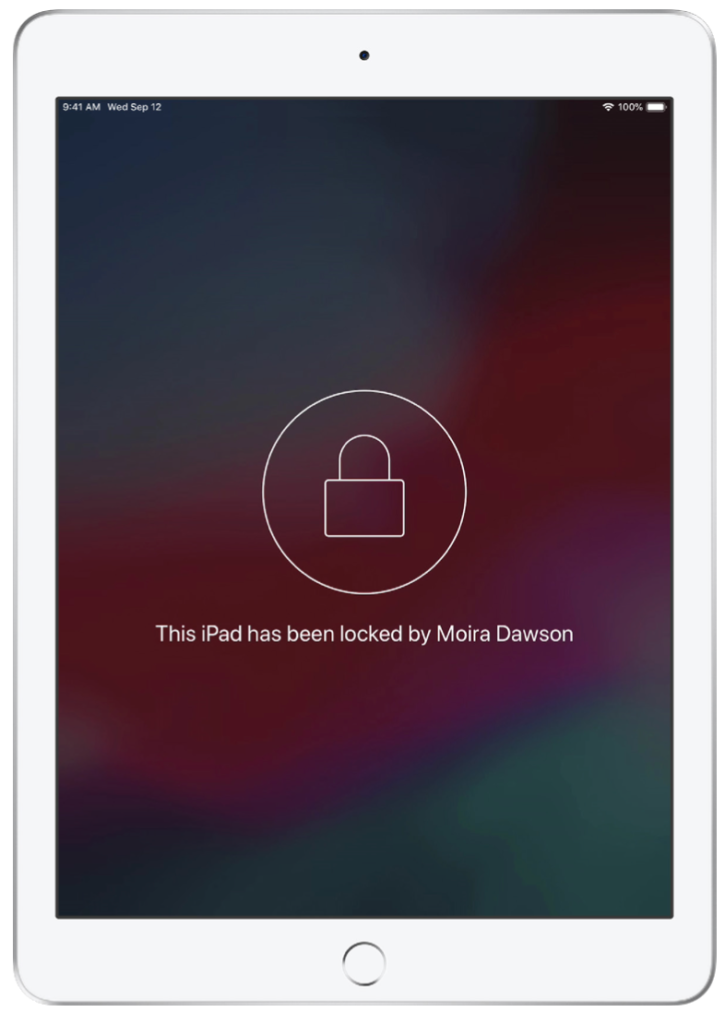
If the sound on a student’s iPad becomes distracting for the rest of the class, you can mute individual or all devices. To get everyone’s attention, you can also lock each iPad in your class, which might be helpful during an important announcement or activity.
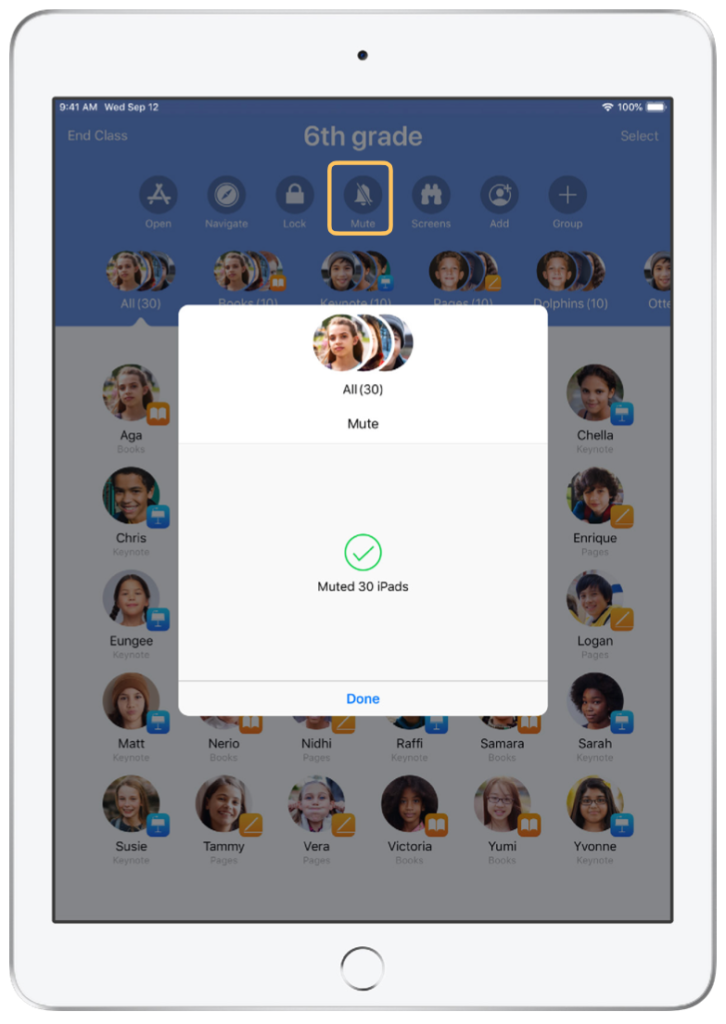
To unmute, press the “Unmute” button
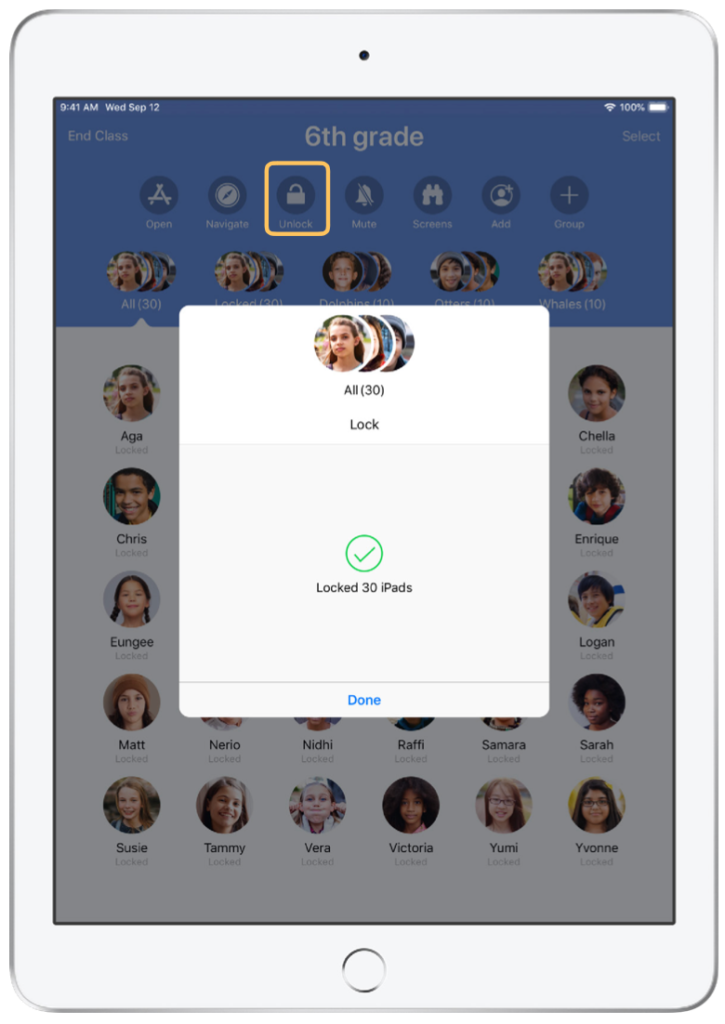
Tap “Unlock” to unlock devices
Student View
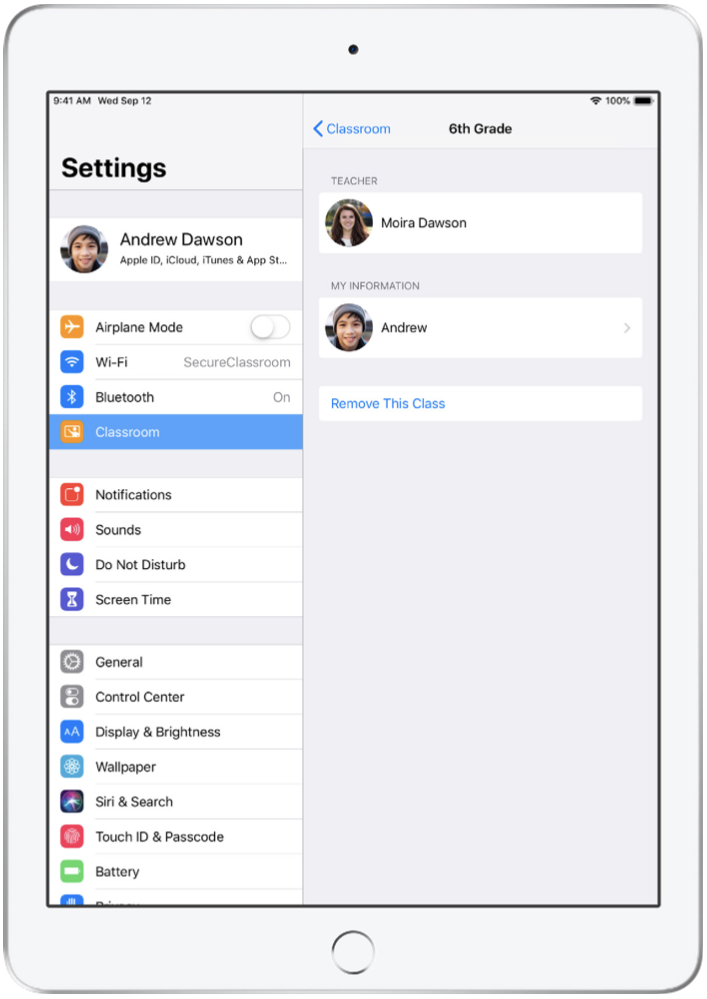
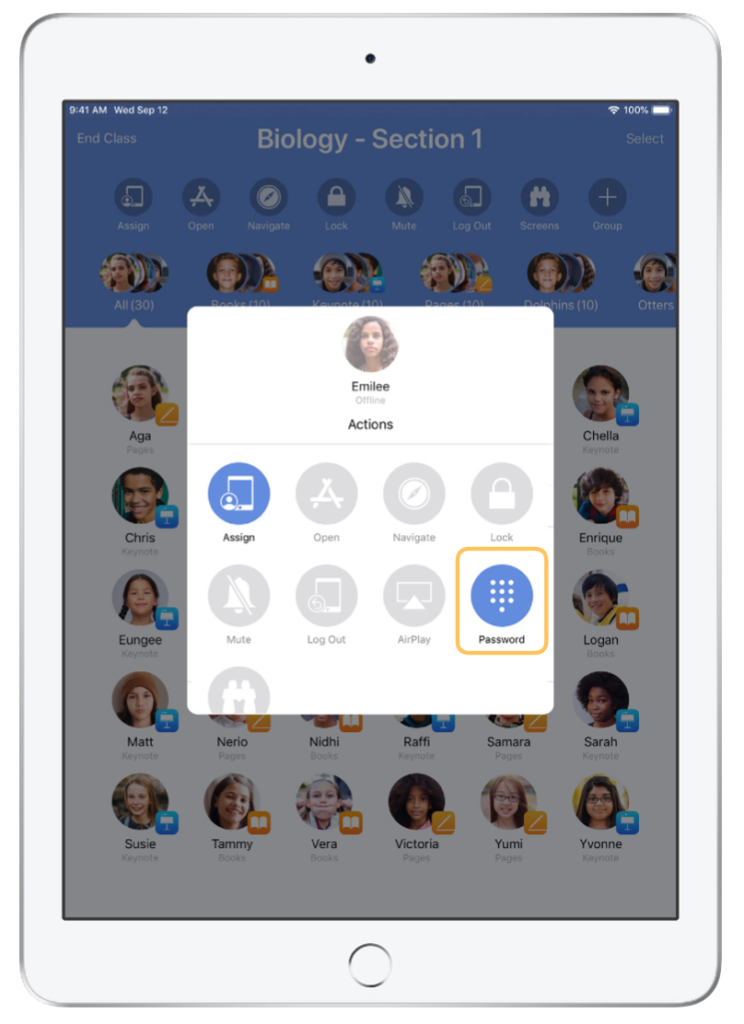
Reset student passwords.
If your school is using Managed Apple IDs, you can use the Classroom app to reset a student’s Managed Apple ID password.

End class and see a Class Summary
When class ends, you can easily stop controlling student devices and get an overview of your students’ activity during class time. It’s a great way to see what students worked on, and save documents you might have missed during class session.
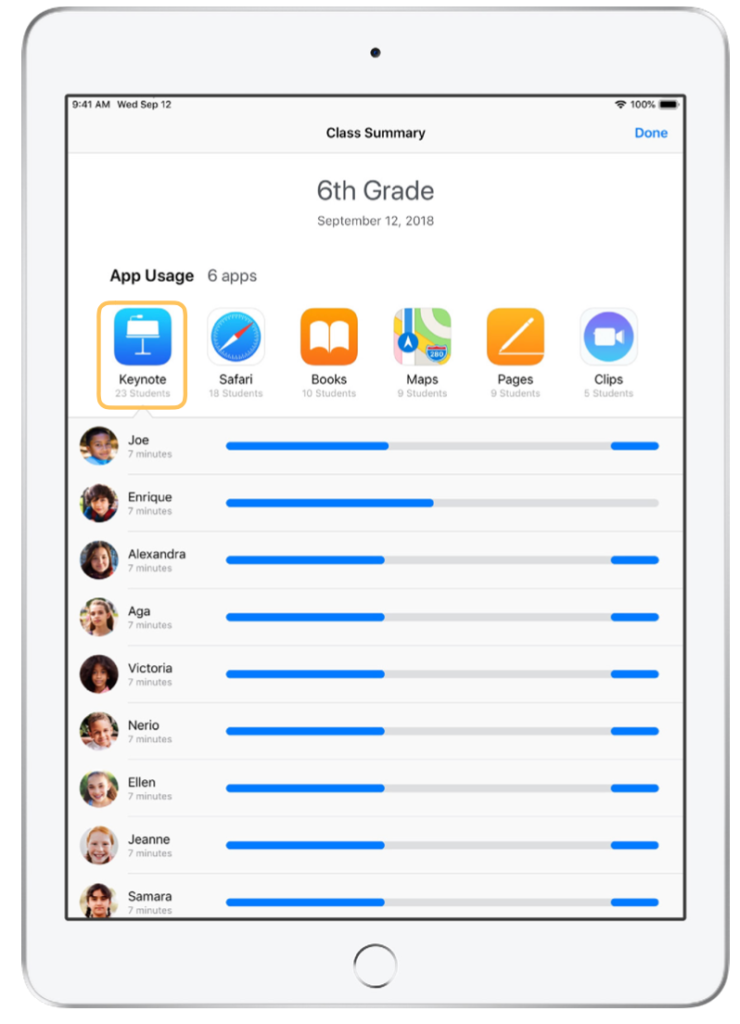
Tap any file or link in the items Shared section to review and save them to your iPad.
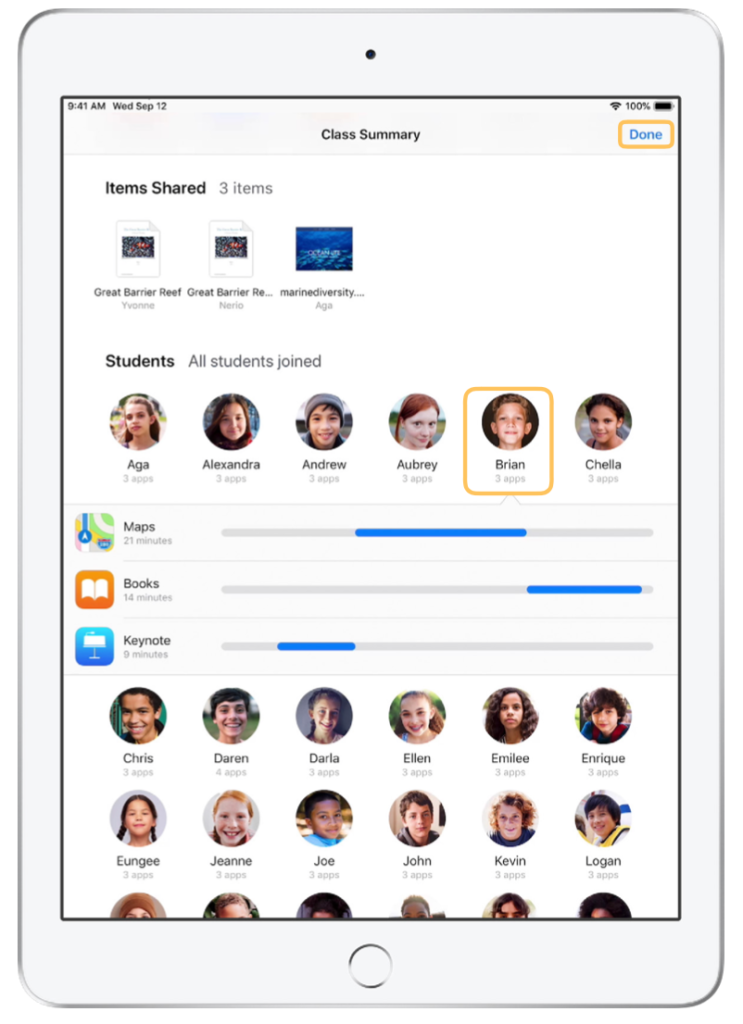
Tap done to exit the Class Summary. Student activity information and any unsaved shared items will be deleted.
Classroom app returns to My Classes and you can no longer access student devices.
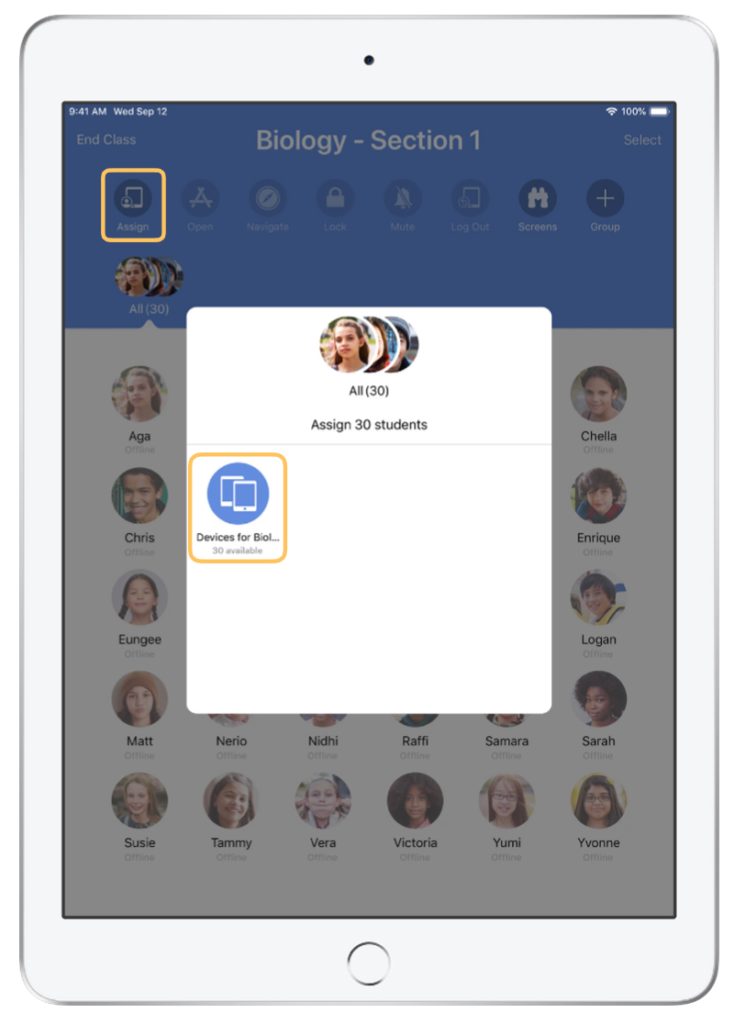
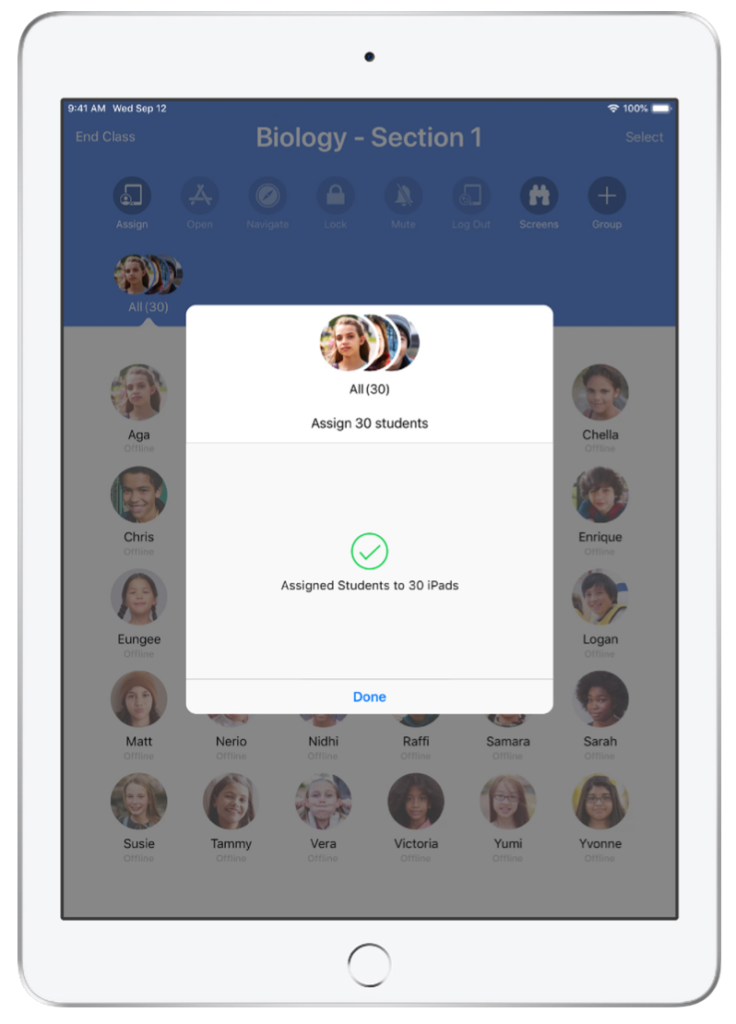
Assign students to shared iPad devices.
When Classroom is configured with MDM for use with Shared iPad, you can assign specific students to each iPad. Classroom determines whether a particular iPad has been assigned to a student before, and assigns the student to the same device. This enhances the student’s experience by reducing the amount of data that needs to be downloaded.
Student View
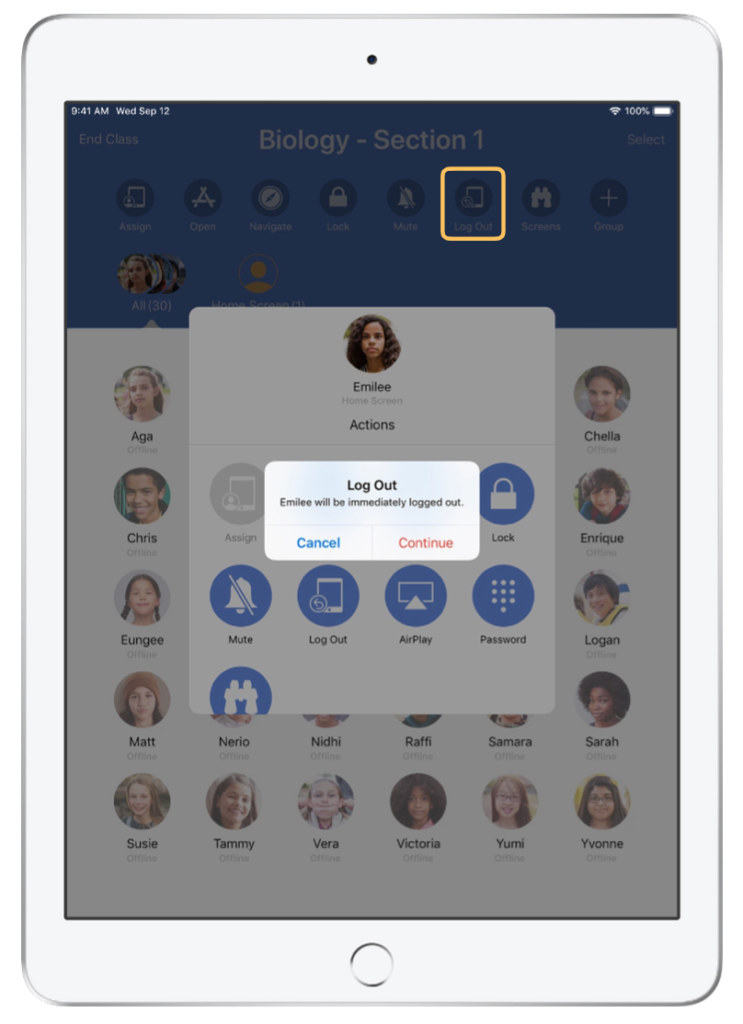
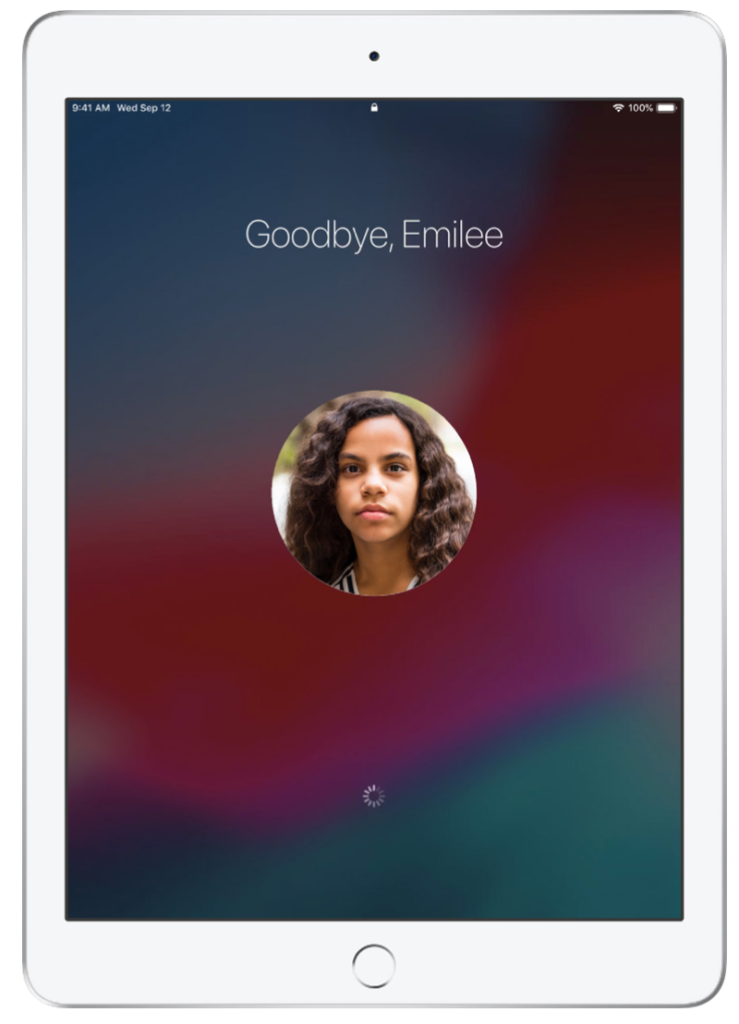
Log out of shared devices
When class ends, you can log out students—a single student, a group of students, or your entire class. When students are logged out, any documents they were working on are synced to the cloud and are available the next time they log in.
Conclusion
The Apple Classroom app can be an incredible asset to your school and classroom. With the ease of use and with its multifunctional capabilities, this app will surely win over any teacher using Apple devices in their lessons. Why not check it out for yourself? You can find the Apple Classroom app on the AppStore.