Microsoft Lens Guide
Here we will be going through Microsoft Lens and how it can be implemented in the classroom.
So, What is Microsoft Lens?
Microsoft Office Lens is a great way to capture information from documents, whiteboards, business cards, receipts, menus, signs, handwritten memos, or anything else containing text that you want to import but not manually type out yourself. With Office Lens, you don’t need to jot down any notes by hand, rely on blurry cell phone images, or worry about misplacing anything.
Office Lens is great for capturing sketches, drawings and equations too — even images without text. When capturing images, Office Lens gets rid of shadows and odd angles, so your final captures are easier to see. You can upload document and whiteboard images to Microsoft OneNote, Word, PowerPoint, or OneDrive, and you can also save them as PDF files or send them in email.
Let’s get started!
Scanning your work
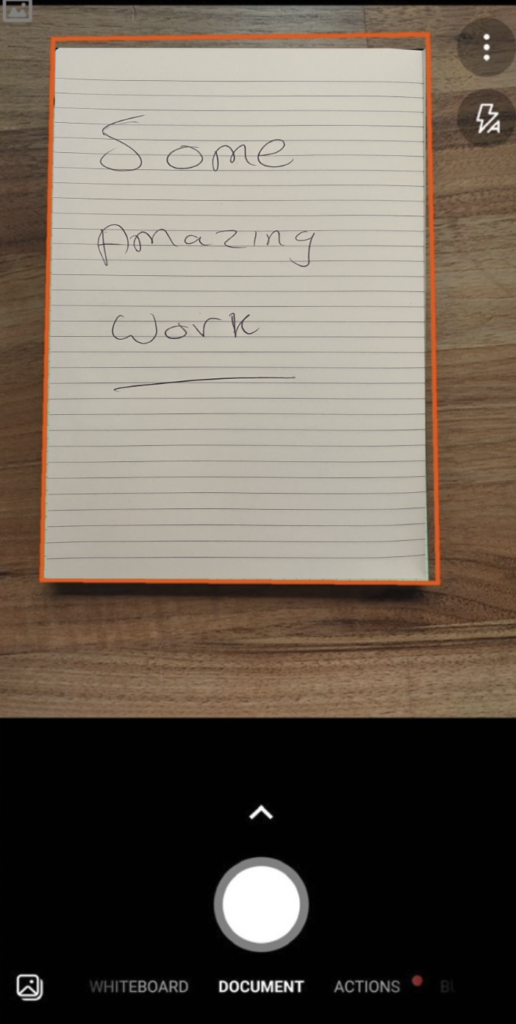
When you’re signed in and ready to scan your work, use the app in the same way as your phone’s camera app – Lens will place an orange border around your document, showing you the image that will be captured, so make sure all of your work is within this box!
When you’re ready to scan the page, press the button at the bottom of the screen to scan the page!
Optimising your Scan
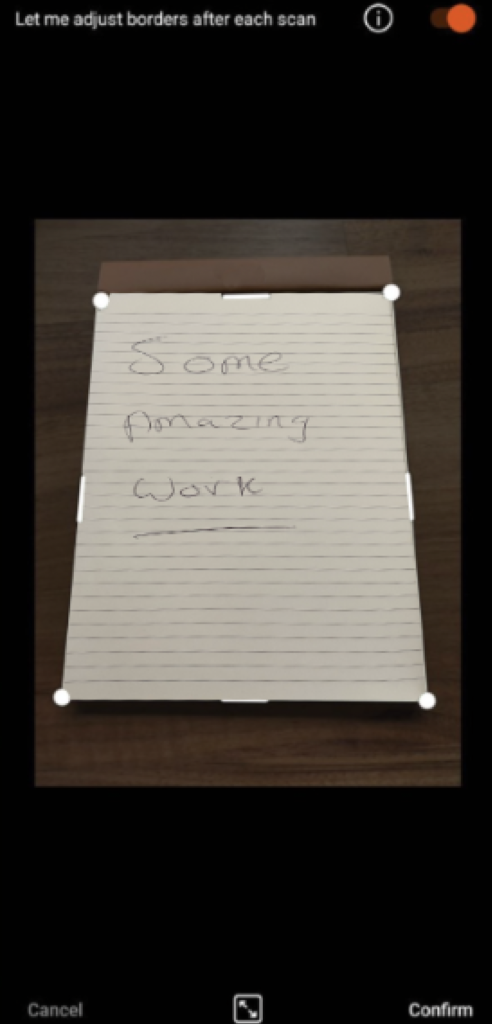
After you scan your work, the app might not have selected the edges of your work perfectly – this can happen if your device isn’t perpendicular to the page when you scan the document!
If you need to, you’ll be able to more accurately select the edges of your work by tapping and dragging the handles at the corners and sides of the image so that they match the edges of the page you’ve scanned – once you’re happy, you can tap the confirm button to move on to the next step, and finalise your scan!
On the next screen you’ll be able to make use of the various buttons to enhance your scanned image.
- Add: Tap this button to take more images
- Filters: Add filters to make your scans easier to read
- Crop: Crop out anything that you don’t want to see
- More: Rotate, reorder, or add text/drawings to pages
- Done: Tap this when you’re ready to save/upload!

Saving work to your device or OneDrive
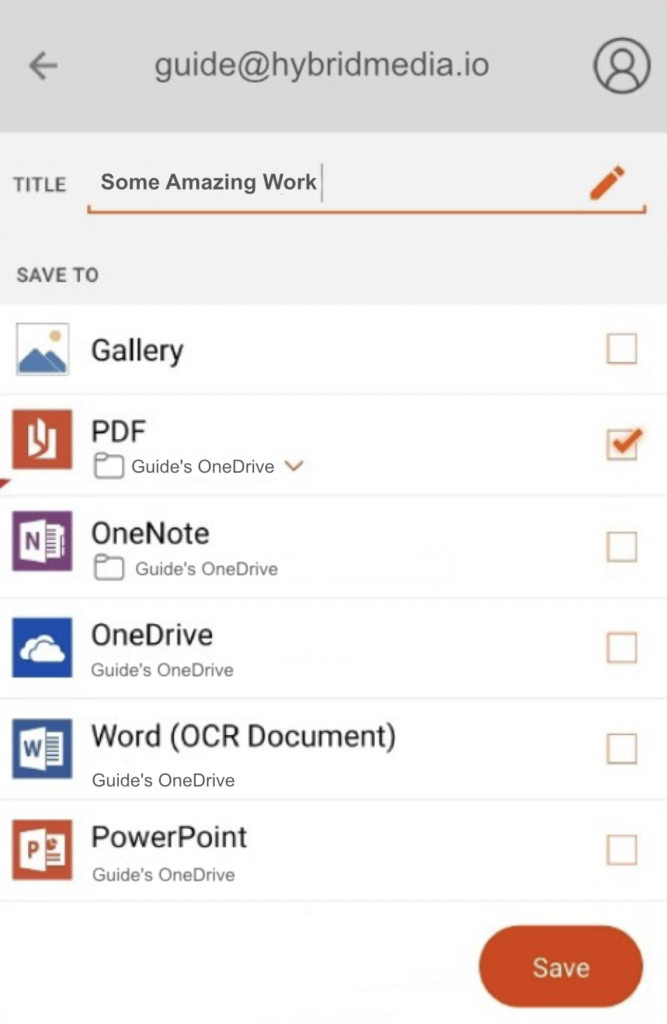
Once you’ve scanned all of your work and made the changes you want, it’s time to save your work to your device, or upload it to OneDrive – using OneDrive will allow you to easily pick your work up on your computer so you can share or upload it from there!
- Make sure to give your scanned document a name that you’ll remember and that makes sense!
- You can save your scanned document as a PDF directly to your device or to your OneDrive – tap on the folder icon to make this change
- Once you’ve decided where to save your work, tap the Save button!
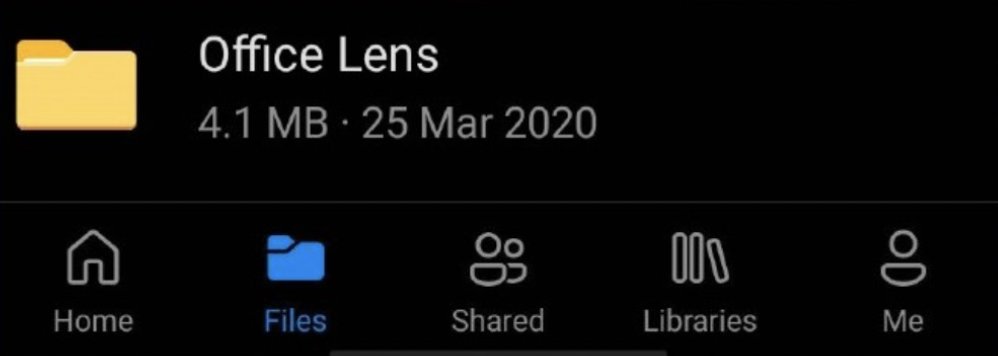
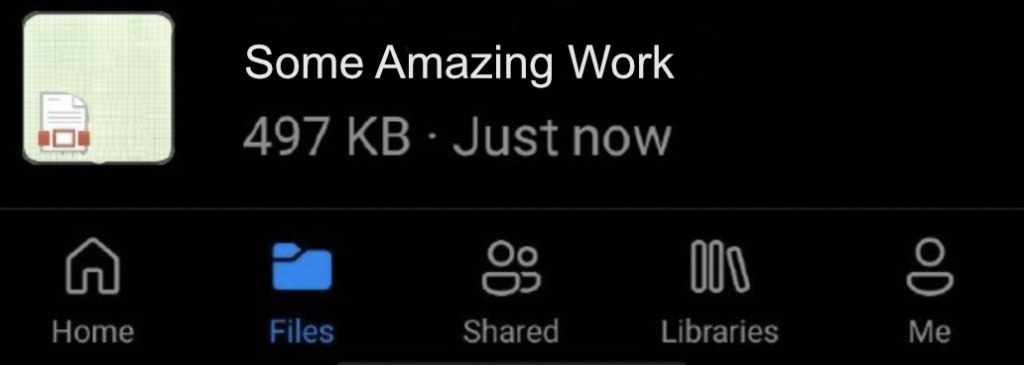
You can opt to save your work to OneDrive, you will be able to see your work in a folder called “Office Lens” – from there you can share, submit, or download your work to your computer!
Conclusion
I hope you found this guide useful, feel free to check out our other guides to see how other applications and software can better enrich your classroom experience.